
This article outlines a step-by-step guide to creating Product Profiles and how they are used in BackOffice and SmartPOS.
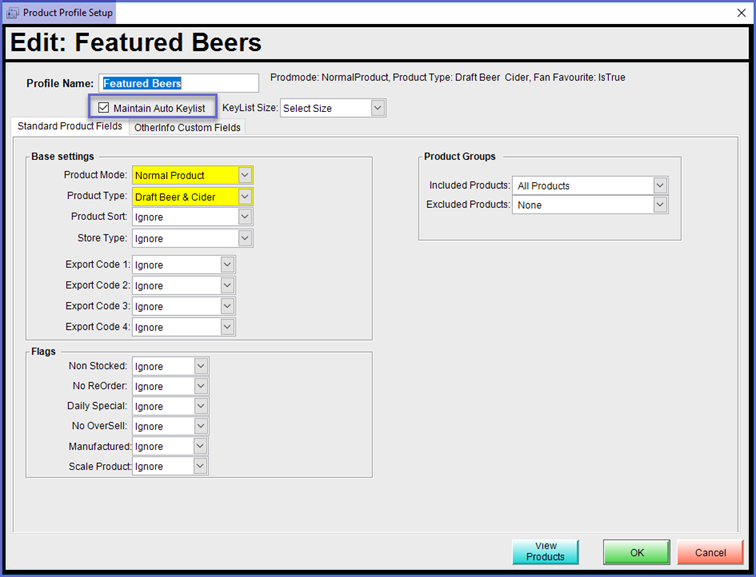
A Product Profile can also be configured to Maintain an Auto Keylist which can be utilized in multiple ways. When added to a KeyMap this creates a dynamic Keylist based on the Product Profile's selected Parameters. Which Products meet those parameters at a particular time will be the Products displayed at a SmartPOS Workstation for the Operator/s.
Prerequisites
- In order to Add a Product Profile to a KeyMap, the Maintain Auto Keylists Flag in the Product Profile Setup must be enabled
Adding Product Profiles to KeyMaps
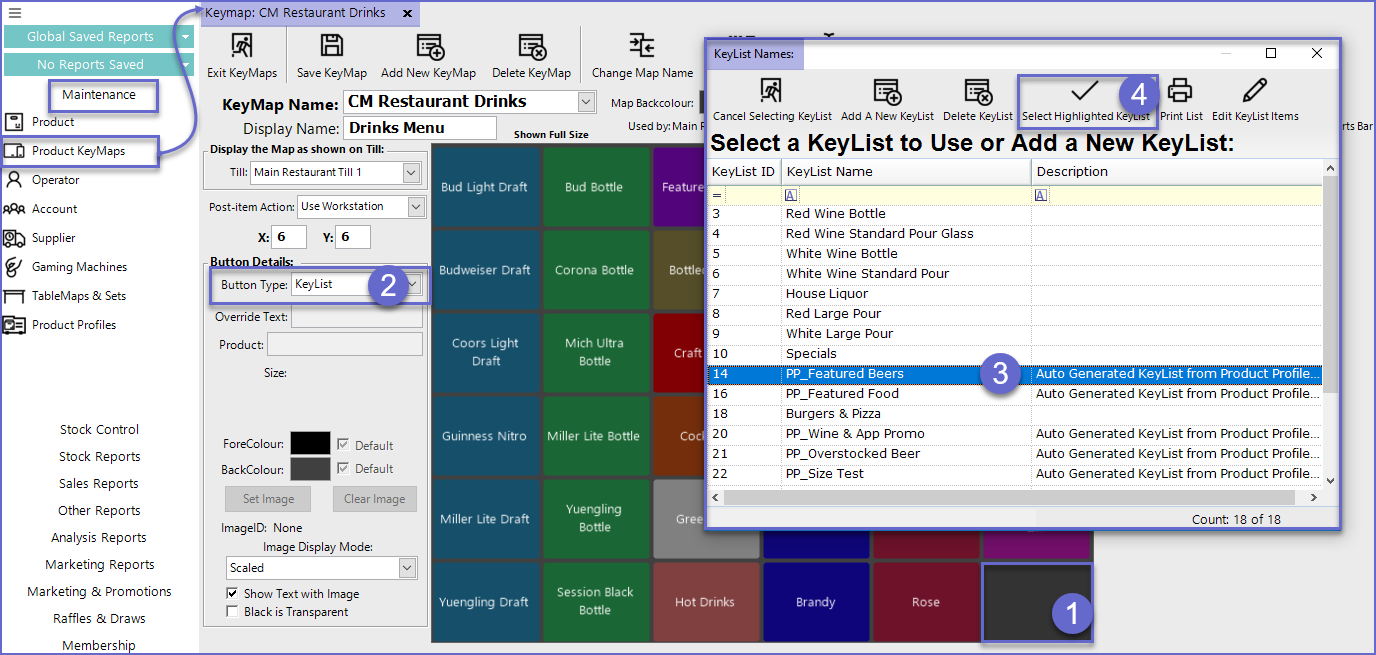
- Once the Prerequisite has been met, go to Maintenance > Product KeyMaps and follow these steps:
- Select the space where the Product Profile needs to be added
- In the Button Details, select KeyLists as the Button Type which will open the KeyList Names window
- Select the Product Profile from the list; the Product Profile will have 'PP' before its name to denote that it is being imported from Product Profiles
- Click on Select Highlighted KeyList button at the top
- The Display Name of the Profile can be changed from the Override Text button in the Button Details
- Once the product Profile has been Added as a KeyList, Select the ForeColour and BackColour of the button as required
Related Material
-
Creating KeyLists -
Editing KeyLists -
Introduction to Marketing and Promotions