
Overview
This is a step by step guide in order to configure a Virtual printer via emulated Com Ports on a Windows system, which allows you then to print to three virtual printers, primarily you will have a Reciept Printer, and two Remote Printers at the end of the Setup.
Prerequisites
-
ComPrinter Installation files
-
Null-modem emulator (Com Ports)
-
Frameworks 3.5 (includes .NET 2.0 AND 3.0)
-
Download the ComPrinter.sfx (Self Extracting Archive)
-
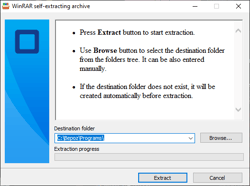
Run the ComPrinter.sfx
-
Which should prompt to extract the file to the 'C:\\Bepoz\\Programs\\' Directory
-
Once Extracted you can navigate to 'C:\\Bepoz\\Programs\\' Directory and create a shortcut onto your desktop of ComPrinter.exe
-
Download the Virtual Com port emulator - com0com
-
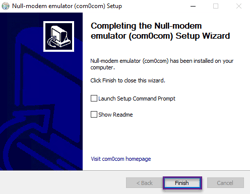
Once com0com has been installed you will now have access to the Setup utility
-
Click Finish
-
To access the Setupg.exe, navigate to C:\\Program Files (x86)\\com0com
-
Run Setupg.exe
-
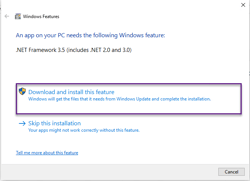
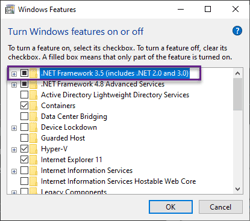
If the Setup Application does not load you will need to install .NET Framework 3.5
-
This should automatically prompt when running the com0com Setup Application.
-
If it does not auto prompt then type Features in the Windows Start Menu
-
Check .NET Framework 3.5 and click OK
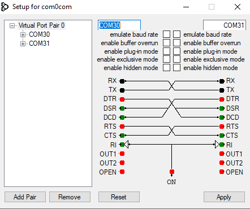
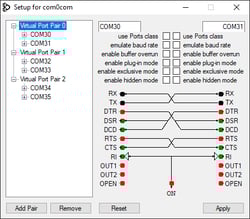
· ComPrinter.exe support a maximum of 3 Virtual printers you will have to configure 3 Virtual Com Pairs
· Edit the Virtual Port Pair 0 from CNCA0 and CNCB0 to COM30 and COM31
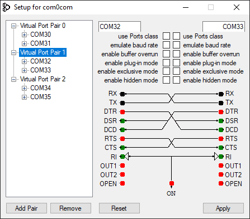
· Edit the Virtual Port Pair 1 from COM3 and COM4 to COM32 and COM33
· Add Pair
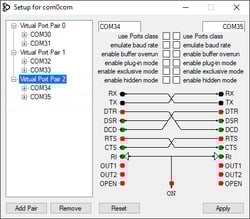
· Edit the Virtual Port Pair 2 from CNCA2 and CNCB2 to COM34 and COM35
· Click Apply
· Exit out of the Setup for com0com
Stage 2 - ComPrinter Setup
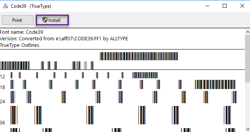
Barcode Font Installations
To ensure that barcodes print or are shown then you MUST ensure that the correct fonts are installed within Windows:
-
Double click the EAN-13 file and then Click Install
-
Double click the Code39 File and then Click Install
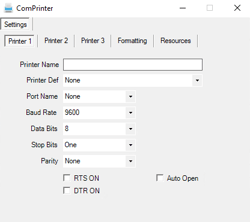
Configuring ComPrinter
-
Run the ComPrinter application
-
You should now see the following screen
-
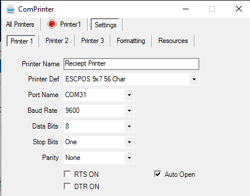
Printer 1 should be setup as the following Right-hand screenshot
o Printer Name: Reciept Printer
o Printer Def: ESCPOS 9x7 56 Char
o Port Name: COM31
o Auto Open Check
-
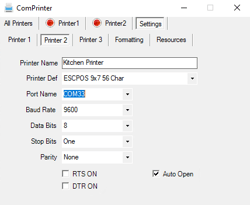
Printer 2 should be setup as the following Right hand screenshot
o Printer Name: Kitchen Printer
o Printer Def: ESCPOS 9x7 56 Char
o Port Name: COM33
o Auto Open Check
-
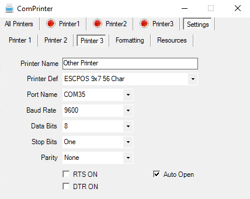
Printer 3 should be setup as the following Right hand screenshot
o Printer Name: Other Printer
o Printer Def: ESCPOS 9x7 56 Char
o Port Name: COM35
o Auto Open Check
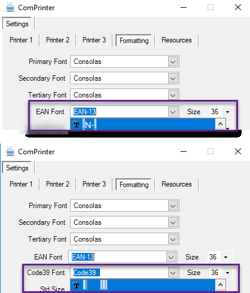
· Navigate to the Formatting Tab
· Ensure you set the above Fonts to the following
· EAN FONT: EAN-13
· CODE39 FONT: CODE39
· Exit ComPrinter to Save the settings
· Rerun ComPrinter
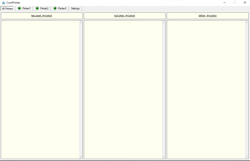
-
All Printers should now show and have a Green Dot - meaning they are Online
Stage 3 - BackOffice Settings
· Now Open BackOffice
· Navigate to Venue Stores and Tills
· Highlight the POS/Workstation you want to Add Devices too
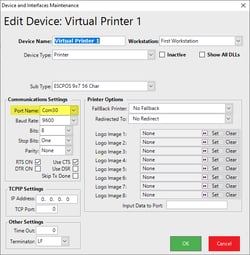
· Create a new device for each Virtual Printer required
· Although any other Sub Types work, we have found that ESCPOS 9x7 56 Char has the best UI
· Reciept Printer should be set to COM30 as the pair is COM30 <-> COM31
· Kitchen Printer should have COM32 as the pair is COM32 <-> COM33
· Other Printer should have COM34 as the pair is COM34 <-> COM35
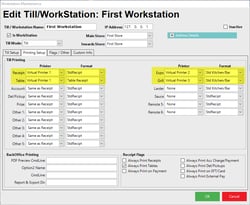
· Edit the POS/Workstation
· Assign the new virtual printers within the workstation Maintenance -> Printing Setup Tab as well as any printer profiles
· Set Reciept to Reciept Printer
· Click OK
· Close BackOffice
Stage 4 - Test Receipt at SmartPOS
-
Ensure ComPrinter is running
-
Run SmartPOS
-
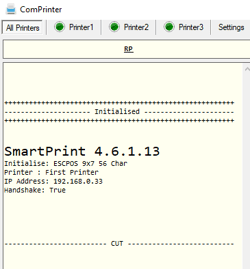
Run SmartPrint
-
If correctly configured you should now receive your first test print
This completes the guide for installing ComPrinter