
This article explains how to enter a Requisition via the SmartPDE Mobile App so it can then be processed fully in BackOffice.
Prerequisites
- Minimum Bepoz version of 4.7 and onwards
- Completion of SmartPDE Mobile App Setup in the given order:
-
SmartPDE Mobile Licensing & Installation -
SmartPDE Mobile Workstation Setup -
SmartPDE Mobile Scheduled Job & Configurations -
SmartPDE Mobile Database Settings -
SmartPDE Mobile HomePage - To access Requisition functions within the SmartPDE mobile application, the applicable Operator Privileges will need to be enabled:
-
Operator Maintenance 'Stock Control' Tab - Requisitions: "Create Requisitions" Flag
- Requisitions: "Edit Requisitions" Flag
Completing a Requisition
- Note: It is a good practice to retrieve the latest copy of the database before performing any stock operation within the SmartPDE Mobile App; this ensures the data integrity is maintained between the SmartPDE Mobile App and the local database in BackOffice
- For info on how to get a new database, please refer
to this article
- To get started, login into the SmartPDE mobile app using a valid Operator ID
- Click on the "hamburger"-style icon on the top left of the application screen and click on the 'Requisition' option in the side menu
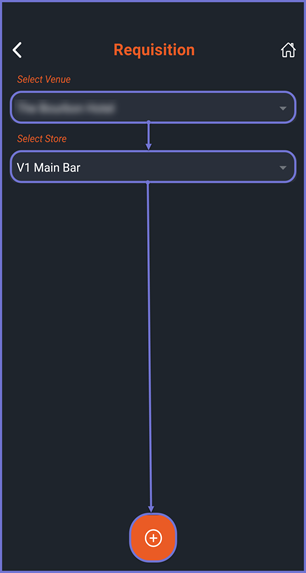
- This will open the Requisition home screen, proceed to select a Venue and Store to create a Requisition for
- Note: To enable Default Venue and Store, please refer to
this article - Once the Venue and Store are selected, click on the 'Add' button at the bottom to create a new Requisition request
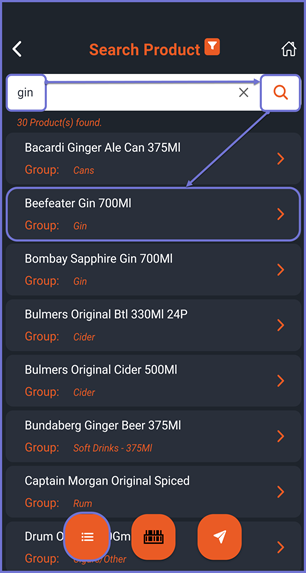
- Proceed and search for a desired product by typing the product name or by using the mobile Barcode Scanner option at the bottom of the screen
- Note: To Add a Barcode or search a product using a barcode, please refer to
this article - Once the desired product, is selected the Product Details page is opened
- Note: For more information on the Product Details page, please refer to
this article - Proceed to add a quantity for the selected product in the 'Enter Qty' field within the Price Level card and click on the 'Add to Requisition' button
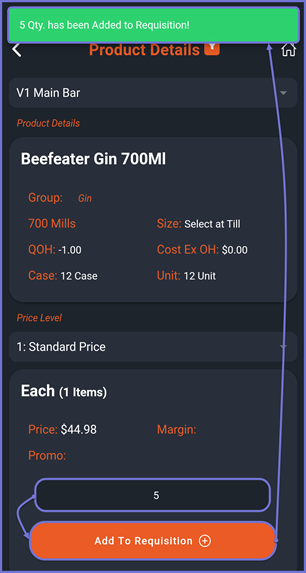
- To add more products to this Requisition, click on the 'Back' option on the top left corner and repeat the above steps to add more Products
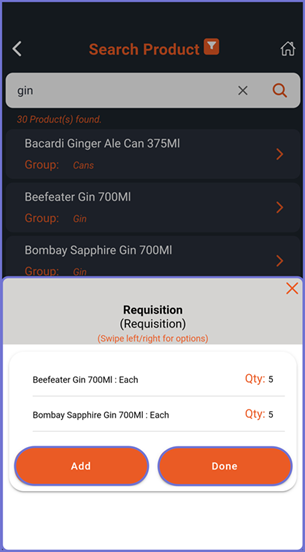
- To view all the products added within the Requisition, click on the 'List' button on the bottom which brings up a modal pop-up window displaying all the products within that Requisition
- Note: To edit or delete an item, please refer to
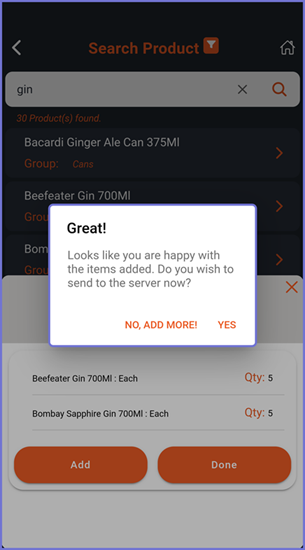
this article - The Products that have been added with their respective Quantities are displayed
- Click on Add to add more Products to the Requisition
- Click on Done if you are happy with the items added
- Once the Operator clicks on Done, the app prompts with a Yes and No, Add More selection
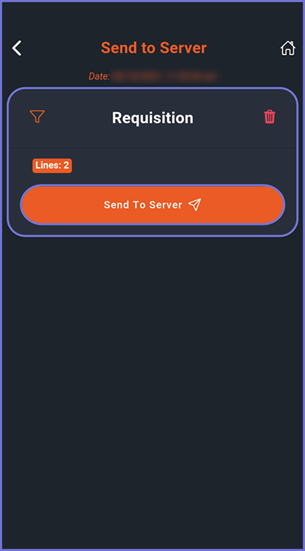
- After a Yes selection, the Requisition is sent to the Send to Server screen
- Navigate to the Send to Server screen and send the newly created Requisition to the Server i.e. BackOffice
- Note: For more information on Send to Server, please refer to
this article
Next Steps
- The newly created Requisition can be found within 'Stock Control' -> 'Requisitions' in BackOffice
- The Requisition will need to be processed and posted from BackOffice for completion
- Follow the link for more information on how to process
Requisitions in BackOffice