This article outlines a brief overview of importing Product Promotions manually by using a BackOffice Extension.
This includes how to create a Device under Boxpromotions.dll called "BOX Generic Promotions" which will create a button in the Product Promotions screen called "Import Promotions"; when pressed, it will import any excel files in the specified location. This also supports all the functions, rules, and definitions of the scheduled job including error handling.
Prerequisites
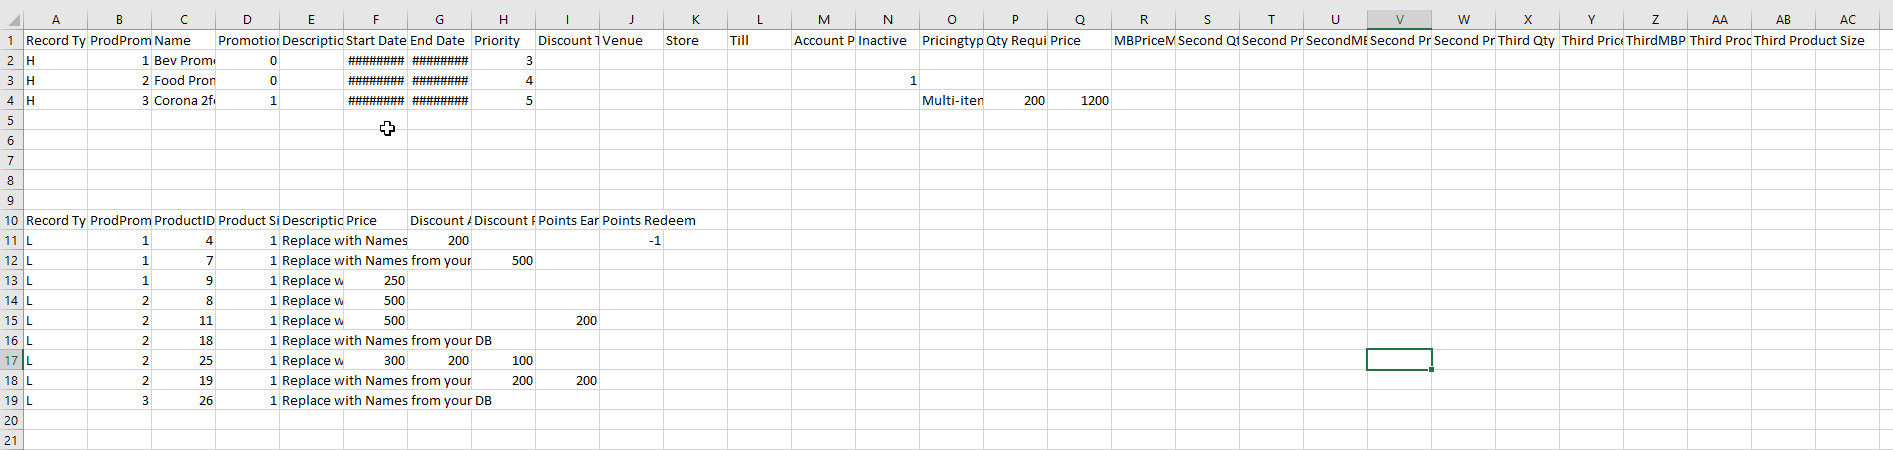
- Ensure that you have a flat-file/Excel from a Windows file directory created
Device Settings
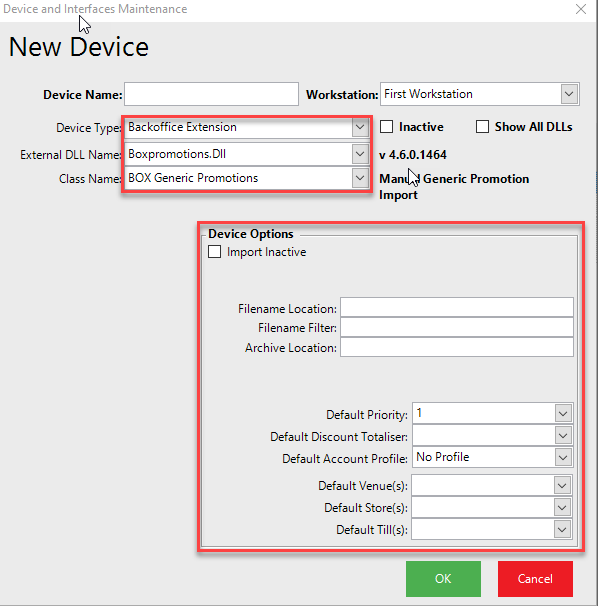
- Create a new device with the Device Type "Backoffice Extension" with Boxpromotions.dll and Class Name as "BOX Generic Promotions"
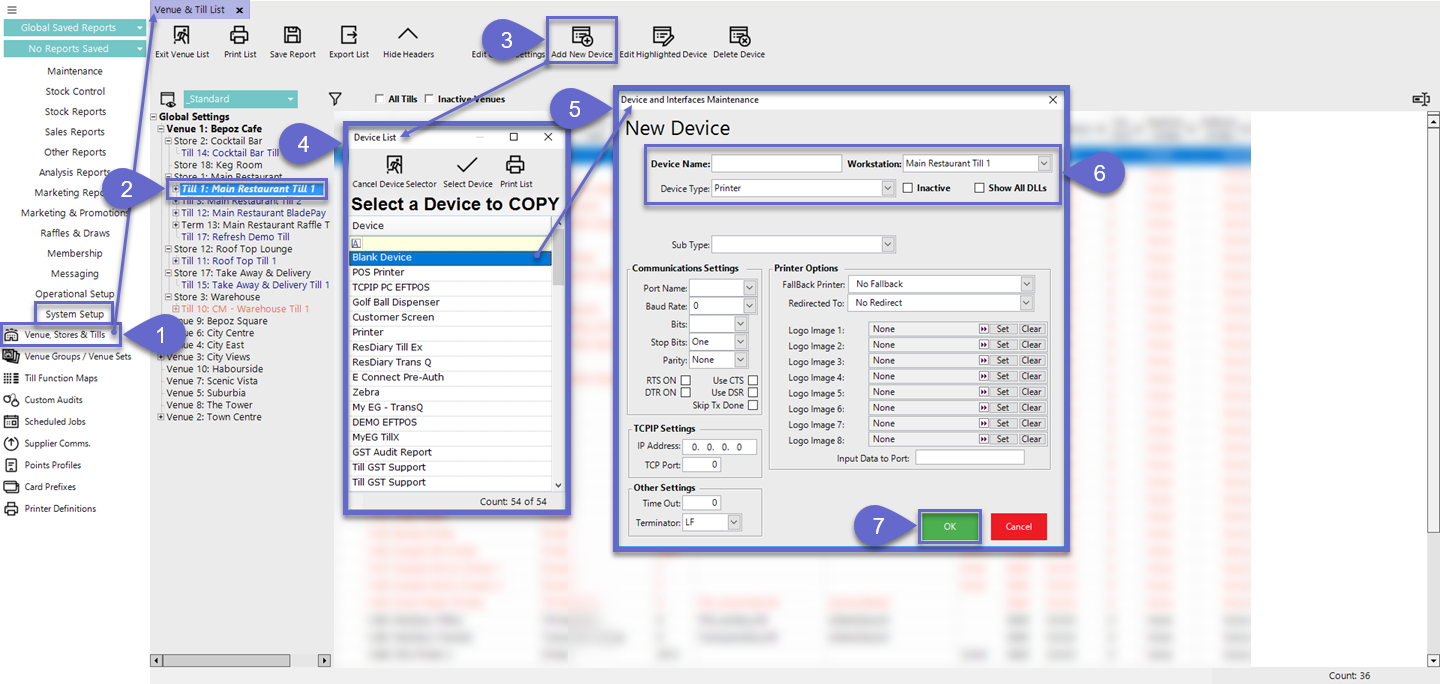
- To create a new device, complete the following steps after logging into BackOffice:
- Navigate to the Venue, Stores & Tills under the System Setup menu and select it to open the Venue & Till List tab
- From the Venue & Till List tab, select the desired Till from the Organizational Tree
- Click on the Add New Device button at the top of the tab
- A Device List window will open which allows for copying an existing Device or, alternatively, select Blank Device to start from scratch
- After making the appropriate selection from the Device List window, a new Device and Interfaces Maintenance window will open
- The following configuration options apply to all Devices:
- Enter the desired Device Name; NB: this is all that's required prior to saving a Device
- Ensure that the correct Workstation is selected as this is the Workstation that the Device will be attached to
- Select the required Device Type
- Depending on the Device Type selected, additional Device configurations will be dynamically populated such as an External DLL Name drop-down, Class Name drop-down, Sub Type drop-down, Communication Settings, TCPIP Settings, Device or Printer Options, and Other Settings
- The Inactive flag can be enabled to make a Device temporarily Inactive as opposed to deleting the Device; then disable the flag to make an Inactive Device active again
- The Show All DLLs flag, when enabled will show additional External DLL Names when applicable
- After completing the Device's configuration, click on the OK button to save the Device
- There are a number of credentials that need to be input and they include:
- Job Name: Give the Job a relevant name
- Job Type: Backoffice Extension
- External DLL: Boxpromotions.DLL
- Class Name: BOX Generic Promotions
- Job Options will also require a number of configuration as well:
- Import Inactive: By default it is set to false. If this flag is true, the import is inactive
- File Location: This is the location of the file to be imported. After import, the file is archived
- Archive Location: This is the location of archived files after import
- Default Priority: This will set the Product Promotions' priority based on the value; the value ranges to 1-20
- Default Discount Totaliser: This will set the Discount Totaliser for the promotion based on the value; the value ranges to 1-30
- Default Venue/s: Select the VenueID to match in the file to determine the VenueID; else use this setting if this is not specified in the import file
- Default Store/s: Select the Stores or Storegroups; else use this setting if this not specified in the import file
- Default Till/s: Select the WorkstationID to match to the Product Promo Till ID; use this setting if this is not specified in the import file
- Default Account Profile: Select the value to the AccProfileID to match; use this setting if this is not specified in the import file
Promotion Import Workflow
- Once the device has been created, select Marketing & Promotions on the side panel and select Product Promotions
- From there you will see the Import Promotions button
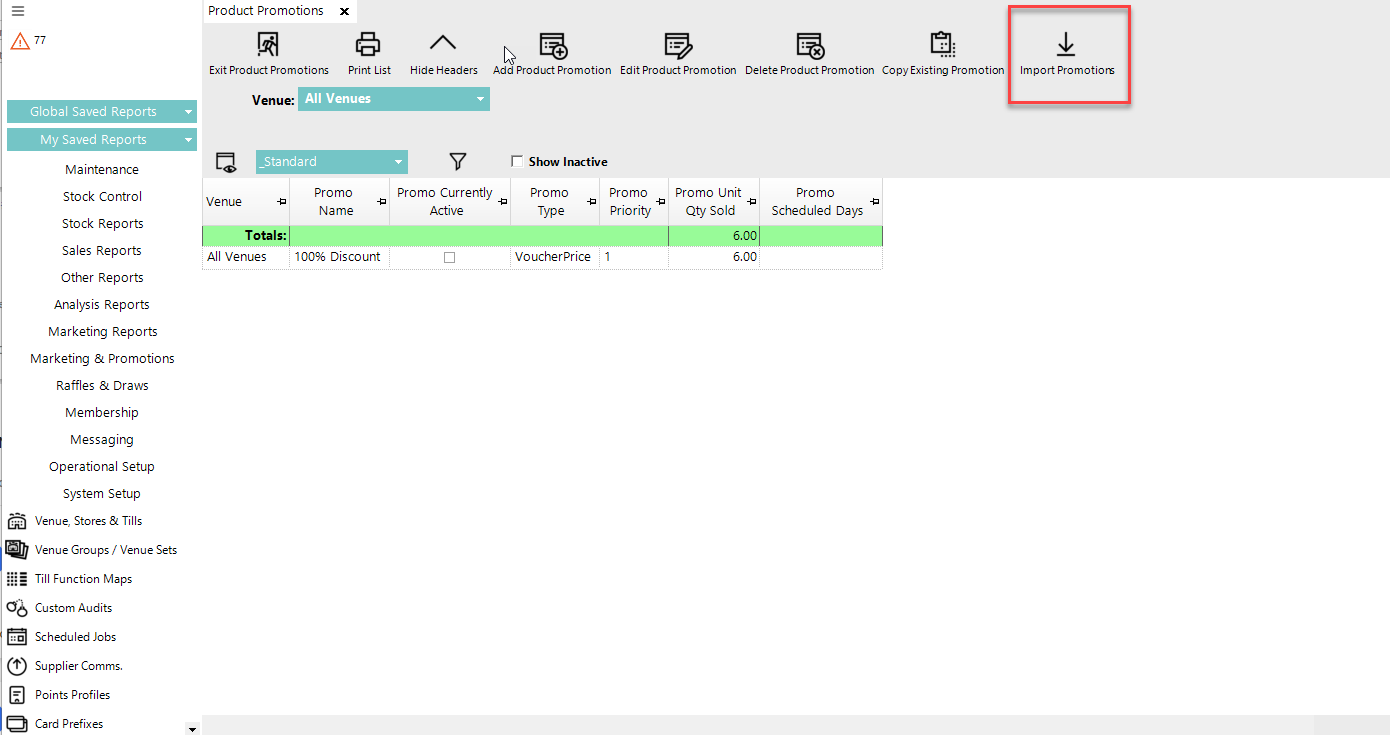
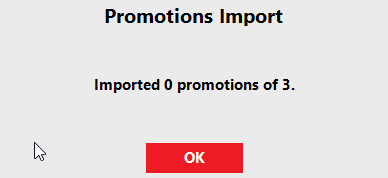
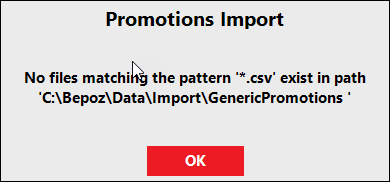
- Select the Import Promotions and it should display Promotion Import prompt
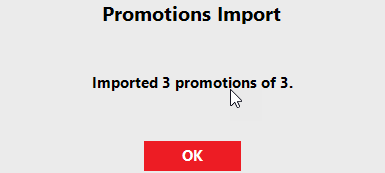
- If a promotion is not importing, it is either the file is not in the correct path or check the Header and Line are input correctly, e.g ProductID