
This article covers the setups that are required to configure the Till Function buttons for retrieving and processing IBA E-Commerce orders via SmartPOS.
Once the Scheduled Job and the Till Extension Device have been configured, we're almost ready to retrieve and handle the E-Commerce Orders in SmartPOS; the final setup step is configuring these Till Functions.
Prerequisites
- Minimum Bepoz version of 4.7.0.4 is required for this integration
- To access Till Function Settings, the applicable Operator privileges will need to be enabled
-
Operator Maintenance 'General' Tab - System Setup: "Maintain Till Function Maps" flag
About
- In order to retrieve & access IBA E-Commerce orders on SmartPOS, an accessible 'Graphical Table' and a set of three other Till Function buttons must be configured in Backoffice
- This function should be configured to select the Table Group that's been designated for use with the IBA E-Commerce integration. NB: New Transactions cannot be added to this Table Group via SmartPOS
Additionally, three (3) iterations of the 'Call External DLL Function' will need to be added which Operators can use to mark an Order as "Ready to Collect", "Collected", or "Delivered"
- These three Till Function buttons link to a Table Group which is used to create the Marketplace transaction in Bepoz
- The Till Function buttons can then be used to set the order as 'Ready to Collect', 'Collected', or 'Sent/Delivered'
Initial Setup
- To set up the Till Function buttons for IBA E-Commerce in BackOffice, navigate to the Till Function Maps option under System Setup in the BackOffice side Menu bar
- This will open the Till Function Override Setup tab, select the desired Function Map from the available list of Function Maps and click on Edit Highlighted Function Map
- Note: If there are no Function Maps, please click on
Maintain Function Map button to add a new Function Map - This will open the Function Map: Store Function Map tab which will display the Function Map menu as it appears on the SmartPOS
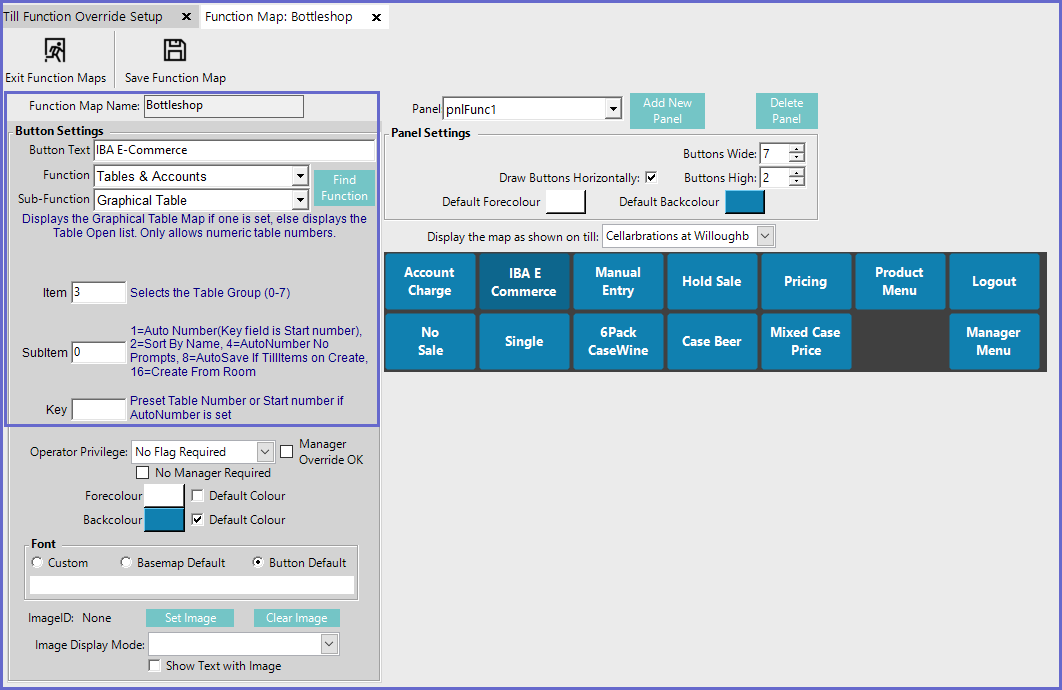
- Click on the desired Button space and then configure the Button Settings:
- In the Button Text field enter the text that will display on the Till Function Button on SmartPOS Workstation screens
- Set the Function drop-down to 'Tables & Accounts'
- Set the Sub-Function to 'Graphical Table'
- In the Item field, enter the corresponding TableGroup ID for IBA E-Commerce Table Group
Function - Specific Configuration Options
- Additionally, three (3) iterations of the 'Call External DLL Function' will need to be added which Operators can use to mark an Order as "Ready to Collect", "Collected", or "Delivered"
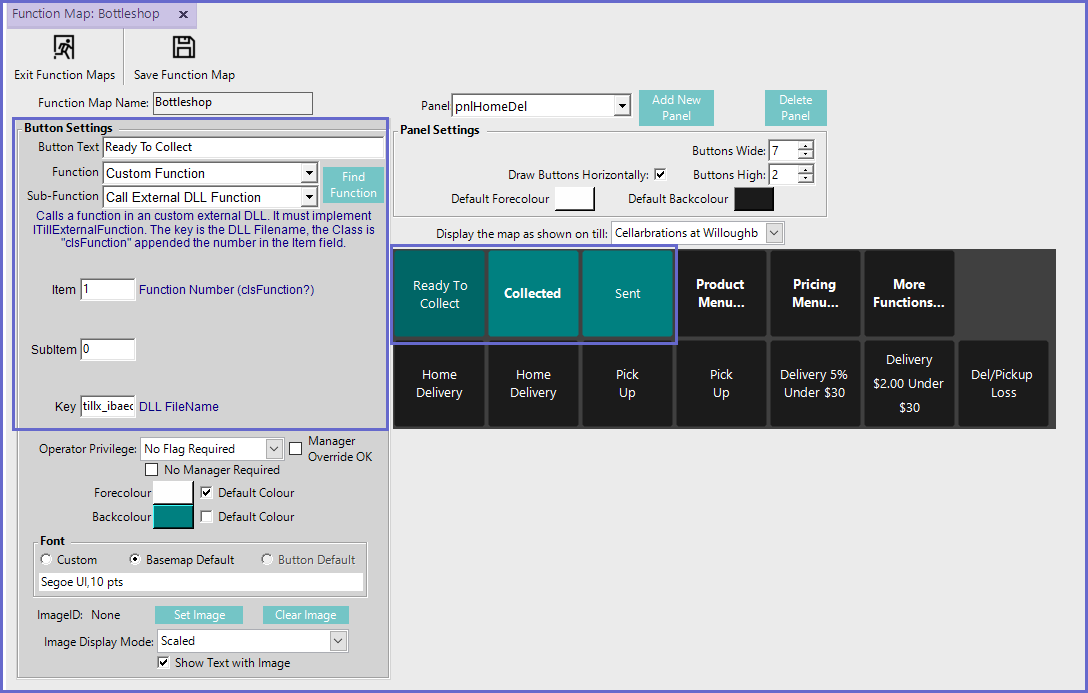
- To set up the three External Function Buttons, change the panel to pnlHomeDel panel within the Function Map
- Click on the desired Button space and then configure the Button Settings:
- In the Button Text field enter the text that will display on the Till Function Button on SmartPOS Workstation screens
- Set the Function drop-down to 'Custom Function'
- Set the Sub-Function to 'Call External DLL Function'
- In the Item field, enter the below value for the respective function buttons
- 0 will mark the IBA E-Commerce Orders as "Ready To Collect"
- 1 will mark the IBA E-Commerce Orders as "Collected"
- 2 will mark the IBA E-Commerce Orders as "Sent"
- In the Key field for all the above three (3) function buttons, enter "tillx_ibaecommerce.dll"
Related Reading
-
IBA E-Commerce Marketplace - Schedule Job Setup Guide -
IBA E-Commerce Marketplace - BackOffice Extension Device Setup Guide -
IBA E-Commerce Marketplace SmartPOS User Guide