
This article covers the Scheduled Jobs setup guide for Linkly Pay @ Table. Prerequisites
Pay @ Table Scheduled Job Setup
- Minimum Bepoz version of v4.7 and onwards
- For an Operator to be able to set up Linkly Pay @ Table, the following Operator privileges must be enabled:
- Venue Maintenance "Main" Tab (General Settings)
- All “System Setup” Flags
- Operator Maintenance 'General' Tab
- System Setup: “Maintain Schedule Job” Flag
- System Setup: “Access Venue, Stores, Tills” Flag
Pay @ Table Scheduled Job Setup
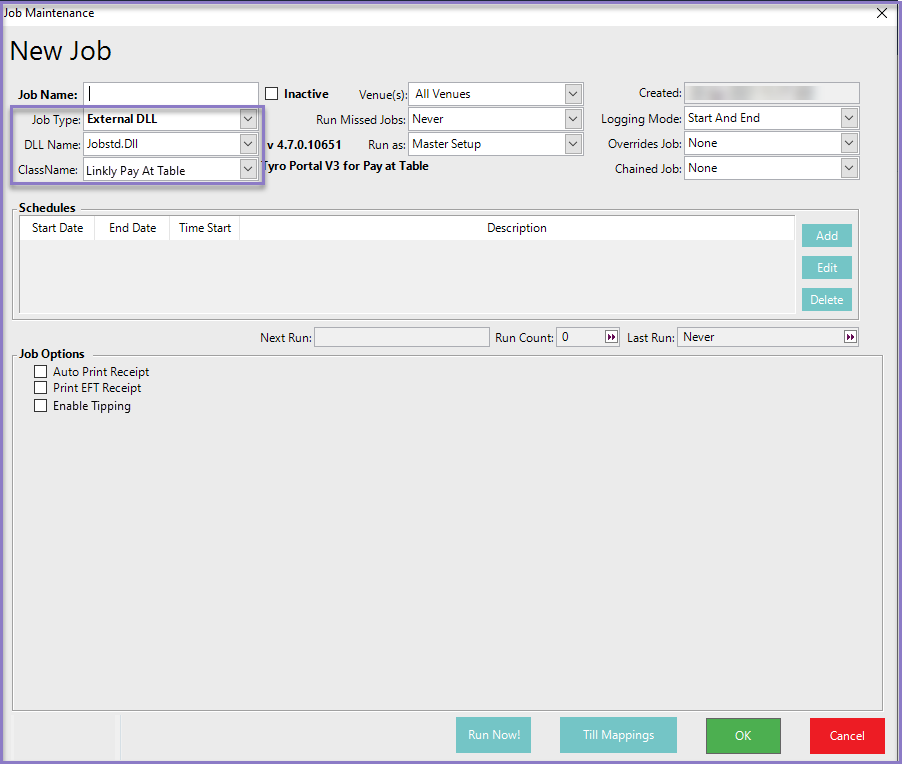
Job Setup
| Job Name | Name or description of the job |
| Job Type | External DLL |
| DLL Name | Jobstd.Dll |
| Class Name | Linkly Pay At Table |
| Schedules | Add a schedule for the job in order to run the job |
Job Options
| Auto Print Receipt |
|
| Print EFT Receipt |
|
| Enable Tipping |
|
- Till Mapping: This, when clicked will open a new pop-up window which will be used to map where certain terminal ID report to and print from
- Select the desired Venue and the Table Group to have Linkly Pay@Table
- Select the Operator from the dropdown who can access the Till and make the payments
- Enter the Service IP and Port number to connect to Linkly
- Click on 'New Key' which generates the API Key
- Enter the Linkly Terminal ID, select the till from the dropdown, and select Add
- The grid will show all existing mappings
- If a row is highlighted in a grid and the delete button is pressed, the mapping will be removed from the job setup
- Click Ok to save the Till Mapping settings

- Click Ok to save the scheduled job settings