
Prerequisites
- Minimum Bepoz version of v4.7.2.8 and onwards
- To access Till Function Settings, the applicable Operator privileges will need to be enabled
- Venue Maintenance "Main" Tab (General Settings)
- All “System Setup” Flags
- Operator Maintenance 'General' Tab
- System Setup: "Maintain Till Function Maps" flag
About
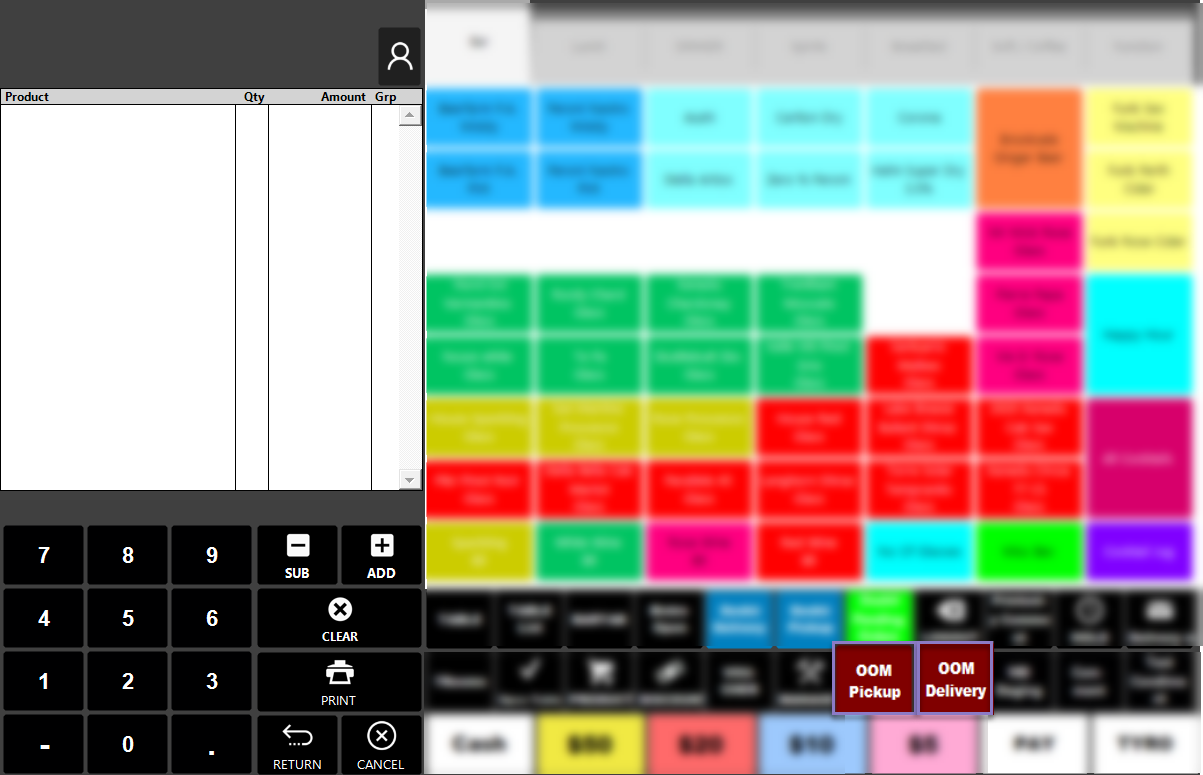
- In order to access Oolio Order Manager orders on SmartPOS, two separate buttons need to configure for Pickup and Delivery
-
The operator can view the Pickup and Delivery orders list separately at SmartPOS
- To set up the Till Function buttons for the Oolio Order Manager Integration, navigate to the Till Function Maps option under System Setup in the BackOffice side Menu bar
- This will open the Till Function Override Setup tab; select the desired Function Map from the available list of Function Maps and click on Edit Highlighted Function Map
- Note: If there are no Function Maps, please click on Adding a Till Function Map button to add a new Function Map
- This will open the Function Map tab which will display the Function Map menu as it would appear SmartPOS
Oolio Order Manager Pickup and Delivery Orders Buttons
-
The Delivery and Pickup orders from Oolio Order Manager will be displayed at SmartPOS with the order type as 'Delivery' and 'Pickup' respectively
-
Till Function Buttons are required to be configured to access Delivery and Pickup orders received from Oolio Order Manager
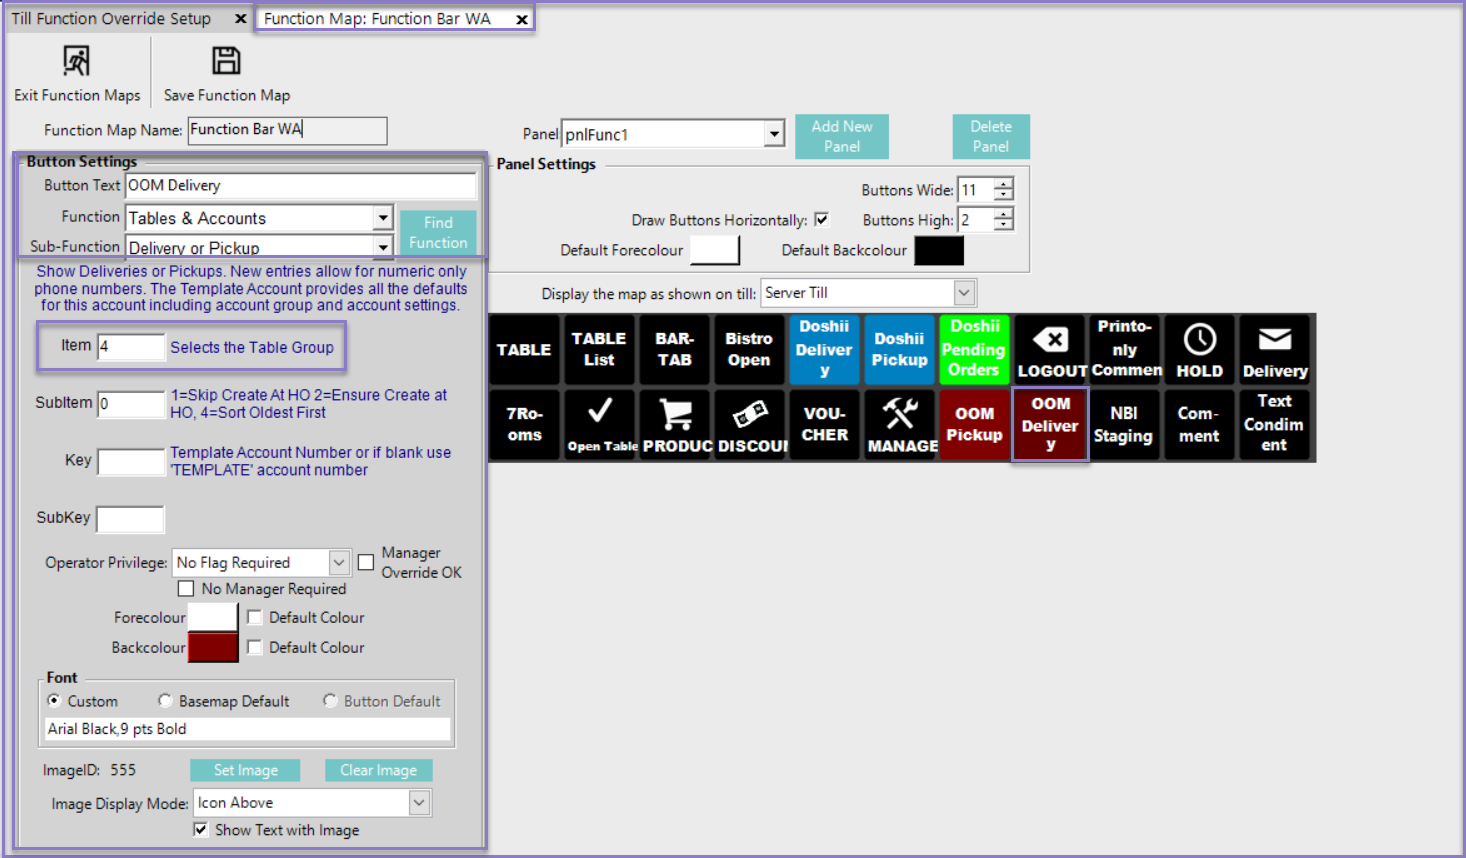
- To add the Delivery Till Function Button, click on the desired button space and then configure the Button Settings:
- In the Button Text field enter the text that will display on the Till Function Button on SmartPOS Workstation screens
- For example : 'OOM Delivery'
- Set the Function drop-down to 'Tables and Accounts'
- Set the Sub-Function to 'Delivery or Pickup Alpha'
- In the Item field, enter the Table Group number which was configured for the Delivery Table Group Name on the Venue Maintenance "Tables" Tab
- Save the Function Map
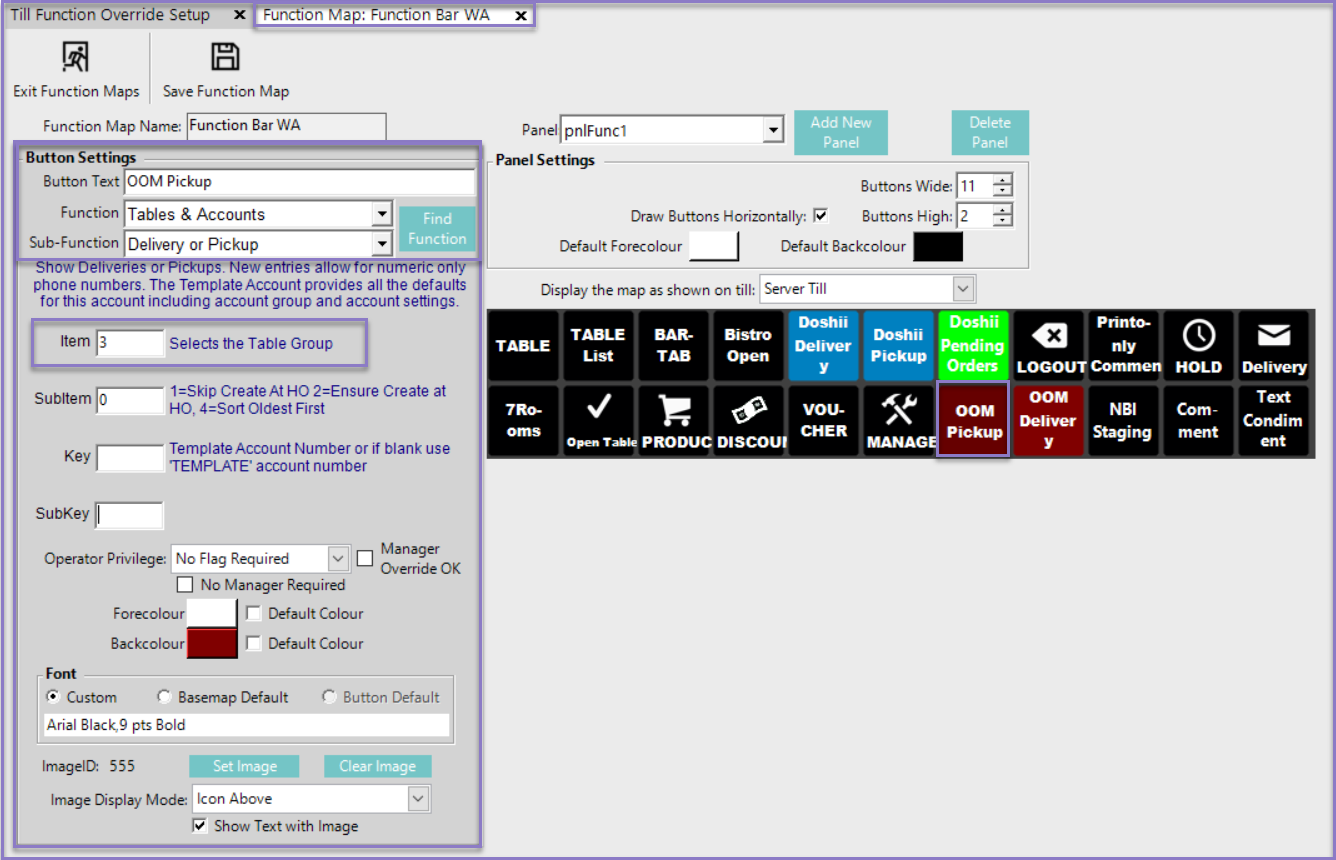
- To add the Pickup Till Function, click on the desired button space and then configure the Button Settings:
- In the Button Text field enter the text that will display on the Till Function Button on SmartPOS Workstation screens
- For example : 'OOM Pickup'
- Set the Function drop-down to 'Tables and Accounts'
- Set the Sub-Function to 'Delivery or Pickup Alpha'
- In the Item field, enter the Table Group number which was configured for the Pickup Table Group Name on the Venue Maintenance "Tables" Tab
- Save the Function Map
Quick Links & Additional Resources
- Venue Maintenance "Main" Tab (General Settings)
- Operator Maintenance 'General' Tab
- Adding a Till Function Map
- Venue Maintenance "Tables" Tab