
This article covers the setup that is required to configure the Till Function button for Pay@Table.
Prerequisites
- Minimum Bepoz version of 4.7.3.x
- Minimum .NET version of 4.8
- The applicable Operator Privileges will need to be enabled:
-
Operator Maintenance 'General' Tab - System Setup: "Maintain Till Function Maps" flag
-
Venue Maintenance "Main" Tab (General Settings) - All “System Setup” Flags
Pay@Table Till Function Button Setup
- To set up the Till Function button for Pay@Table for SmartPOS Mobile transactions, navigate to the Till Function Maps option under System Setup in the BackOffice side Menu bar
- This will open the Till Function Override Setup tab; select the desired Function Map from the available list of Function Maps and click on Edit Highlighted Function Map
- Note: If there are no Function Maps, please click on
Adding a Till Function Map button to add a new Function Map - This will open the Function Map tab which will display the Function Map menu as it would appear on SmartPOS Mobile
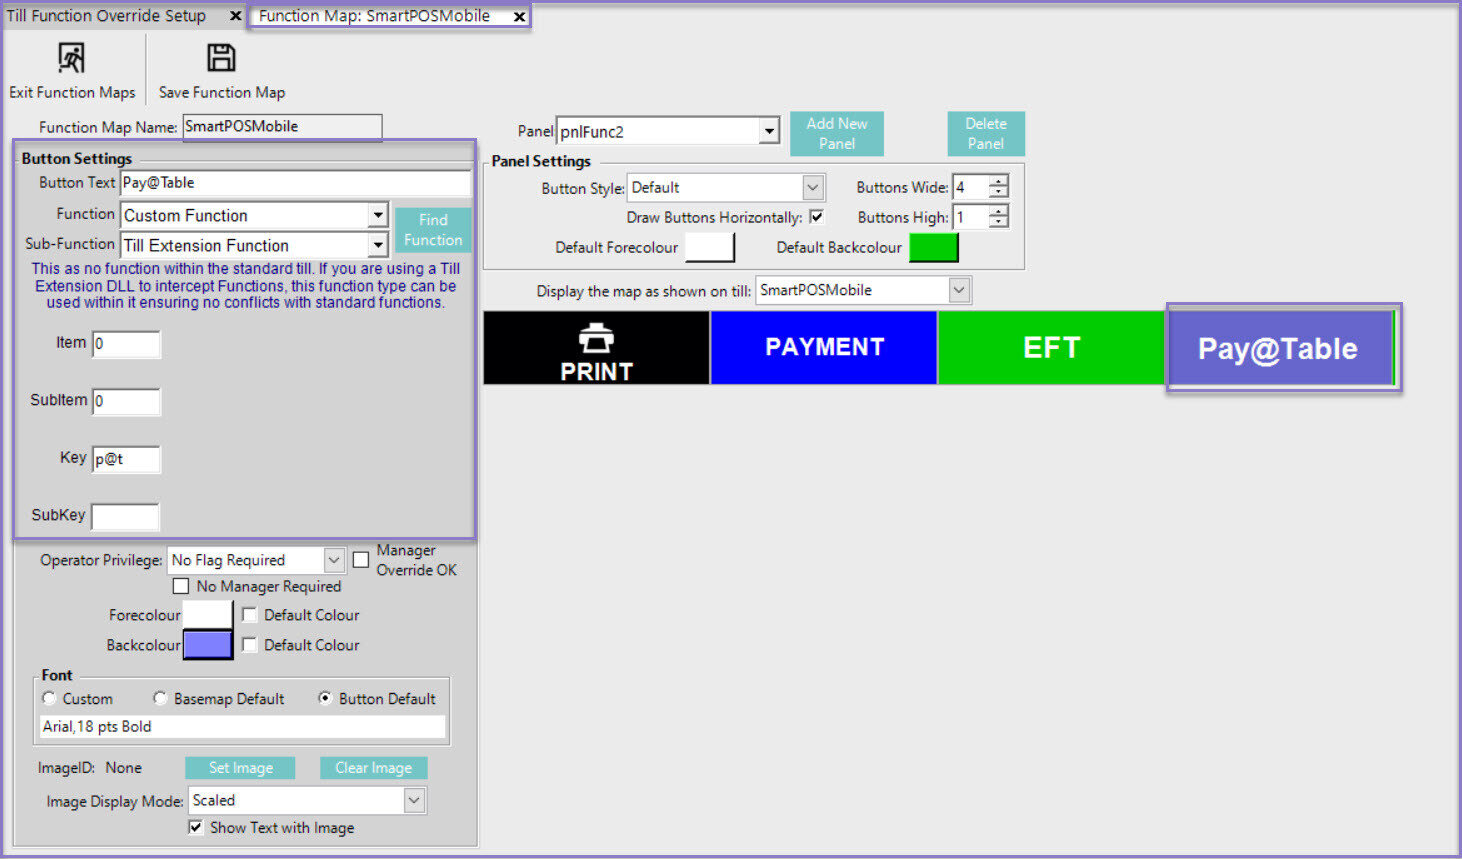
- Click on the desired Button space and then configure the Button Settings as follows:
- In the Button Text field enter the text that will display on the Till Function Button on SmartPOS Mobile
- Set the Function drop-down to 'Custom Function'
- Set the Sub-Function to 'Till Extension Function'
- In the Item field, enter '0', SubItem as '0', Key as p@t and save the Function Map
SmartPOS Mobile App Setup Articles
- To complete the full & correct setup of the SmartPOS Mobile App, the Operator must follow & execute these articles provided in the given chronological order:
-
SmartPOS Mobile Workstation Setup -
SmartPOS Mobile Venue Maintenance Setup
-
SmartPOS Mobile Till Function Map Setup Guide -
SmartAPI Host Usage -
SmartPOS Mobile App Configuration Screen