
Overview
Default guide on how to install SQL 2019 for Peek Performance along with SSMS and SQL CE 3.5
Prerequisites
Server minimum requirements
-
Supported Operating System: Windows 10 or Greater, Windows Server 2016 or Greater
-
Processor: Intel-compatible processor with a minimum spec of i5 or a faster processor Recommended i7
-
RAM: Minimum 32 GB
-
Hard Disks (SSD): 4 x Harddrives - 1 for Production DB, 1 for SQL TempDB, 1 for Production DB Backup, 1 x OS
-
Software: Frameworks 4.8
SQL EXPRESS 2019 Installation
-
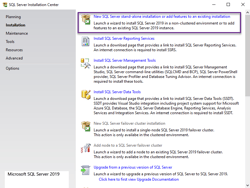
Once SQL finishes downloading the installation files the setup wizard will launch, this is where the option to install a New SQL Server will present. Click on the Hyperlink to proceed to the next step
-
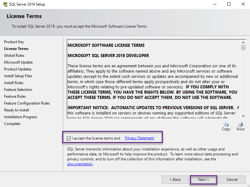
Accept the license terms and click Next.
-
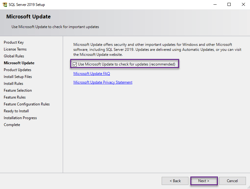
Optional you can use Microsoft Update to check for any SQL Updates. (Default is unchecked), click next to continue.
-
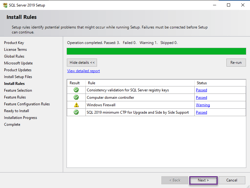
Install Rules will highlight any rule failures or software requirements. Click Next to continue.
-
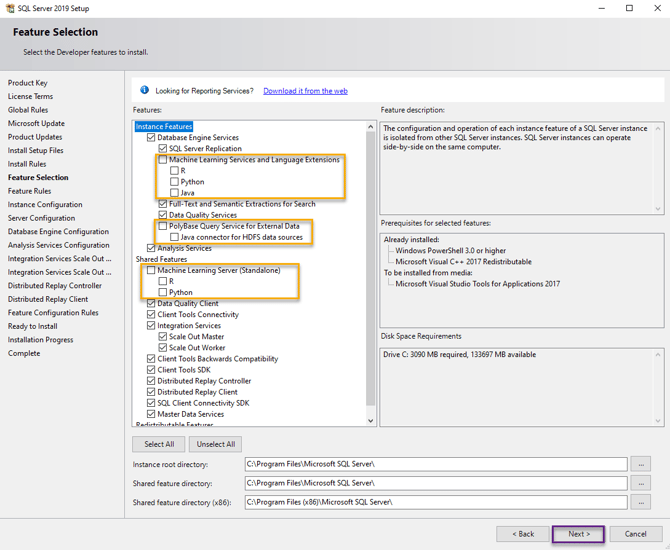
Feature Selection by default the correct features are already checked, but the Machine Learning Services are not required so it can be unchecked. Click Next to continue
-
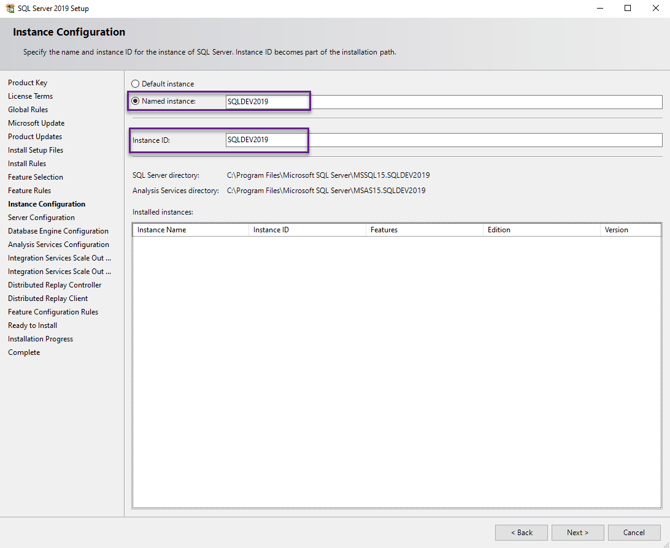
Instance Configuration can go with the default name 'SQLExpress' but would recommend renaming this to something more suitable. Click Next to continue.
-
Server Configuration, ensure SQL Server Browser is set to 'Automatic'. Click Next to Continue.

-
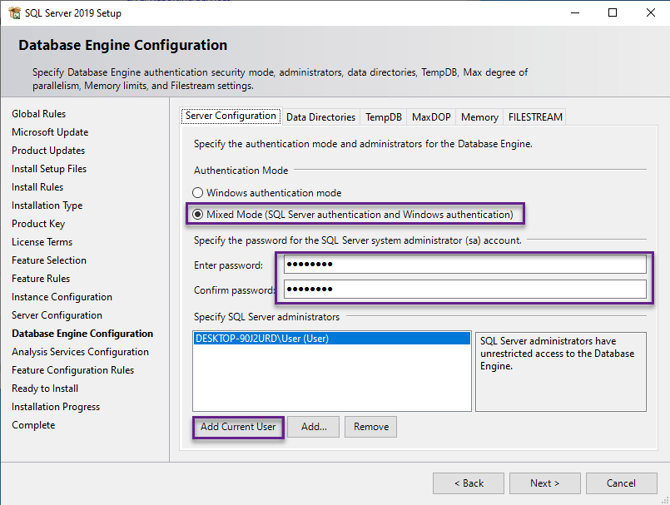
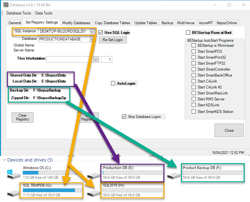
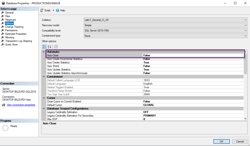
Database Engine Configuration, ensure 'Mixed Mode' is checked and enter a SA (System Administrator) password, Default is normally 'do4safet', also ensure that all Windows Users that require System Admin Rights are specified in the Server Administrators.
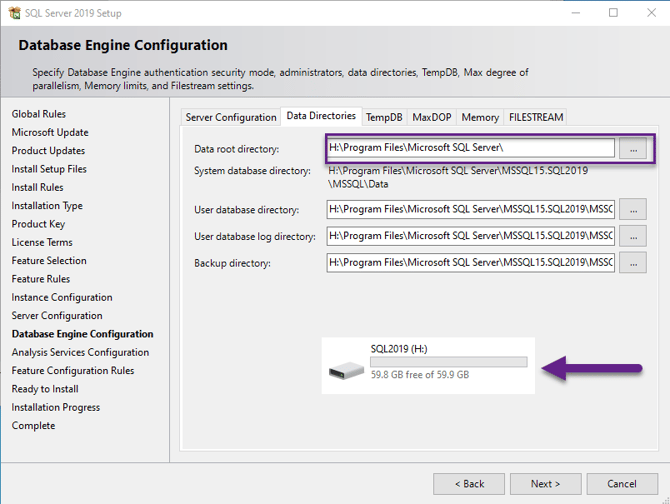
The best Practises for Total SQL performance is to install SQL on its own drive too, away from the OS drive. So OS, SQL and Production DB and SQL TempDB do not compete with System resources. Primarily DISK IO. In this case I'm setting the Data Root Directory to the H Drive
The reason for the split is to keep the OS, SQL, SQLTempDB and the Production Database all on their own resource level, we are not working with small files that have quick read or write properties, these files a generally massive with heavy read and write IO and if they all share the same drive then when SQL has to perform a task it has to use the TempDB and the production DB and the OS has to compete for the Same Harddrive Resources which causes bottlenecks which can ultimately result in timeouts and data loss.
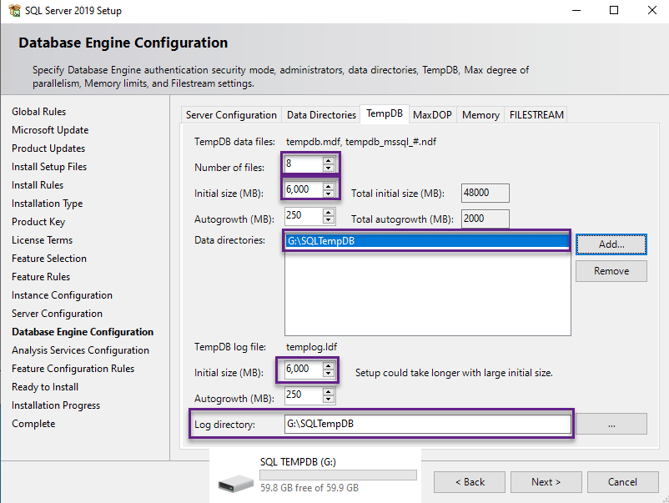
The next Tab is TempDB the number of files should automatically calculate the number of cores running on the system your installing on but if this is not clear then you need 1 Tempdb file per core so if your system is running 8 cores you will specify 8 number of files.
Since the TempDB is running on its own Drive (Not a Shared partition) you need to divide the Drive by 9 as you will have 8 Tempdb files and 1 log file. So in this case, I have 60GB Drive so 60/ 9 = 6.66 (rounded) to 6GB each, specify the SQLTEMPDB Drive in the Data Directories,
The reason for the big TempDB files sizes is to prevent SQL from autogrowing or Resizing them, when this event is trigger your performance is reduced as it has to grow these files, but in case it does have to grow 250MB should be fine.
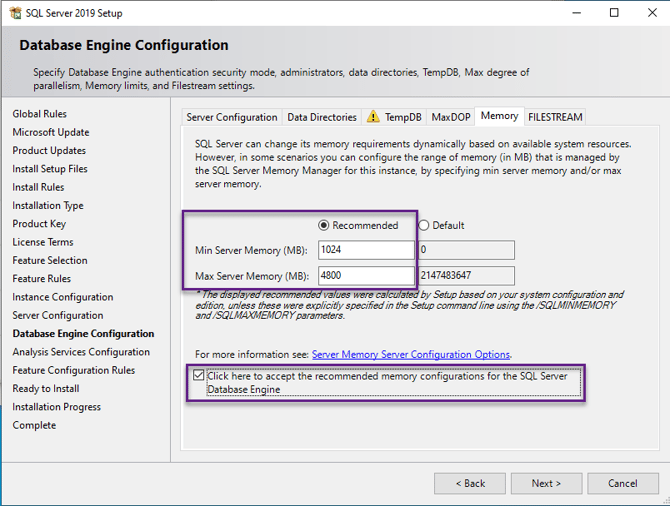
The Next Tab is Memory, this should be Roughly 60% of the total allocated System Memory. In my Example, I have 8GB (8*60% = 4.8GB)
I would always set the minimum of 1GB
-
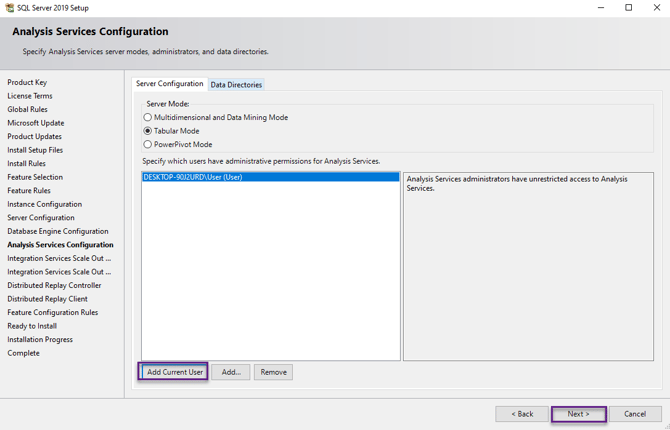
Analysis Servers Configuration
-
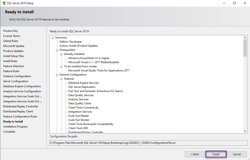
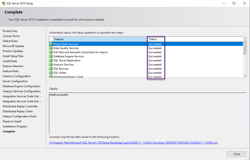
SQL Server should now start the installation process and once finished should show the Complete Window, with a Status for each Feature installed which should all be 'Succeeded', Click Close to Exit the installation Wizard.
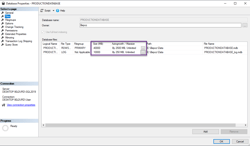
Lastly, you want to ensure the Production Database has a much space allocated as possible, you want to do this to prevent unnecessary growth.
Run SSMS and right-click the DB you want to size and head to the files Page
Here you want to set the size if it's a large multi venue set this size as high as you possibly can. The next is the log file (LDF) the should be size to 25% of the MDF file size.
Auto Growth should still be enabled but it shouldn't be set to a percentage it should be in Megabytes
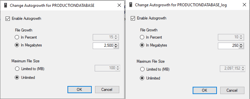
Under the options: you should also set Auto Close = False in a production Database. This is to prevent SQL from flushing the data cache and execution plans out of memory for that database,
SQL SERVER MANAGEMENT STUDIO Installation
-
SQL Server Installation Center, select the option to 'Install SQL Server Management Tools.
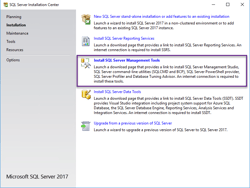
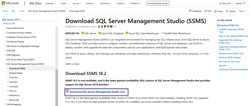
This will launch a web browser to download the SSMS Installation Package
-
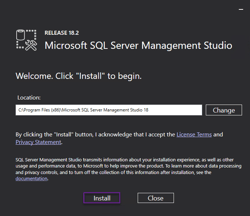
Once Downloaded run the Installation Package 'SSMS-Setup-ENU', Click Install to continue.
-
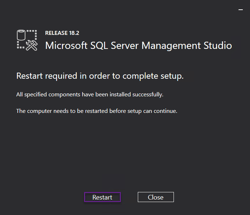
Once installed it is recommended to Restart.
SQL CE 3.5 Installation
-
SQL 3.5 has two files on for Windows x86 (32bit) and Windows x64 (64bit) on a Windows (64Bit) OS both the (32bit) and (64Bit) installers need to be run in order of (32bit) first and then (64bit) second.
-
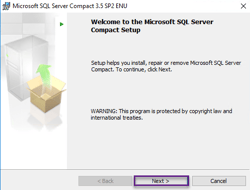
Run 'SSCERuntime_x86-ENU' and then Run 'SSCERuntime_x64-ENU' the steps below are the same for both installers.
-
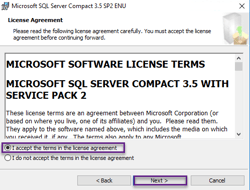
Accept the Terms in the license agreement and click Next.
-
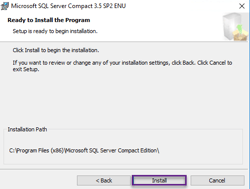
Click Install
This completes the SQL installation part of Installing Bepoz