This article serves as a how-to guide to setting up a Tyro Pay at Table Terminal in BackOffice including an EFTPOS Device and a Scheduled Job.
About
- Tyro is an EFTPOS device that can be installed and configured in BackOffice so that the physical hardware can be used to process payments in SmartPOS
- This article outlines the steps that need to be carried out in BackOffice in order for the physical device to be used
- There are two processes involved, including:
- Adding the Tyro "Device" to the Till in BackOffice
- Creating & running a Scheduled Job in BackOffice
Prerequisites
- To access Tyro Payment Features, the following Operator Privileges will need to be enabled:
- Operator Maintenance 'General' Tab
- System Setup: "Access Venue, Stores & Tills" Flag
- System Setup: "Maintain Venue Stores & Tills" Flag
Configure EFTPOS Device
- To add the Tyro Terminal to a designated Till, log in to BackOffice and follow the steps below:
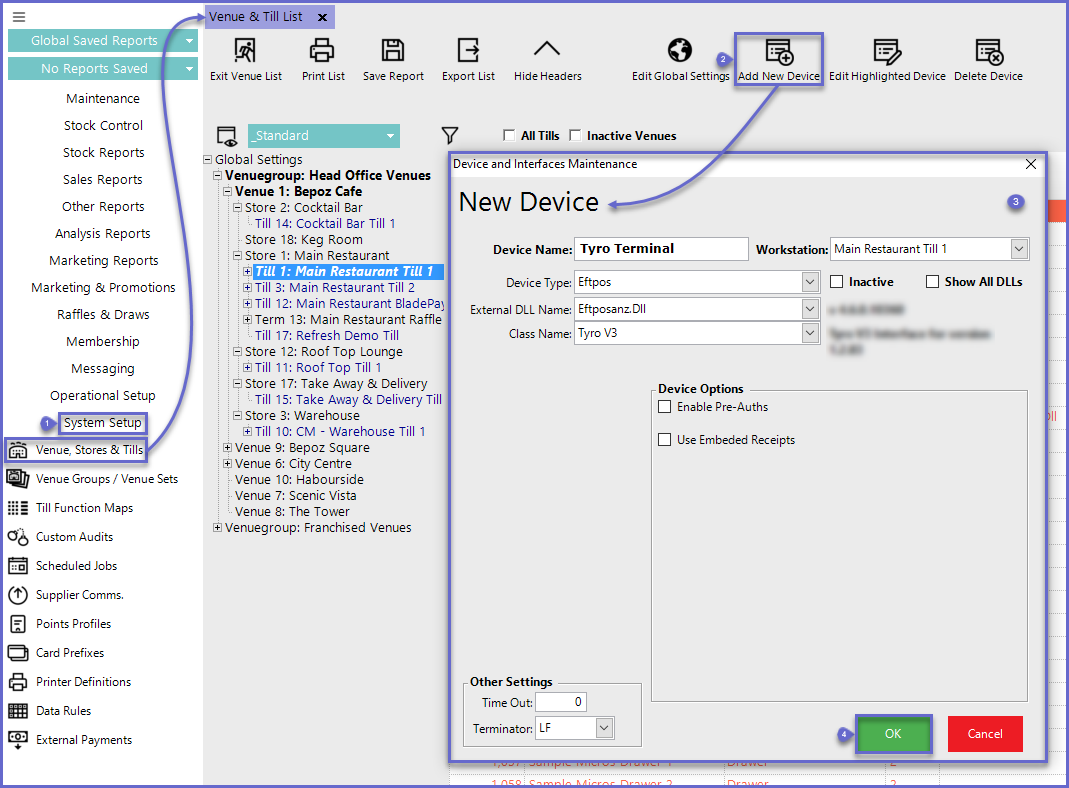
- Within the System Setup Menu, select Venue, Stores & Tills
- Highlight the desired Till and Select the Add New Device button
- Enter the following credentials in the Device and Interfaces Maintenance window:
- Device Name: Relevant Name
- Device type: EFTPOS
- EXTERNAL DLL Name: Eftposanz.Dll
- Class Name: Tyro V3
- Enable Pre-Auths: If this flag is on, pre-authentication will be used for Table Bar Tabs
- Use Embedded Receipts: If on, receipts are passed back to the Till for embedding
- Time Out: Response time (seconds) before the connection times-out
- Once all information has been entered, select OK to complete the process
Creating a Scheduled Job
- To add a Scheduled Job for the Tyro Terminal Configuration, log in to BackOffice and follow the steps below:
- Within the System Setup Menu, select Scheduled Jobs
- Select the Add Job button
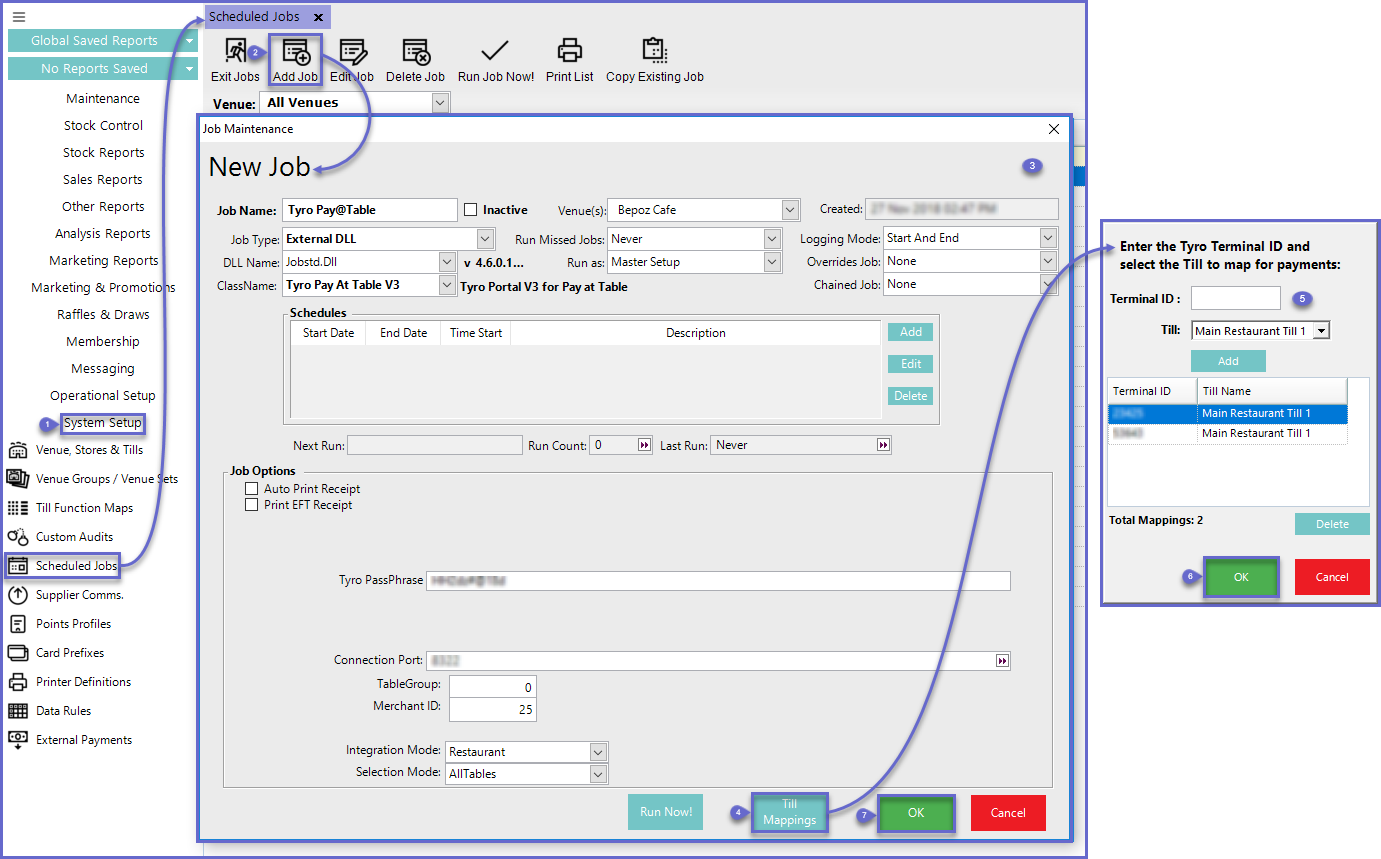
- Enter the following credentials in the Job Maintenance window:
- Job Name: Relevant Name
- Job Type: External DLL
- DLL Name: Jobstd.Dll
- Class Name: Tyro Pay At Table V3
- Tyro PassPhrase: Enter the PassPhrase that was configured on the Terminal
- Connection Port: 8080 (this may vary depending on network configurations)
- TableGroup: Enter the Table Group ID to be used
- Merchant ID: Enter the Merchant ID that was configured on the Terminal
- Integration Mode: Enter the mode that was was configured on the Terminal
- Selection Mode: Determines which transaction list will be displayed - either for All Tables or for an individual Table Group
- Once all information has been entered, select the Till Mappings button
- Enter the Terminal ID, select the Till to be mapped and select Add
- Repeat Step 5 if more than one Tyro v3 EFTPOS Device has been set up and therefore more than one Till needs to be mapped
- Click OK to save the Till Mappings
- Click Run Now! to run the Job immediately and click OK to save the Scheduled Job