
This article explains the process of using Scheduled Jobs to automate Purchase Order creation.
There are 2 Scheduled Jobs which can be configured to be used for automatically creating Purchase Orders based on a Schedule: Job POTemplate & Job POSaved Reports.
The Job POTemplate uses Purchase Order Templates as the basis for creating the Purchase Orders and up to 10 can be added to the Job.
Conversely, the Job POSaved Report uses Saves Reports as the basis for creating the Purchase Orders and also up to 10 can be added to the Job.
Job POTemplates Prerequisites- Before the Create P.O. from Template Job can be utilised, the system will need to have at least 1 Purchase Order template created
- To create a P.O. Template, an Operator with access will need to create the Adding & Editing Purchase Order Templates
- As a quick run-through, complete the following steps (or use the above link for detailed instructions):
- From the Menu Tree select Stock Control > Purchasing & Receiving
- The Purchase Order List window will appear in BackOffice
- From the top menu in the window you will see a Flag called "Show Templates"
- By default there are no templates, however, with the "Show Templates" flag enabled, Operators will have the ability to create Templates via the "New Template" button first before they appear on the template list
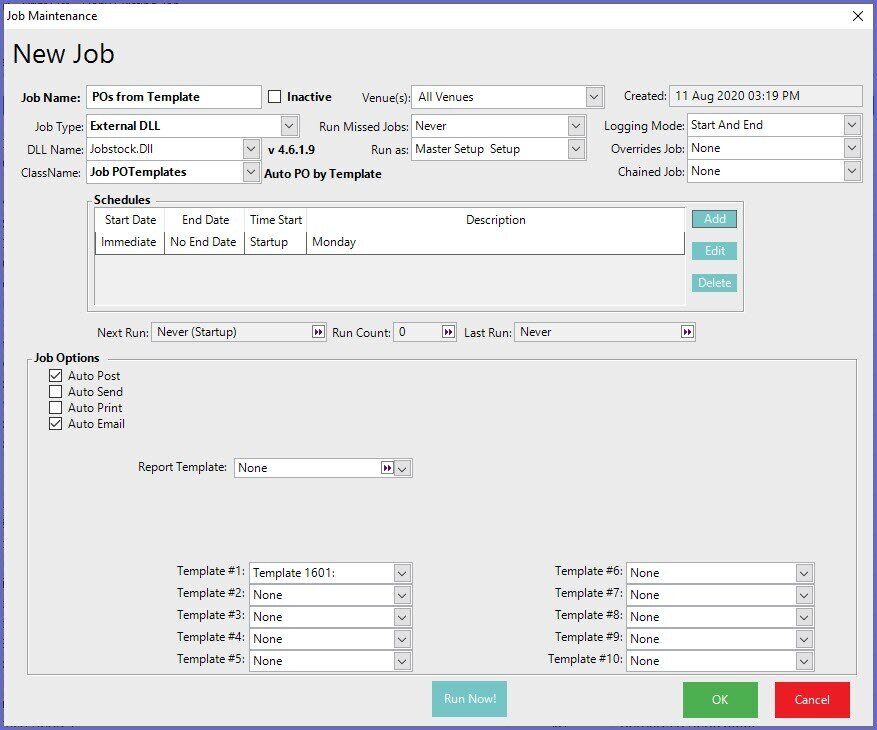
- From the menu tree in BackOffice, go to Venue, Stores & Tills > Schedule Jobs
- Select 'Add Job' from the menu in the top window which will open a New Job window
- In the Job Name field, add a Job Name
- For the Job Type select 'External Dll'
- In the DLL Name field, select JobStock.DLL
- In the Class Name select Job POTemplates
- Configure any other base Job settings such as "Run as" or "Chained Jobs"
- Add a schedule for the job to designate the days/times for it to run automatically
- Keep in mind that multiple instances of this Job can be created and run on different schedules; e.g., one instance could be used for P.O.s that are due to Suppliers on Mondays and another instance for P.O.s that are due to be placed on Wednesdays, etc.
Job Options |
Description |
| Auto Post |
|
| Auto Send |
|
| Auto Print |
|
| Auto Email |
|
| Report Template |
|
| Template#1 to #10 |
|
Job POSaved ReportPrerequisites
- Before the Auto P.O. by Saved Report Job can be utilised, the system will need to have at least 1 compatible Saved Report created
- The Saved Reports to be used for this Job must be in the PO format
- To create a compatible Saved Report, a P.O. needs to be created with a type called user-defined in Purchasing & Receiving
- After the report is configured, select Save Report which will open a prompt to Save the Report
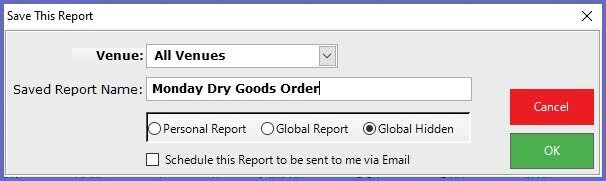
- Type in the name for the report and select the Global Hidden option, select OK
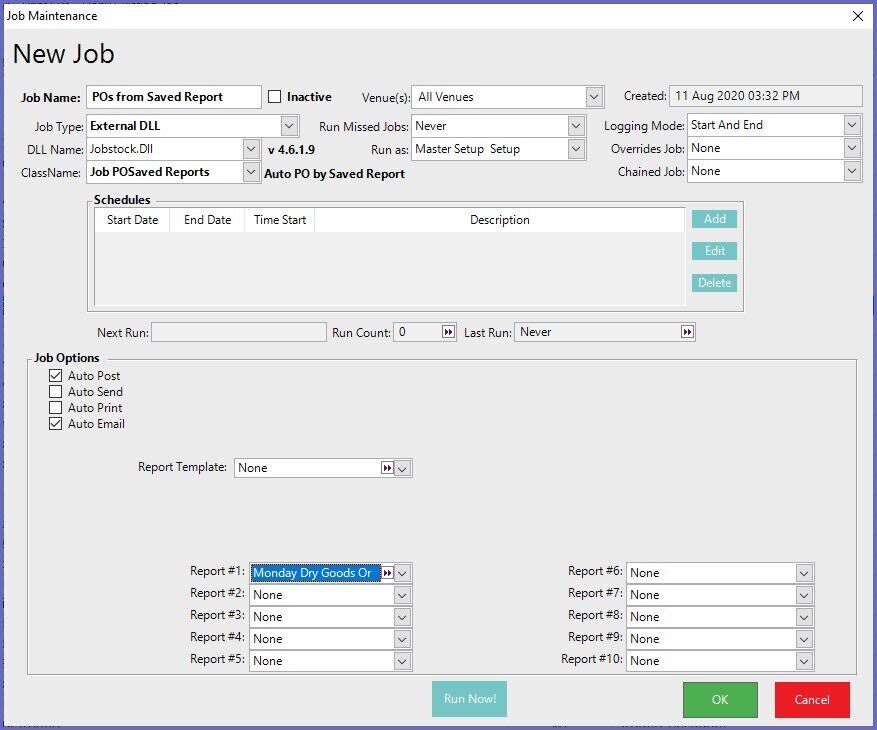
- From the menu tree in BackOffice, go to Venue, Stores & Tills > Schedule Jobs
- Select 'Add Job' from the menu in the top window which will open a New Job window
- In the Job Name field, add a Job Name
- For the Job Type select 'External Dll'
- In the DLL Name field, select JobStock.DLL
- In the Class Name select Job POSaved Reports
- Configure any other base Job settings such as "Run as" or "Chained Jobs"
- Add a schedule for the job to designate the days/times for it to run automatically
- Keep in mind that multiple instances of this Job can be created and run on different schedules; e.g., one instance could be used for P.O.s that are due to Suppliers on Mondays and another instance for P.O.s that are due to be placed on Wednesdays, etc.
Job Options |
Description |
| Auto Post |
|
| Auto Send |
|
| Auto Print |
|
| Auto Email |
|
| Report Template |
|
| Report #1 to #10 |
|