This article covers how to Import Stock through the creation of a Scheduled Job called Import Stock.
This allows for Importing Stock into the System through an external file containing Stock Import data.
Prerequisites- To access and edit Purchase Order Settings, the applicable Operator Privileges will need to be enabled:
- Operator Maintenance 'General' Tab
- System Setup: "Maintain Scheduled Jobs" Flags
- Operator Maintenance 'Reporting' Tab
- Other Reports: "Allow Audit Reports" Flag
How-To Add a New "Import Stock" Scheduled Job
- To create an 'Import Stock' Job, login to BackOffice
- Go to System Setup > Scheduled Jobs
- Click on the 'Add Job' button in the header which will open a Job Maintenance window
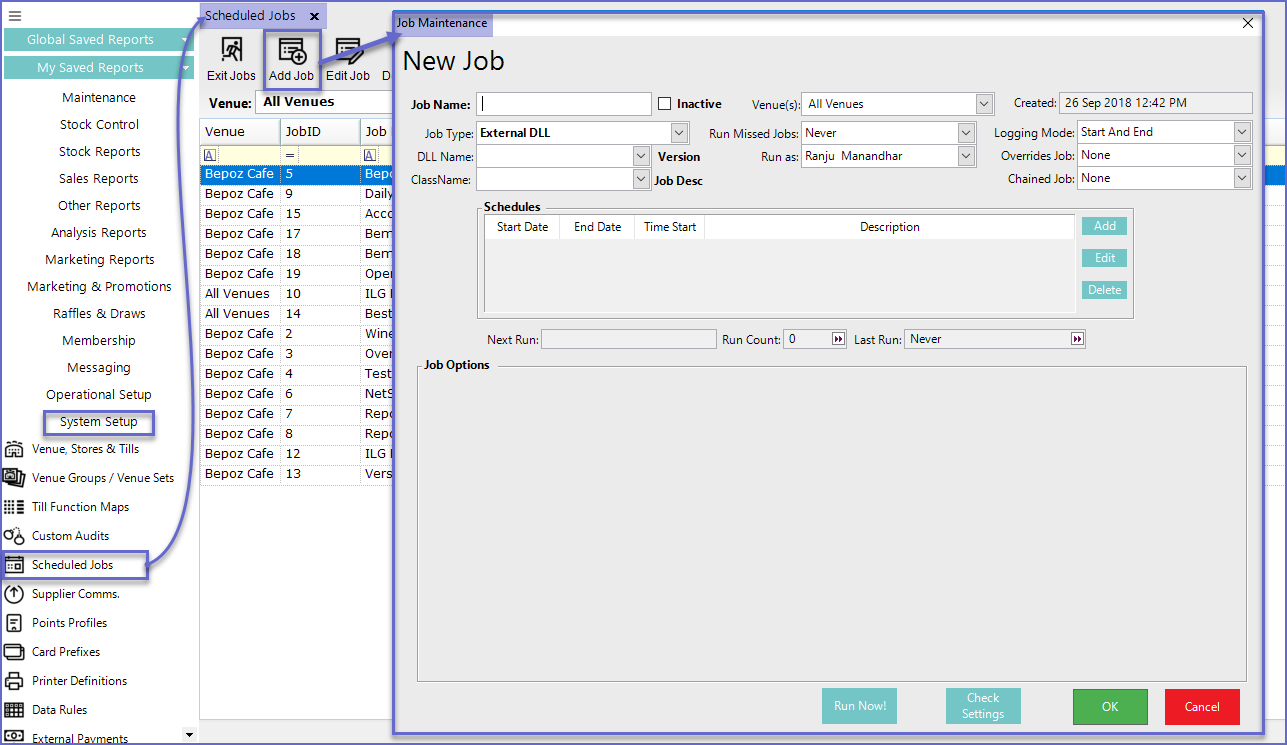
Field |
Description |
| Job Name |
|
| Inactive |
|
| Job Type |
|
| DLL Name |
|
| Class Name |
|
| Venue(s) |
|
| Run Missed Jobs |
|
| Run as |
|
| Created |
|
| Logging Mode |
|
| Overrides Job |
|
| Chained Job |
|
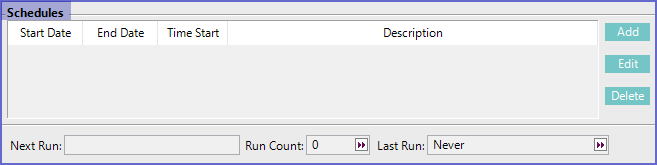
- Schedules allow setting the Date and Time when the job will run
- To Add a new schedule, Click on the 'Add' button and to edit the schedule, Click on the 'Edit' button
- Next Run
- This shows the Date and Time when the job will run next depending on the schedule
- Run Count
- This shows the number of times the job has run
- Last Run
- This shows the last time the job was run
- The Job options depend upon the type of Job chosen by the operator
- For 'Import Stock' Job, Bepoz gives the following configuration options
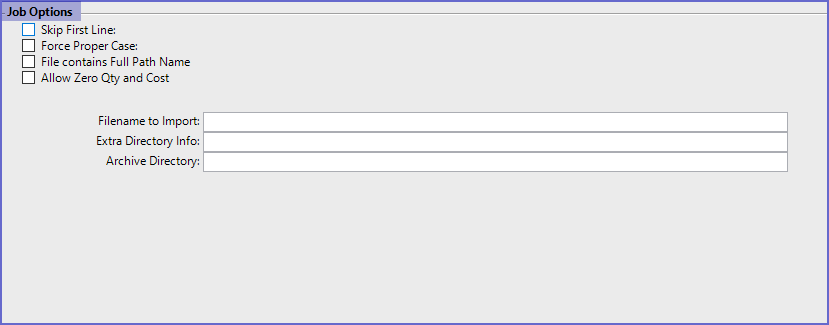
- Skip First Line
- Skips the first line from the file
- Force Proper Case
- The system becomes Case Sensitive
- File Contains Full Path Name
- Reads only the file having a full Path Name
- Allow Zero Qty and Cost
- Allows zero quantity and cost for the items
- Filename to Import
- Sets the Filename to Import
- The files that are imported must be in CSV format or plain text format
- Extra Directory Info
- Sets the directory to import the file from
- Archive Directory
- Sets the Archive Directory for the file
Run Job & Verify
- After the necessary setup, Click on the 'Run Job Now!' button to start the job
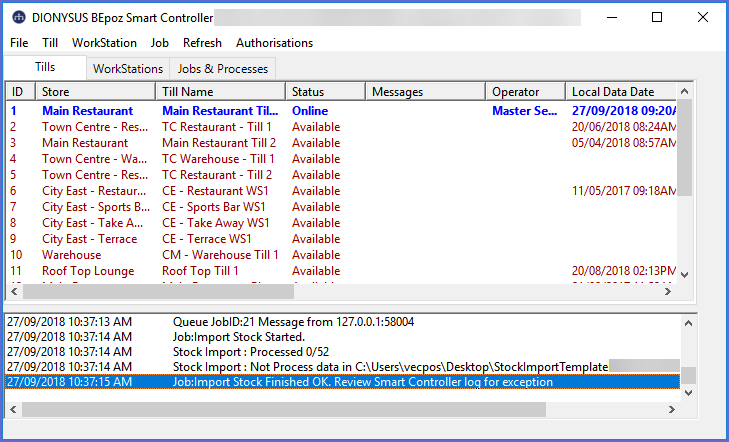
- Once the job is run, Smart Controller can be viewed to check if the job ran properly or not
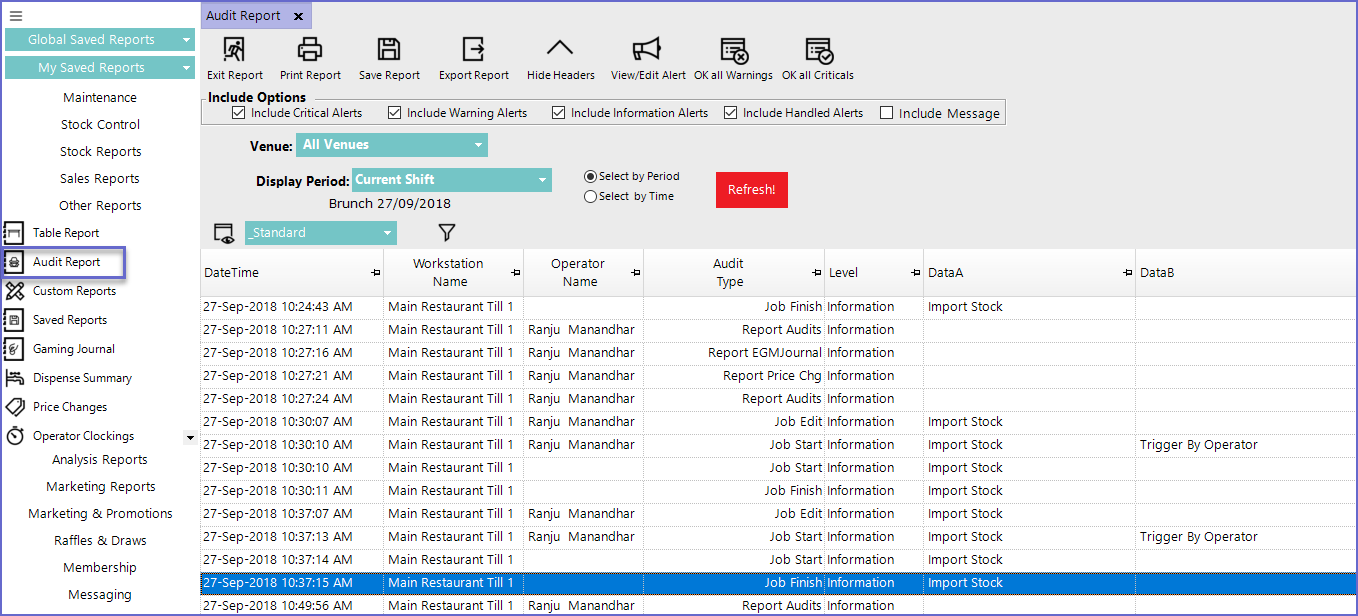
- Operators can also view the job done in the Audit Reports