This article explains how to setup and configure the Till Extension which is required to interface with the iVvy Event Management Solution.
Firstly, to enable communication with iVvy so that the interface functions seamlessly, both a Till Extension and a Transaction Queue will need to be created and configured accurately. Certain options within the Till Extension will also require two (2) Products, an Account, and an External Payment definition to be created.
An External Payment Device should also be set up to cater for situations where Function payments are Paid in iVvy.
Lastly, Till Functions will need to be added & configured so that iVvy bookings can be viewed and accessed from SmartPOS.
Prerequisites
- To access iVvy Interface Settings, the applicable Operator Privileges will need to be enabled
-
Operator Maintenance 'Maintenance' Tab - Accounts & Membership Flags
-
Operator Maintenance 'General' Tab - System Setup Flags
BackOffice Configurations
iVvy Till Extension
- After logging into BackOffice, complete the following steps to create & configure an iVvy Till Extension:
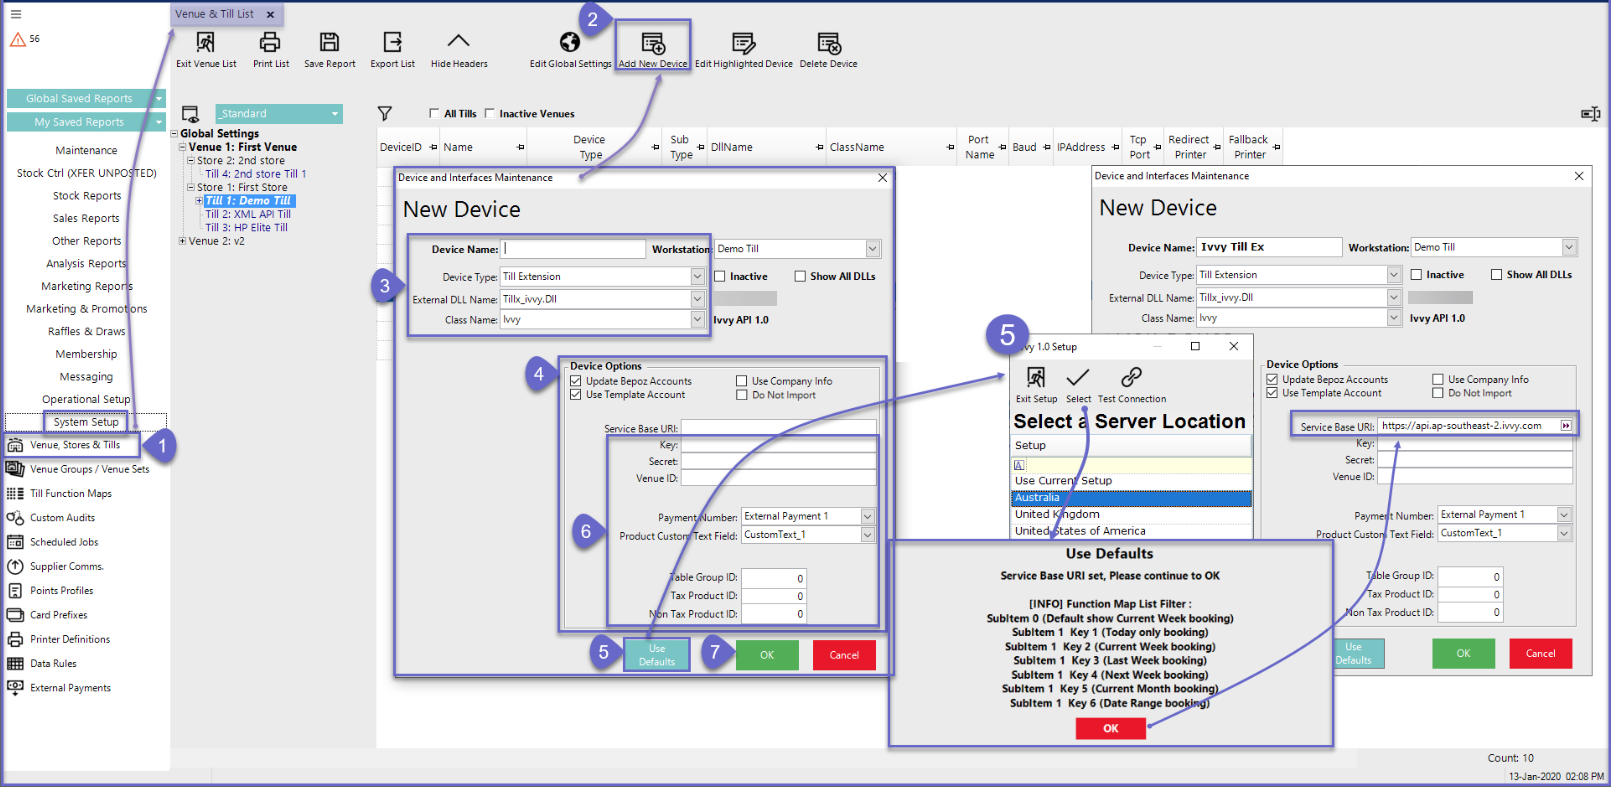
- Navigate to the System Setup component in the sidebar, expand, and select Venue, Stores & Tills to open the Venue & Till List Tab
- Highlight the desired Till and click on the Add New Device button at the top of the tab; when prompted select 'Blank Device' and a New Device and Interfaces Maintenance window will open
- Enter a relevant Device Name, set the Device Type to 'Till Extension', the External DLL Name to 'Tillx_ivvy.Dll', and the Class Name to 'Ivvy'
- Configure the Device Options Flags as desired:
- If the Update Bepoz Accounts flag is enabled, Accounts in Bepoz will be updated and/or associated with Accounts from iVvy
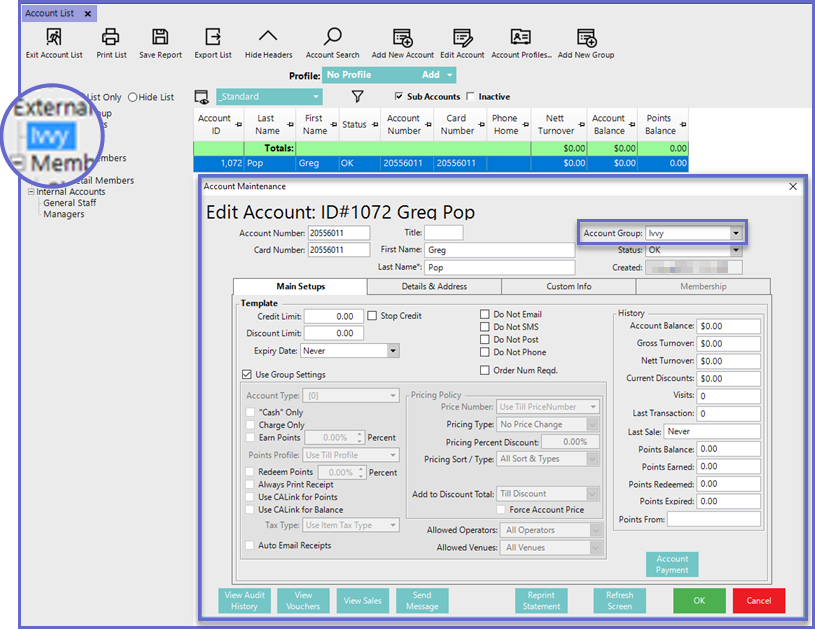
- When the Use Template Account flag is enabled, an Account Group with the Account Number of "Ivvy" will be used as the base settings for Accounts that are Imported from iVvy
- NB: If enabling this flag, the Account Group called "IVVY" must be created first in the BackOffice Account List
- If Use Company Info flag is enabled, Bepoz will use Company Info instead of Contact Number to create accounts
- If Do Not Import flag is enabled, will not import any pre-ordered products on SmartPOS from Ivvy
- NB: This flag is only available from 4.6.2.6 and onwards
- Select the Use Defaults button which will open a new, smaller window with the ability to select a Default Server Location
- Select the relevant Server Location by either double-clicking or highlighting & clicking the "Select" button; this will fill in the corresponding Service Base URL
- Optionally, leave as "Use Current Setup" if no changes are required
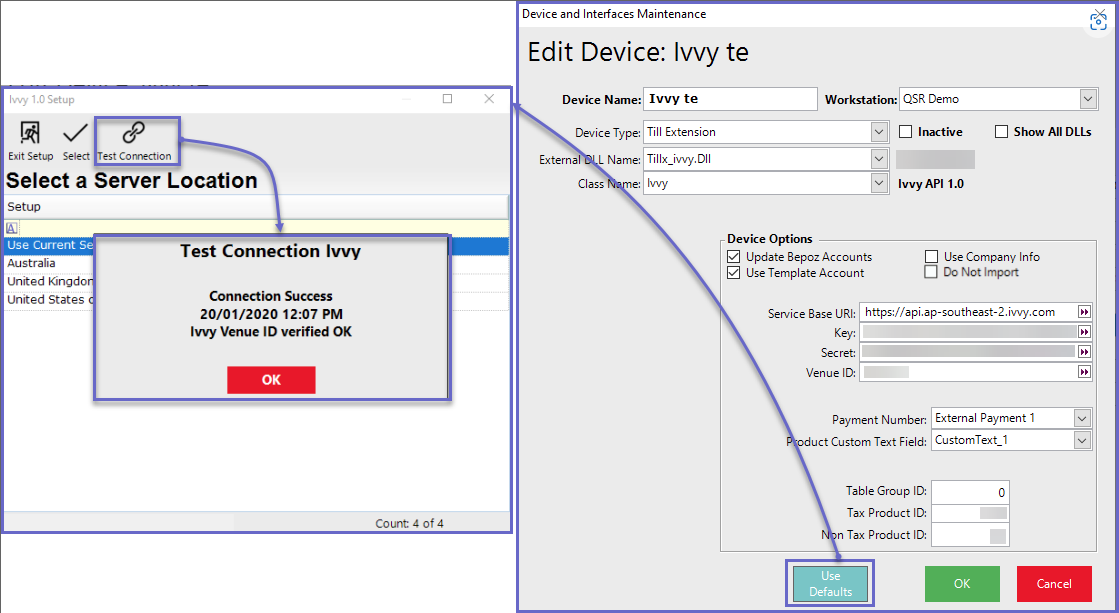
- After completing all setups including the remaining steps, return to this window to use the Test Connection button; this will confirm a connection to iVvy
- Configure the additional Device Options:
- Key - enter the Account's or User's API Key
- Secret - enter the Account's or User's API Secret
- Venue ID - enter the iVvy VenueID; this should be unique to each Venue
- Payment Number - use the drop-down to select one of the System's External Payments that payments made from iVvy will attribute to
- NB: An External Payment Definition to be used specifically for iVvy will first need to be created in the BackOffice
External Payments component - Product Custom Text Field - This will use the Ivvy description and match off the Product Custom field text as set in the Till extension device
- When set accordingly, this will retrieve the individual food and beverage product information into the SmartPOS
- To retrieve the product level information, a 'Custom Text Field' must be setup in Product Maintenance --> Custom Info tab which must then be assigned to the Product Custom Text field in the device setting
- NB: If the Resources, Menu, Beverage Package and Sessions information in Ivvy doesn't match to a Bepoz Product, then the price values of unmatched items will revert to the GST and GST Free Product logic
- Table Group ID - enter the TableGroup ID that should be used for iVvy; this is obtained from the Venue Maintenance Tables Tab and is the TableGroup # belonging to the desired Table Group to be used in this instance regarding iVvy
- Tax Product ID - if any tax Item sold in iVvy will be available / mapped into POS as Product item specify with this Product ID
- NB: this should be the Product ID of a Product in the System's database that was created to be used specifically for this purpose and setup as GST-Free, Non-Stock, Zero Cost and Price
- Non Tax Product ID - if any non-tax Item sold in iVvy will be available / mapped into POS as Product item specify with this Product ID
- NB: this should be the Product ID of a Product in the System's database that was created to be used specifically for this purpose and setup with GST, Non-Stock, Zero Cost and Price
Click OK to save the Till Extension