This documentation details how to setup and configure QSR.
On the Server
Prerequisites
- A minimum Bepoz version of 4.6 is required for this functionality
- To access KDS features and configuration options in BackOffice, the following Operator Privileges will need to be enabled
-
Operator Maintenance 'General' Tab - System Setup: "Access Venue, Stores & Tills" Flag
- System Setup: "Maintain Venue, Stores & Tills" Flag
- System Setup: "Maintain Till Function Maps" Flag
-
Operator Maintenance 'Maintenance' Tab - Products: "View Products" Flag
- Products: "Edit Products" Flag
Setup Instructions
On the Server
- Install the following
- Builder Installer
- Control Point Installer - Both Client and Server
- Kitchen Server Setup
- Report Installer
- Server Full Installer
On the Screen
- Install the following
- Server Full Installer
- Control Point Installer - Both Client and Server
After Installation
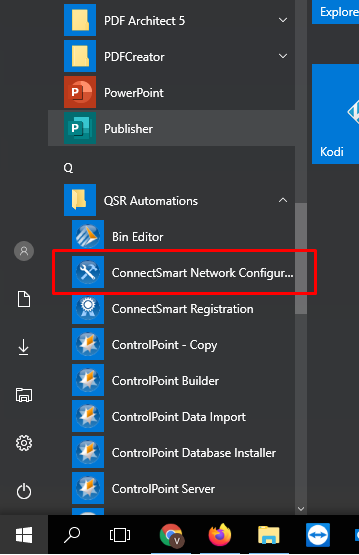
- Click run and go to QSR Automation and run Network config on the server
- Then set the below; the server will have the same IP all the way through:
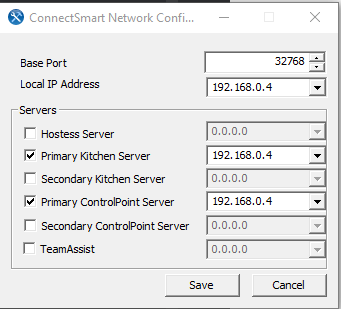
- On the tills, you will have to set the same IP but change the Primary Kitchen Server and Primary ControlPoint Server manually in the XML as below:
- ID = the same ID as in the Kitchen Builder Pro you configured
- This needs to match the same screen you need this to be as
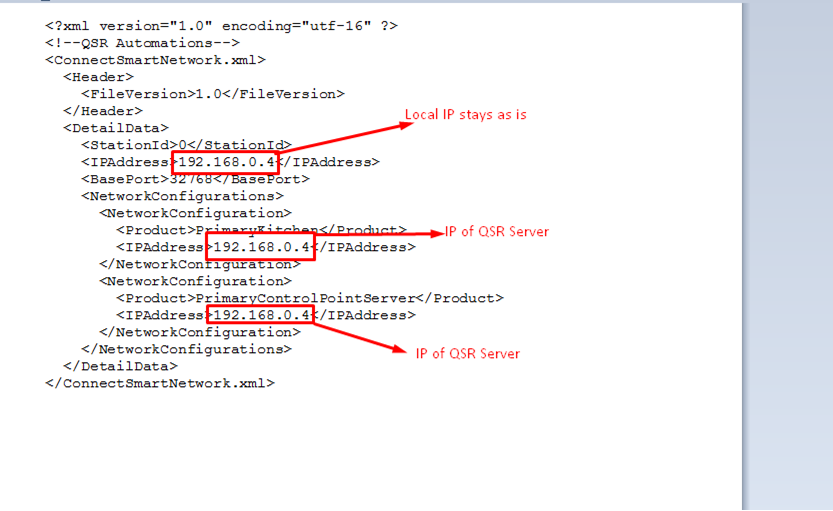
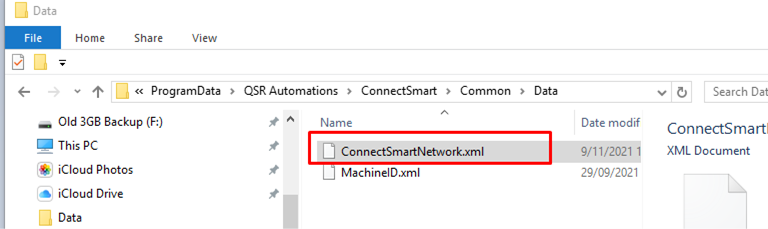
- Save this and then copy this file to the following locations as well:
- c:\programdata\QSR Automations\ ConnectSmart\
- Kitchen \ Data - Paste it in there
- Display Client \ Data - Paste it in there
- Once you have done this part the system will connect and display as you have configured it from Kitchen Builder Pro
Control Point Setup
- Go To:
- C:\Program Files (x86)\QSR Automations\ControlPoint\ControlPointServer\DeviceAgent\Win32
- Copy this folder to
- c:\QSRAuto
- Rename to DeviceAgent
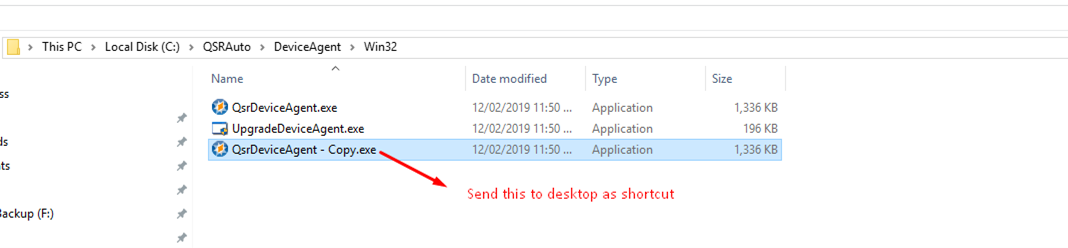
- Create a copy of QSRDeviceAgent.exe in the same folder
- Then send the copy to the desktop
- Then, from the desktop right click and add the following to Target:
- /p
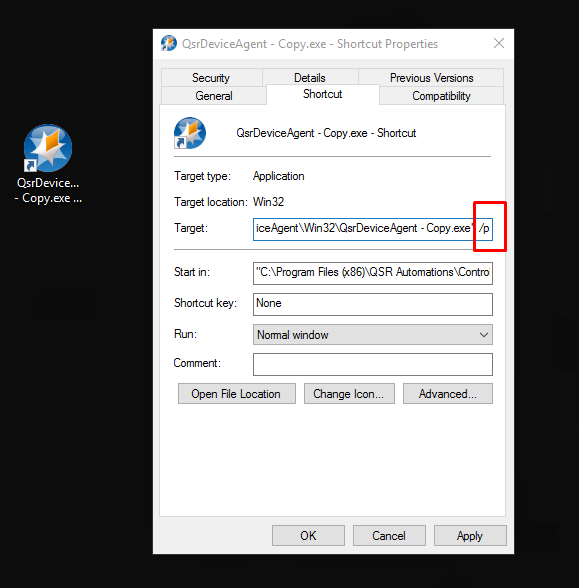
- This will allow the program to run as we don't use QSR hardware
- Do not run still
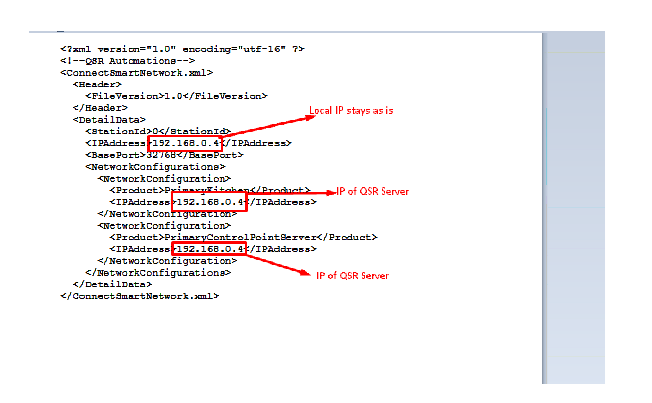
- Then copy the original edited XML file into this same location
- c:\QSRAuto\DeviceAgent
- This will then allow the software to communicate with the Control Point back at the server
- Copy this to the QSRAuto\DeviceAgent folder
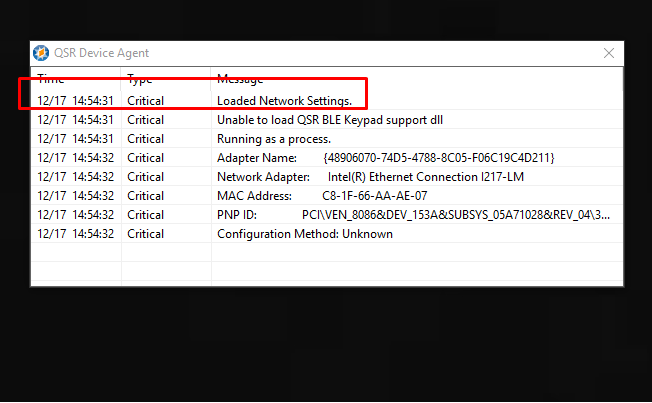
- Run the Device Agent
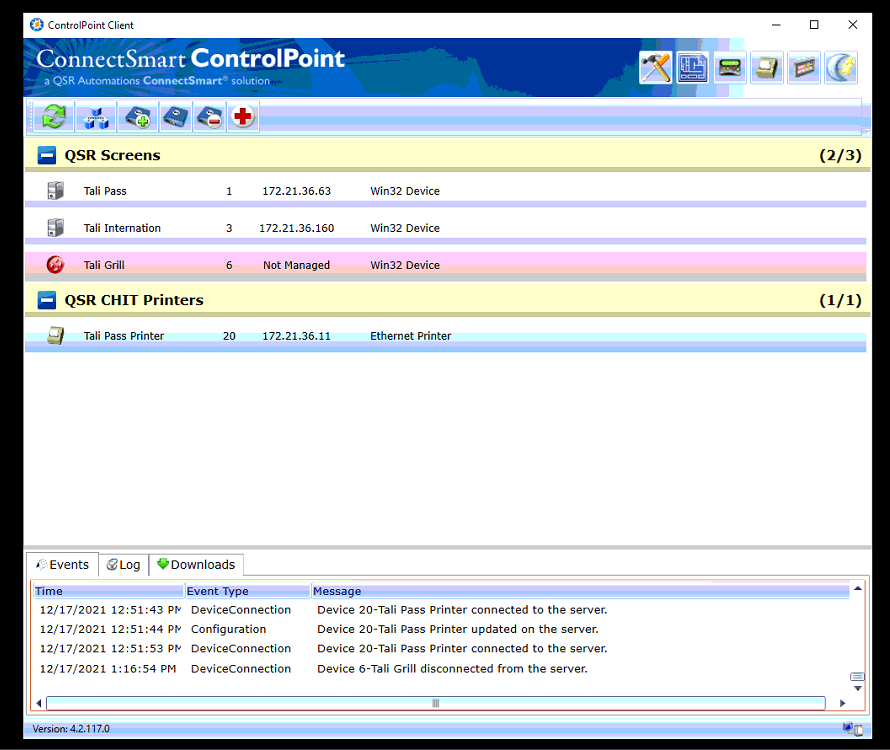
- To know you have done the above correctly the program should run and show all the details below
- Loaded Network Settings should display
Control Point on QSR Server
- Once you create all the devices you will see below: