This article serves as a how-to guide to setting up a scheduled job for Wirely.
Prerequisites-
Minimum Bepoz version of v4.6.2.0
-
Minimum NewtonSoft version of 11.0.0.0
-
To access Wirely feature, the applicable Operator Privileges will need to be enabled
-
Operator Maintenance 'General' Tab
-
System Setup: "Maintain Scheduled Jobs" Flag
-
System Setup: "Access Venue, Stores & Tills" Flag
-
-
-
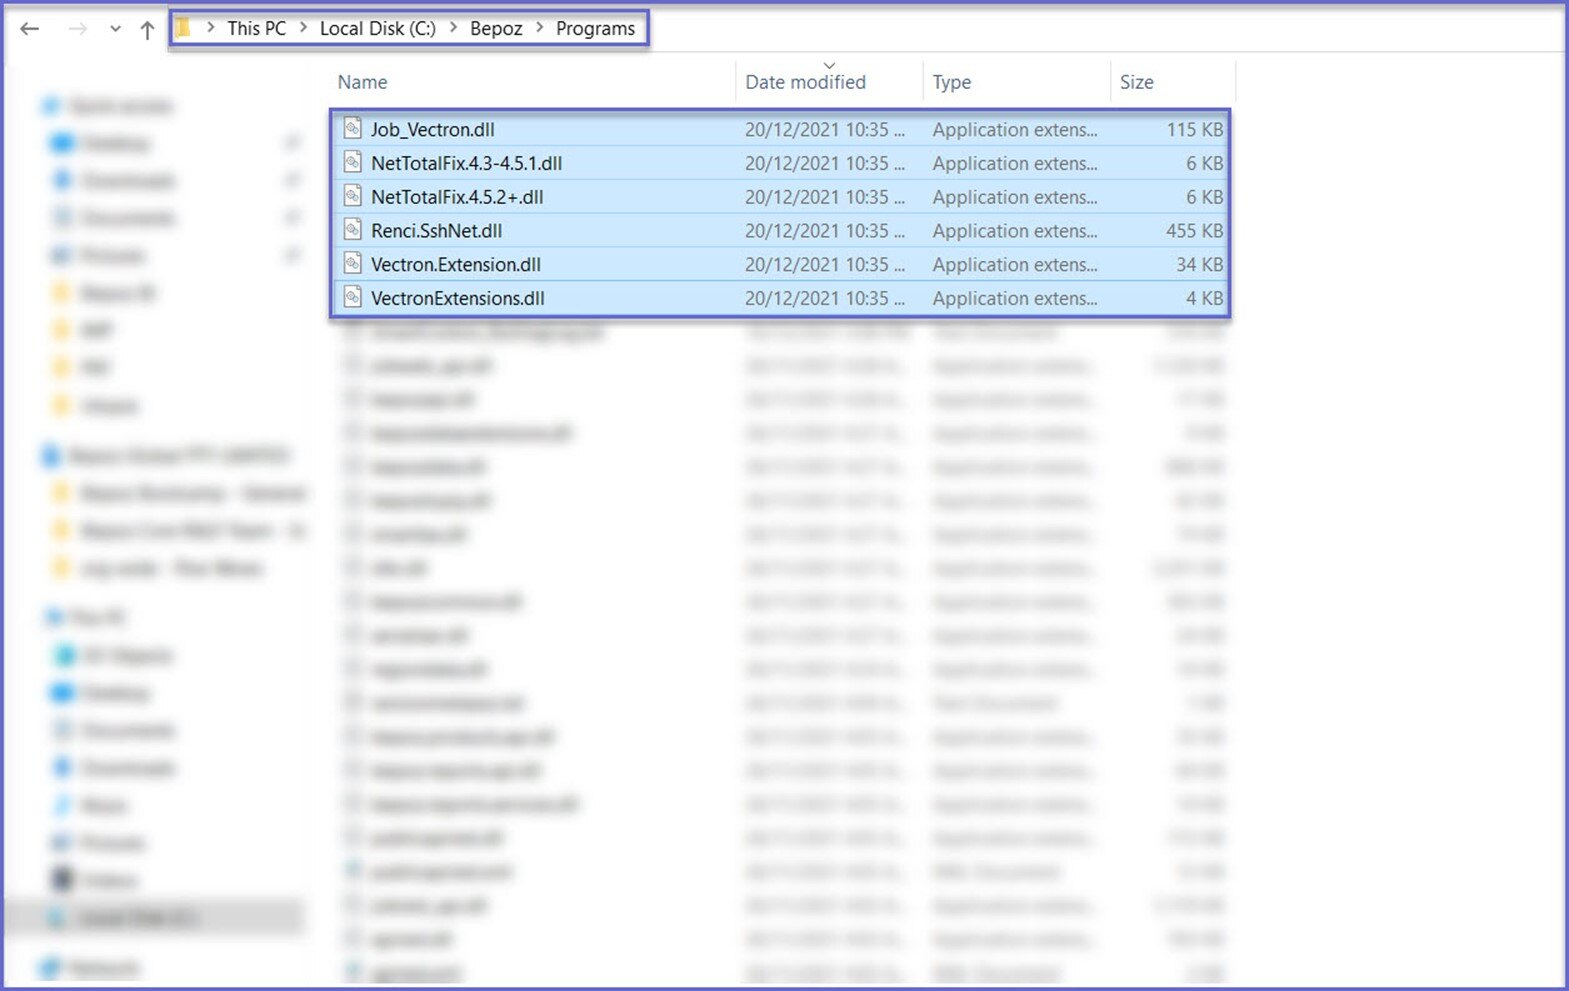
The required library files are:
-
Job_Vectron.dll
-
NetTotalFix.4.3-4.5.1.dll
-
NetTotalFix.4.5.2+.dll
-
Renci.SshNet.dll
-
Vectron.Extension.dll
-
VectronExtensions.dll
-
-
Download the files from below and place them at the given file path directory: C:\\Bepoz\\Programs
About
-
Sales data from Bepoz is sent to Wirely at a given frequency which is configured at Bepoz
-
Bepoz send two json export files which are, 'Mapping' file which is sent once a day and 'Sales Data' file
Scheduled Job Setup
-
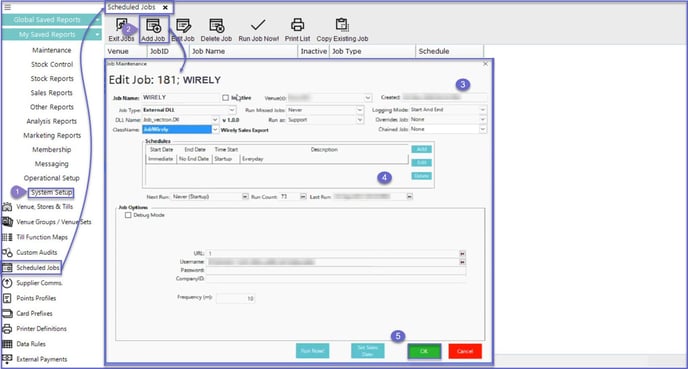
To add a Scheduled Job for Wirely, log into BackOffice and follow the below steps:
-
Navigate to the System Setup component in the sidebar, expand, and select Scheduled Jobs to open the Scheduled Jobs Tab
-
Select the Add Job button to create a new scheduled job
-
Enter the following details in the Job Maintenance window:
-
Job Name: Give the job a relevant name
-
Job Type: External DLL
-
DLL Name: Job_vectron.Dll
-
Class Name: JobWirely
-
Debug Mode: Exports JSON data as CSV into the bepoz\\data directory instead of uploading files
-
If the Debug mode is ON and a particular Venue is selected, then it will export the data only for the selected venue to debug
-
-
URL: URL is provided by Wirely
-
If no URL is provided, the default is: https://wirely-data.wirely.com.au/v1/api/bepoz-push
-
-
Username: Username is provided by Wirely
-
Password: Password is provided by Wirely
-
CompanyID: Internal Company ID, provided by Wirely
-
Frequency (m): Enter frequency of export in minutes (Typical Configuration is every 5 minutes)
-
Set Sales Date: Enter months for Historical Sales. Default value is 36 and click OK to save the settings
-
-
Once all the information has been entered, now add the schedule by clicking on Add button and select start time as ‘On Startup Only’
-
Click Run Now! to run the job immediately and click OK to save the Scheduled Job
-