How Discounts Work within Oolio
Pre-set discounts can be set up within Oolio Back Office for use within the Front of House. They are displayed as buttons within the Function Map under Discounts and can be varied values of either dollar amounts or percentages.
How to How to Create a Discount
-
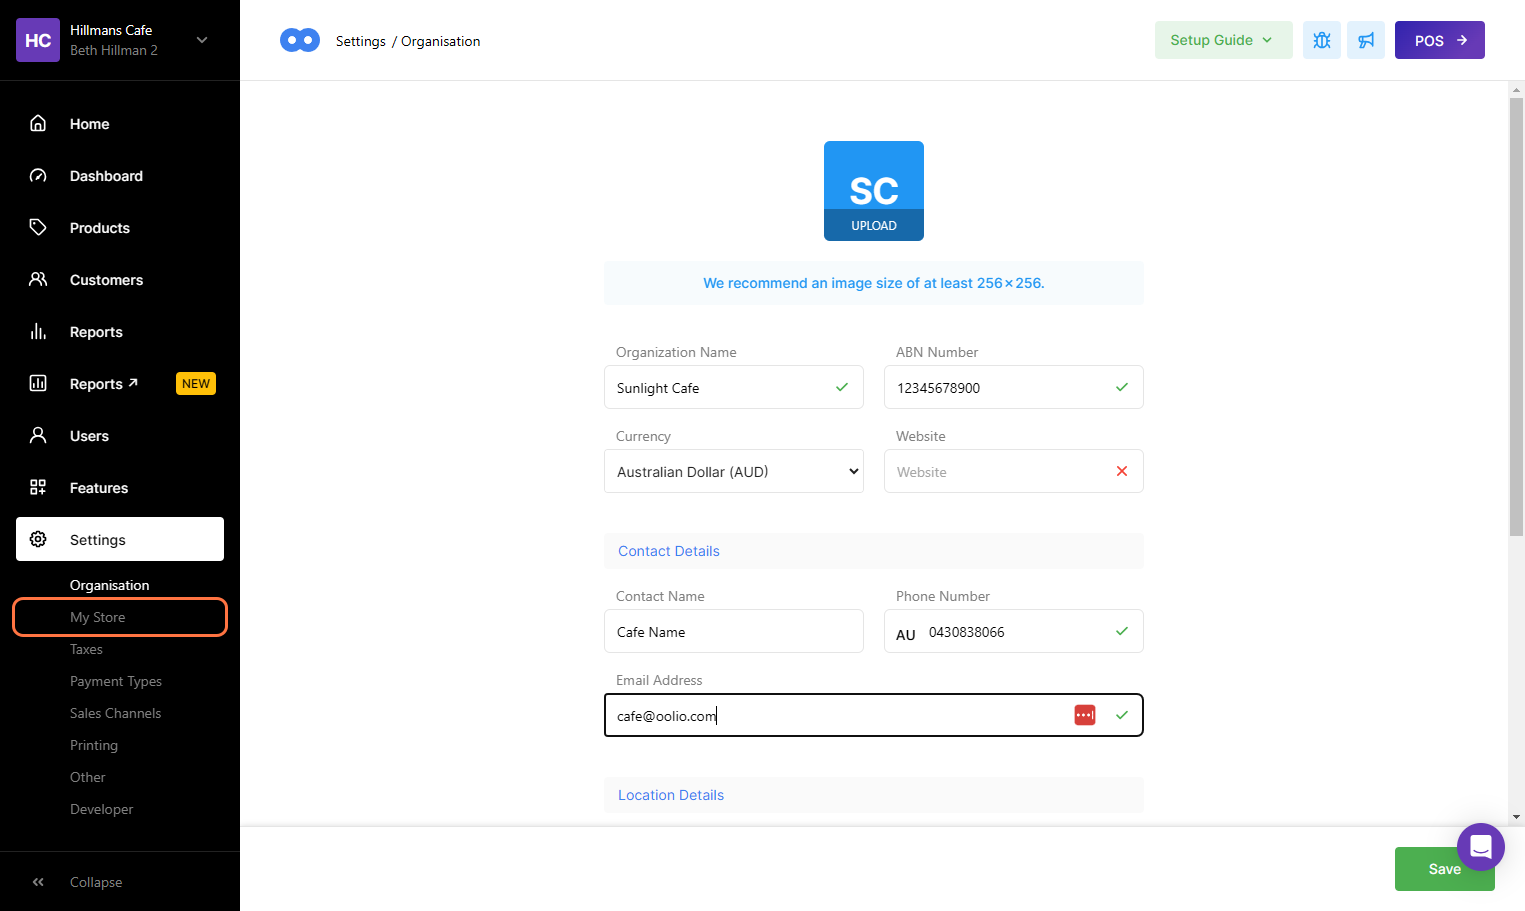
Start by navigating to Settings and selecting 'My Store'
-
Note: For multi-venue setups, this will say 'Venues & Stores'
-
Start by navigating to Settings and selecting 'My Store'
-
Note: For multi-venue setups, this will say 'Venues & Stores'
-
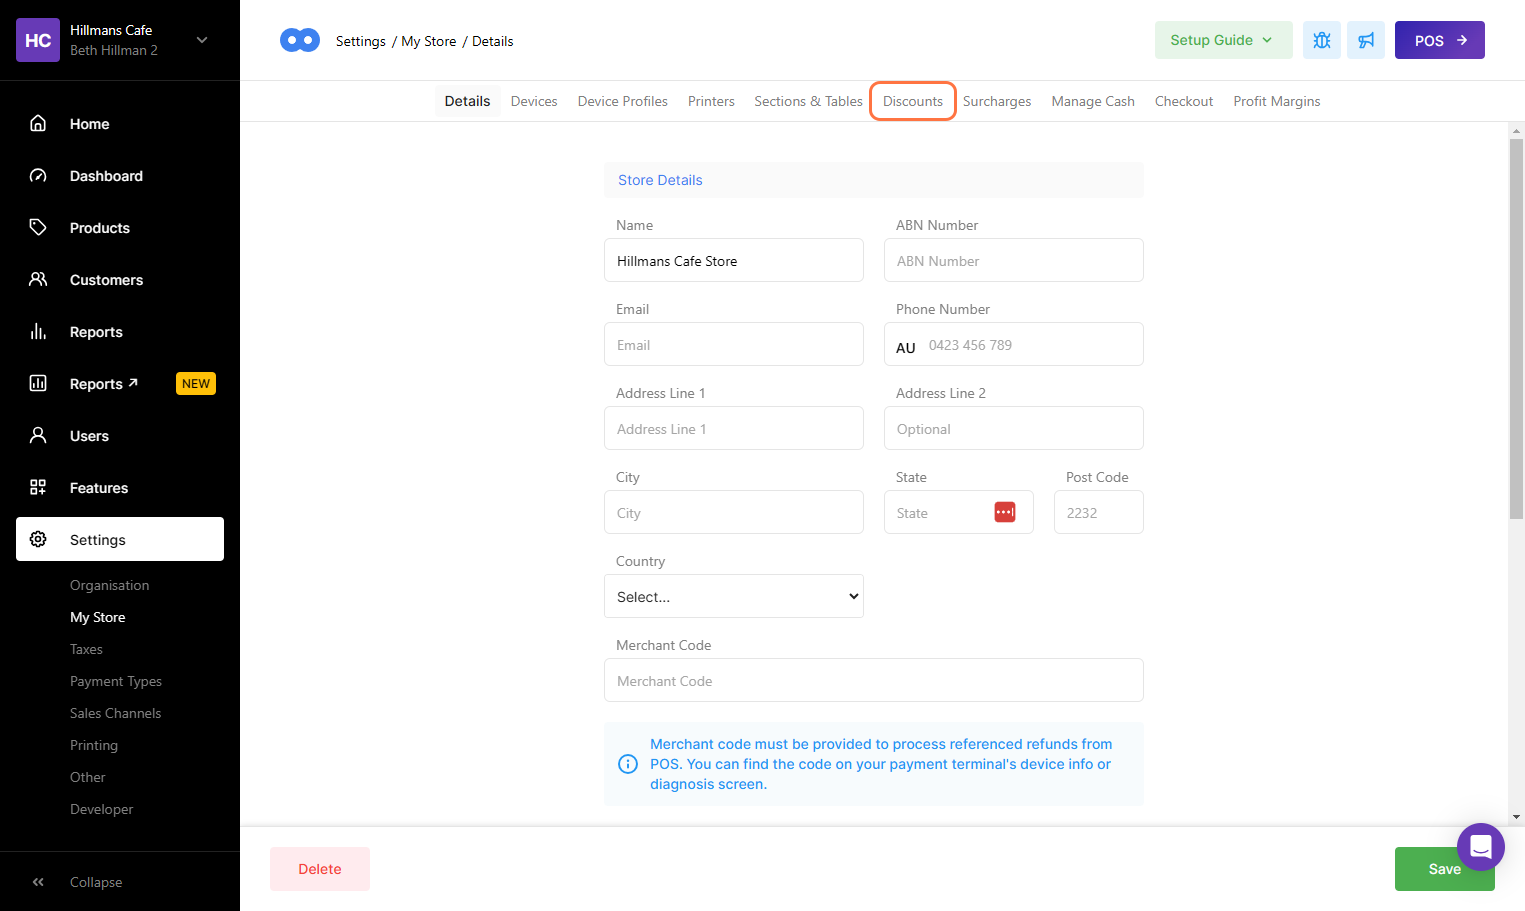
Once in the Store Settings, select the Adjustments Tab across the top of the screen
Once in the Store Settings, select the Adjustments Tab across the top of the screen
-
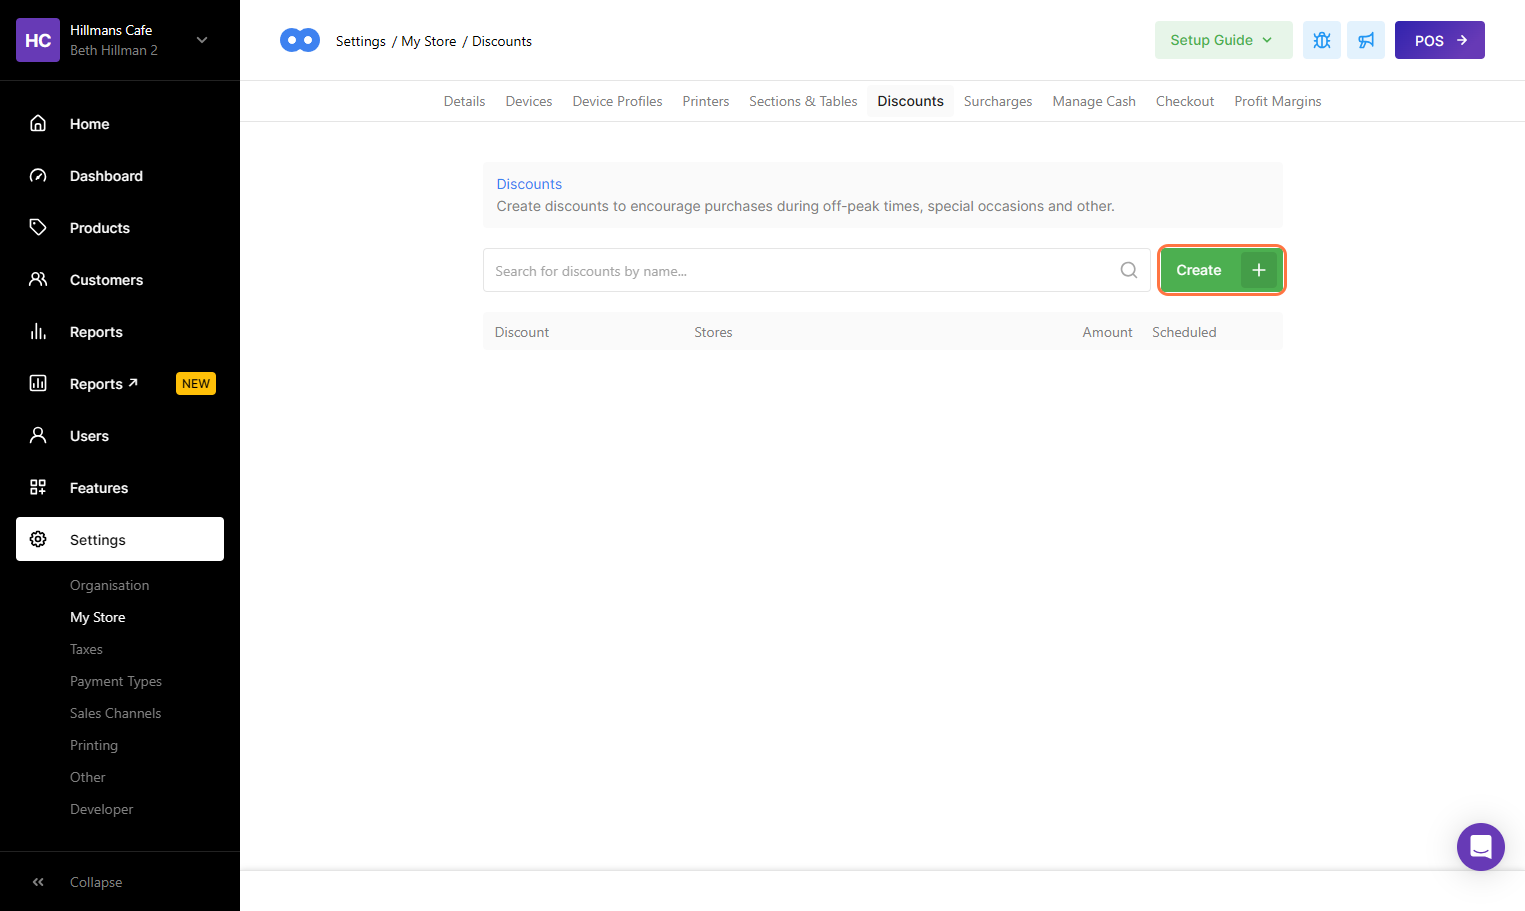
Within the Adjustments Tab, discounts can be configured using a negative value under the Amount
-
To begin doing so, select the Create Button
Within the Adjustments Tab, discounts can be configured using a negative value under the Amount
To begin doing so, select the Create Button
-
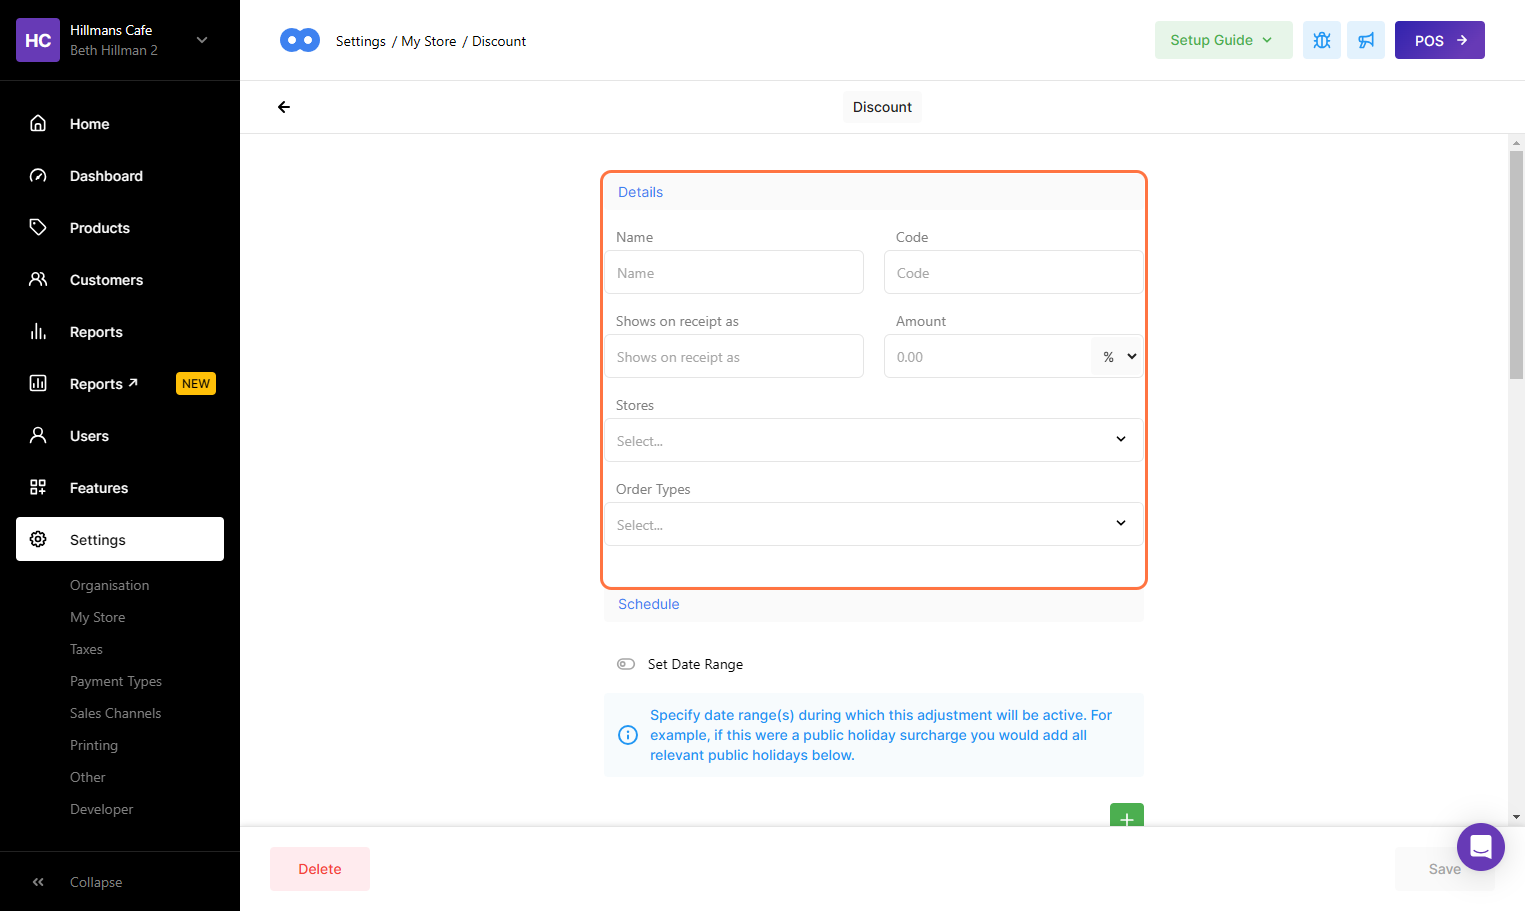
This will direct you to the Adjustment Settings Page, enter the relevant name of the discount wished to be added
-
Enter the name that is desired to be shown on the receipt
-
Enter the desired amount of the discount
-
Choose to create a ‘Dollar’ amount or ‘Percentage’ amount discount from the drop-down menu
-
If relevant, select which Order Types that require a discount
This will direct you to the Adjustment Settings Page, enter the relevant name of the discount wished to be added
Enter the name that is desired to be shown on the receipt
Enter the desired amount of the discount
Choose to create a ‘Dollar’ amount or ‘Percentage’ amount discount from the drop-down menu
If relevant, select which Order Types that require a discount
-
To finalise the newly added discount select Save
To finalise the newly added discount select Save
Scheduling a Discount
Oolio Platform also has the ability to schedule discounts on a yearly calendar, along with scheduling by time and day of the week.
-
Within the Adjustment Settings, scroll down to Schedule
-
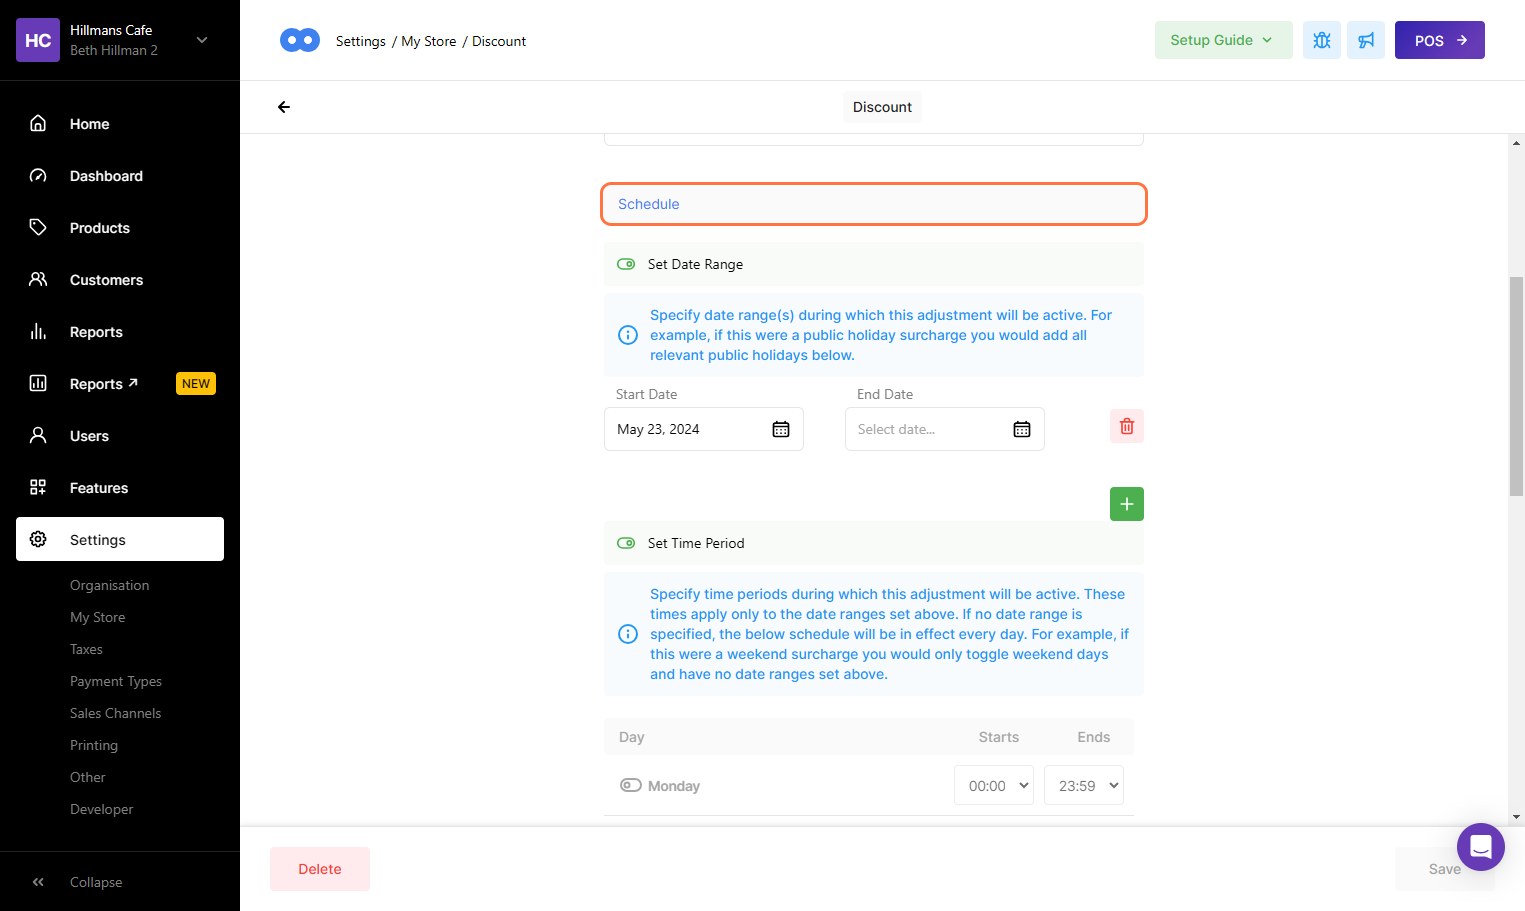
Select the Set Date Range toggle
-
Enter each day of the year that discount may need to be automatically applied
Within the Adjustment Settings, scroll down to Schedule
Select the Set Date Range toggle
Enter each day of the year that discount may need to be automatically applied
-
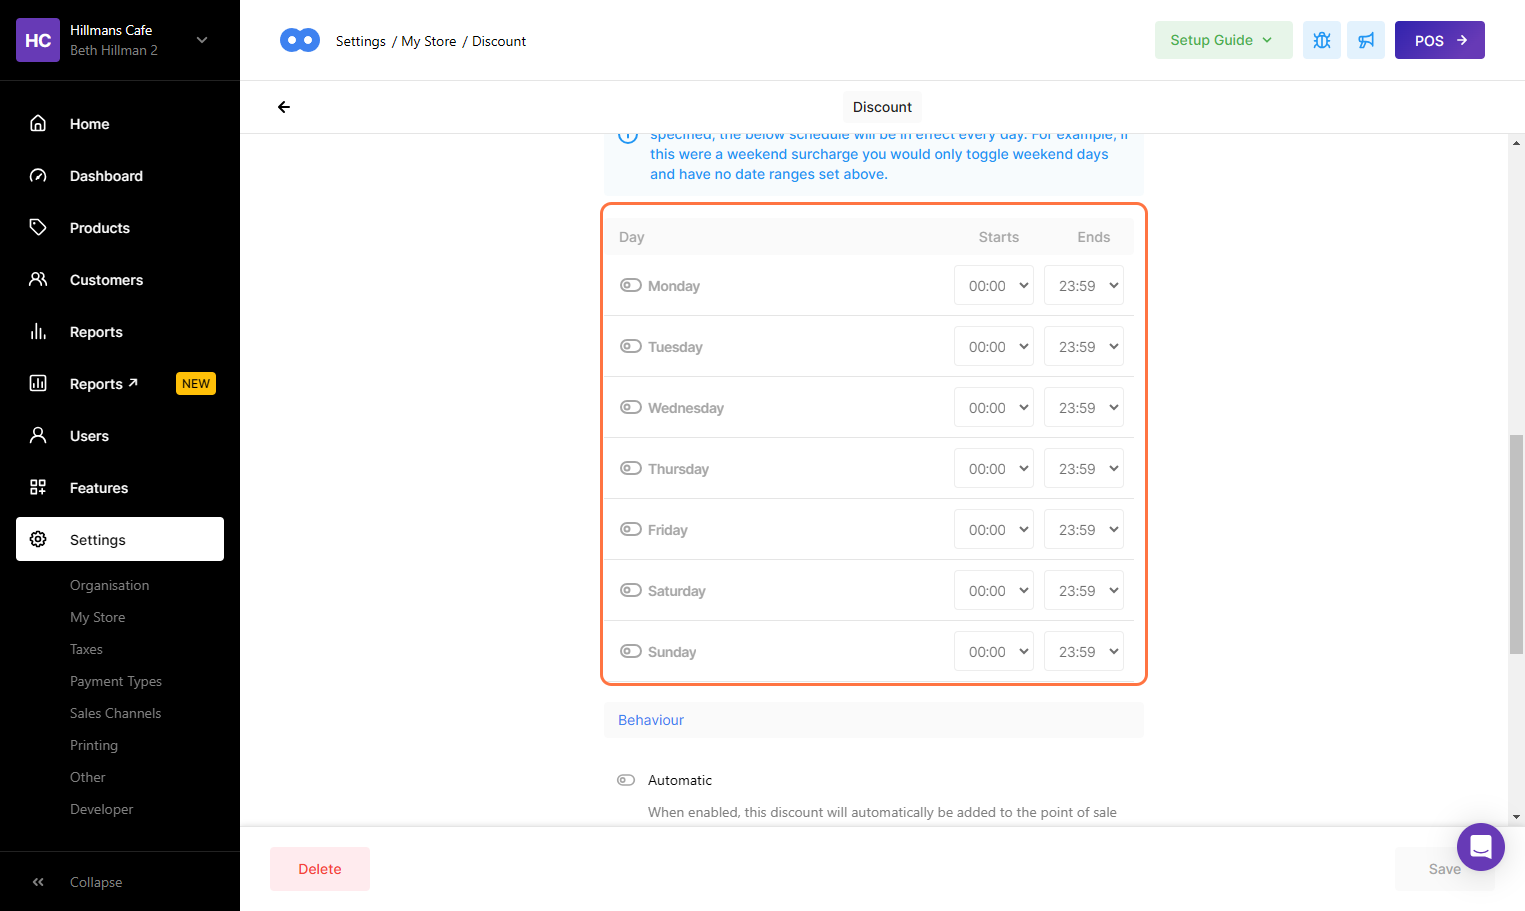
If the discount is only needed for a specific time frame, i.e. Happy Hour, select the Set Time Period Toggle
-
This will enable the below table to be edited
If the discount is only needed for a specific time frame, i.e. Happy Hour, select the Set Time Period Toggle
This will enable the below table to be edited
-
To ensure the discount is automatically applied depending on the fulfilments, select the Automatic toggle
-
To finalise the scheduled discount, select save
Other Settings
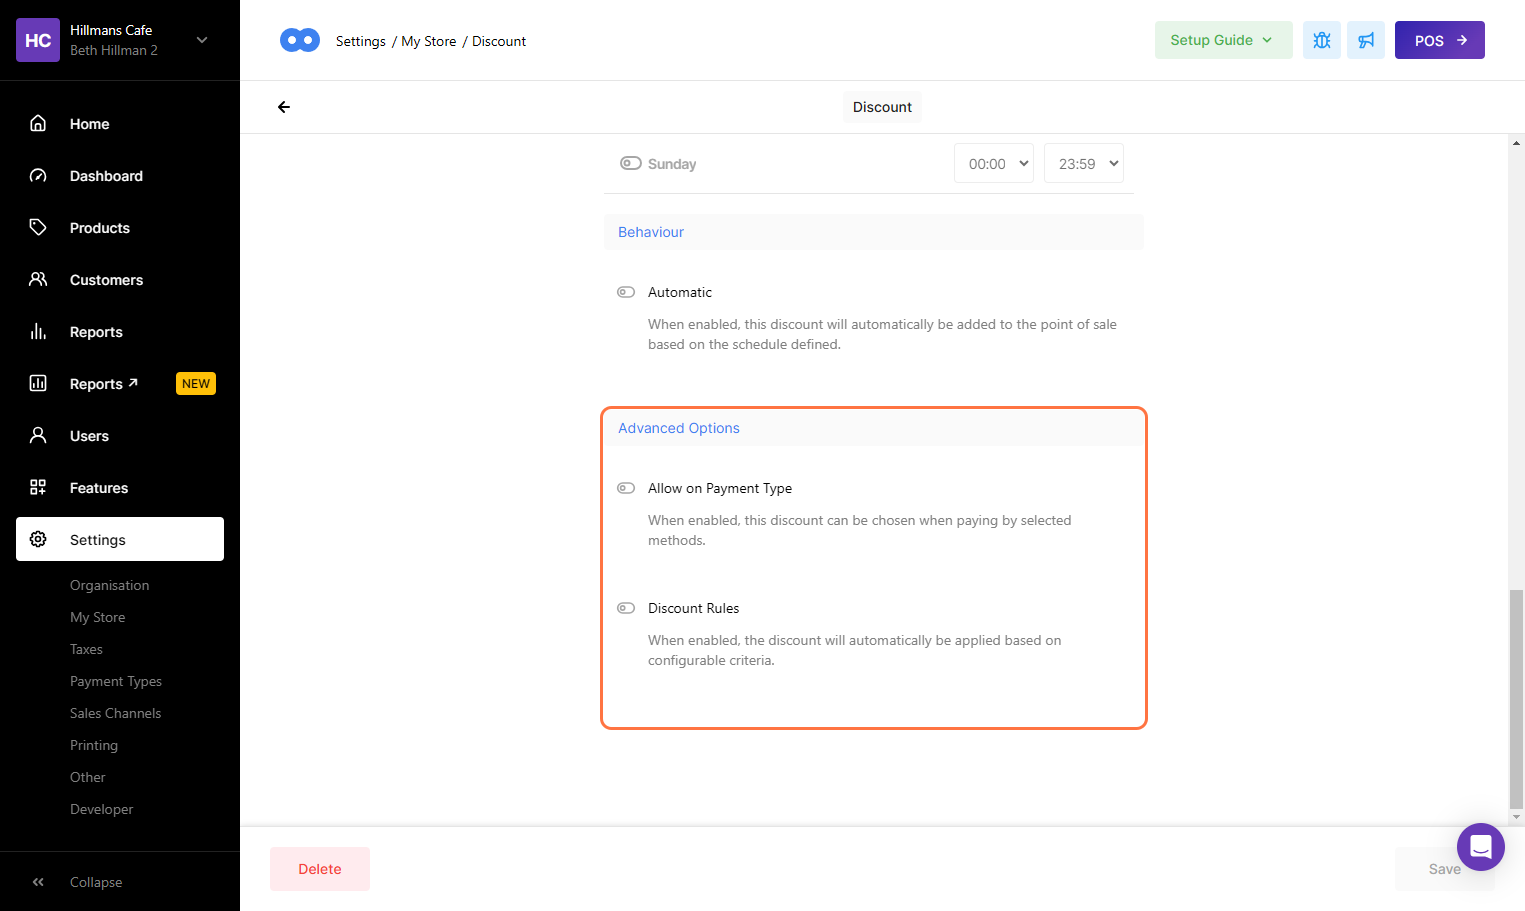
There are a few additional settings that can be toggled on or off, these are optional. If you would like assistance to reach out to our Support Team.
-
Scroll further down to Other Settings
-
Selecting Allow on Payment Type allows for the discount to only apply to specific payment types.
-
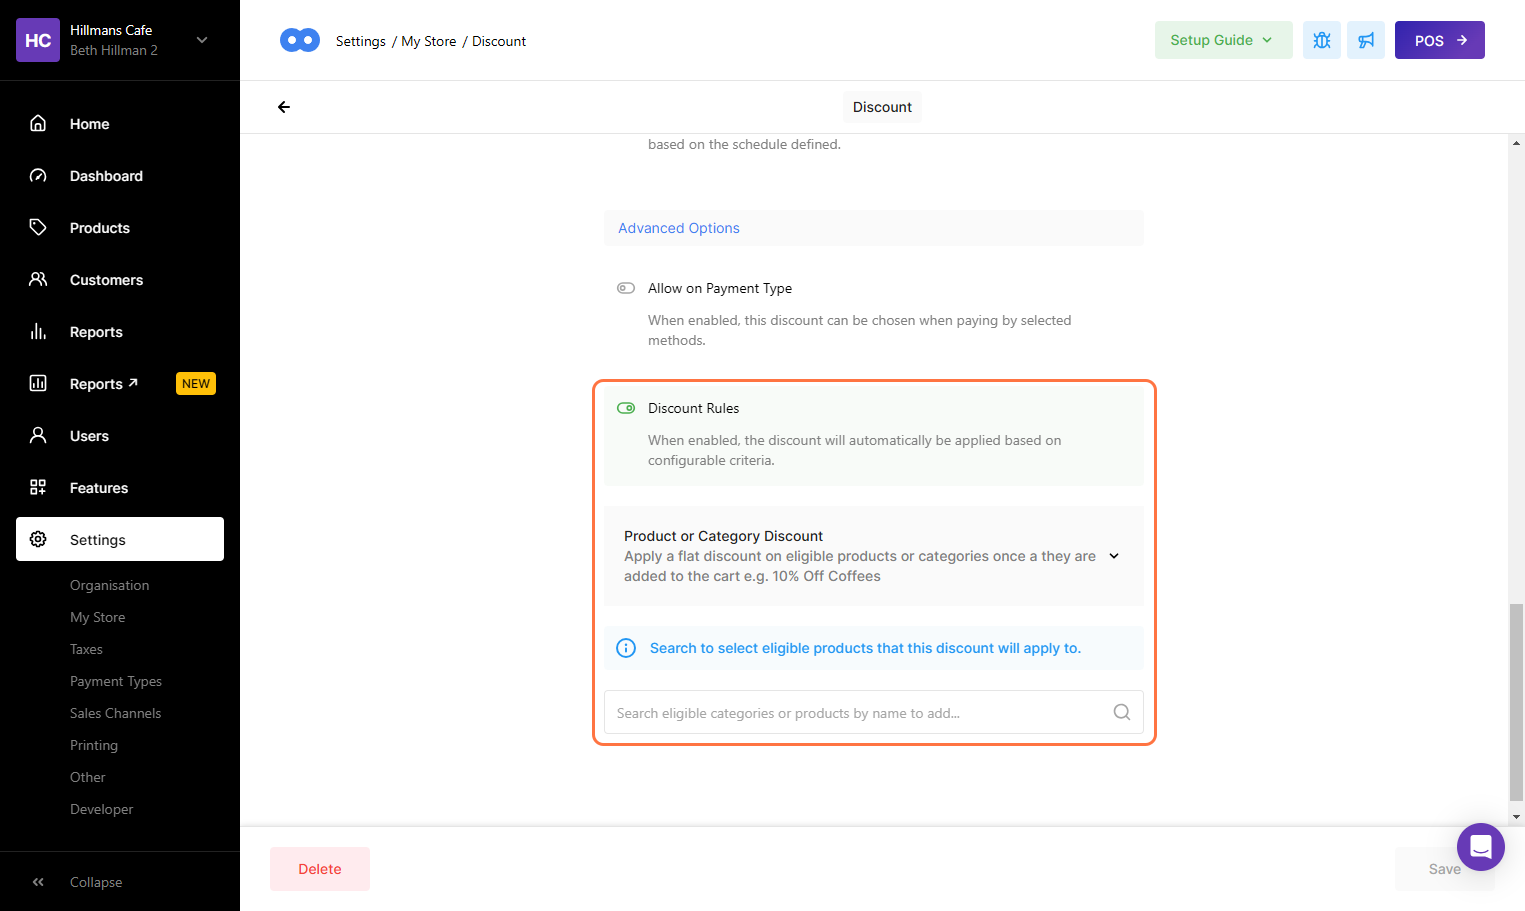
Discount Rules will all the discount to automatically be applied based on the configurable criteria.
-
By selecting the drop-down, the user can select the desired rule
-
Use the search bar to add specific categories or products
-
To finalise the discount, select save
