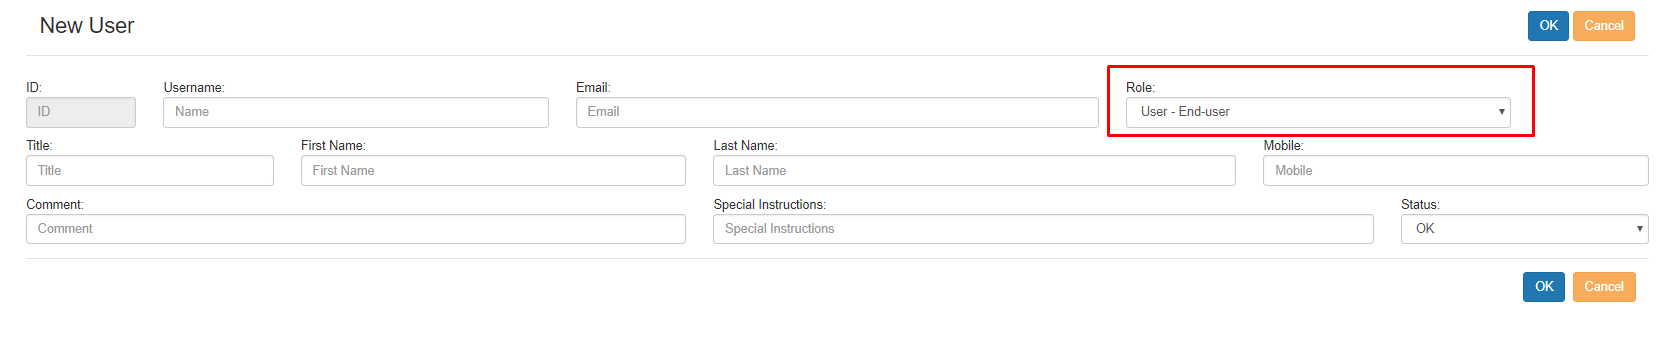
Add a New User From the USERS menu item in the left navigation, by clicking “Add user” Admin Backpanel users can add a new customer or a staff member. When a customer is added through the Admin Backpanel an email is sent to the new customer with a temporary password. When staff are added an email is sent with a link to set a password along with links to manage the website.
From the USERS menu item in the left navigation, by clicking “Add user” Admin Backpanel users can add a new customer or a staff member. When a customer is added through the Admin Backpanel an email is sent to the new customer with a temporary password. When staff are added an email is sent with a link to set a password along with links to manage the website. Any individual sent a temporary password will be asked to change the password after the first login.
Website users can have different access permissions, which are called “Roles”. The end-user role corresponds to customers only and this role does not have access to the Admin Backpanel.
There are 4 options available as described in the below table.
| ROLE | ACCESS |
| ADMIN - administrative user |
Have access to every section, but some fields are restricted. Please consult Vectron/Bepoz Support team if in need of assistance |
| STAFF - regular staff | Limited access to all the sections. For example, the ‘Settings’ section in the left navigation menu does not display, and some fields are locked to prevent misconfiguration |
| USER - end users/customers |
Do not have access to the Admin Backpanel. Customers can order, view order history, points balance, save delivery addresses and manage their account profile through the Retail website and app. |
PLEASE NOTE: Member Pricing is not covered above because it is configured in BEPOZ and best price displays in YourOrder when members go to the Checkout page. Best price will be taken between Member Price settings and active BEPOZ promotions. Note this this excludes Mix & Match promotion which is currently not supported in YourOrder.
MEMBER PRICING IN BEPOZ SUPPORTED – EXAMPLE 1: PERCENTAGE DISCOUNT OFF ALL ITEMS
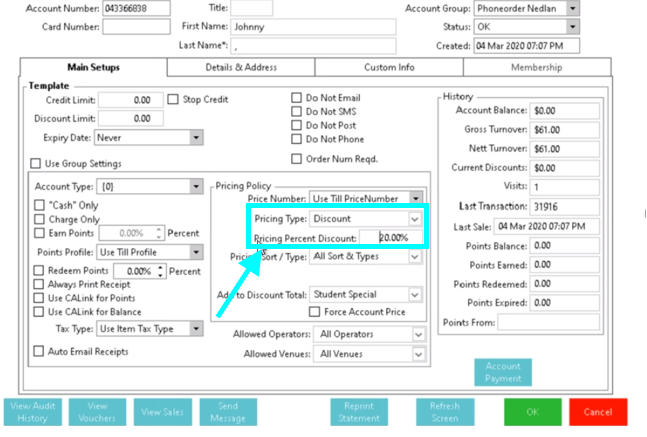
In the Pricing Policy section under Account Settings in BEPOZ, the operator may elect to set the ‘Pricing Type’ field to Discount and the ‘Pricing Percent Discount’ to the preferred percentage value off for the member. If this member price offers the member the lowest price of all running discounts/promotions in BEPOZ then YourOrder will apply a 20% discount to the cart items for that member as soon as the member has logged in and clicks the checkout button.
MEMBER PRICING EXAMPLE 2 - MEMBER PRICE LEVEL
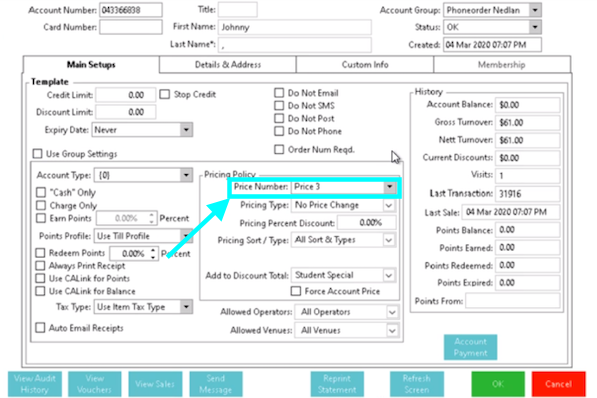
The operator may elect instead to set a preferred special price level for products so that eligible members see that price. Under the Pricing Policy section in the Account Settings in BEPOZ, this is achieved by setting the ‘Price Number’ to the preferred price level so that the relevant price is applied for purchased items at checkout
MEMBER PRICING EXAMPLE 3 - PRODUCT PROMOTION
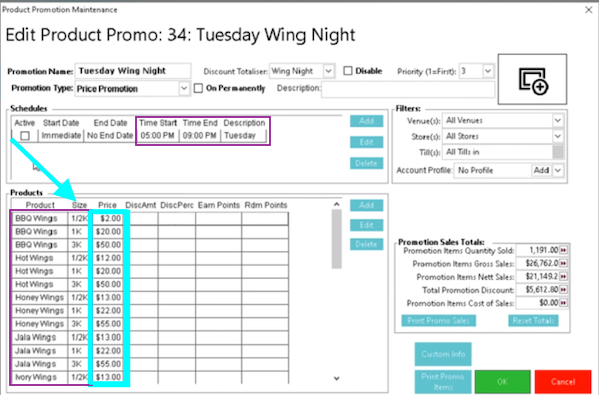
Under the Product Promotion Settings in BEPOZ, the operator may elect to set a promotion by opening a new promotion, giving it a ‘Promotion Name’, Promotion Type of ‘Price Promotion’, Schedule that applies exclusively to the dates and times the promotion runs, and adding all the Products’ Sizes, Prices and/or Discount Amounts that apply. For all items included in the promotion the discount may apply at checkout for Guests or any Members who are not entitled to a better price through their membership.
* In BEPOZ Backoffice, the operator should send the database from Head Office to the affected venue(s) to apply any new discount. Note also that any modification to the system can take around 15-20 mins to activate in YourOrder for the venue database(s) to be updated.
For assistance, please contact an authorised person or a Bepoz support team member.
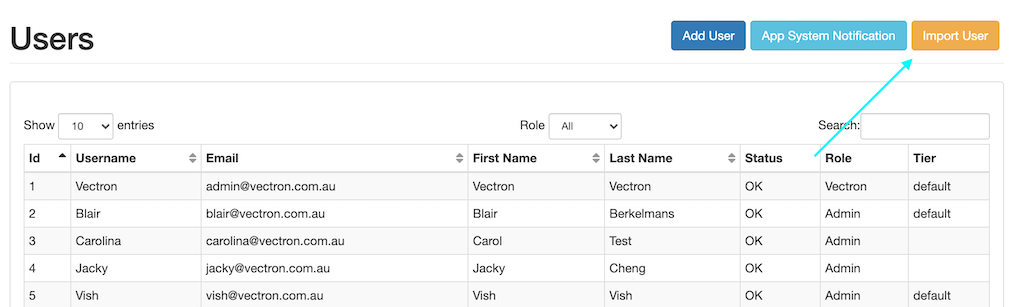
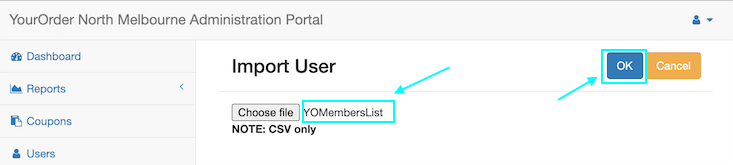
Import a List of Users
Private venues may prefer to set up YourOrder member accounts for their members because they do not allow customers to sign up. For cases like these it may be easier for the operator to import a list of members from BEPOZ into YourOrder to automatically create the desired YourOrder accounts, and automatically send the login details to each members’ email address so that they can sign in.
In BEPOZ BackOffice, operator should create a view with the following columns in the same order.
| Account ID | Account Number | Card Number | First Name | Last Name | Mobile | Email Primary | Title |
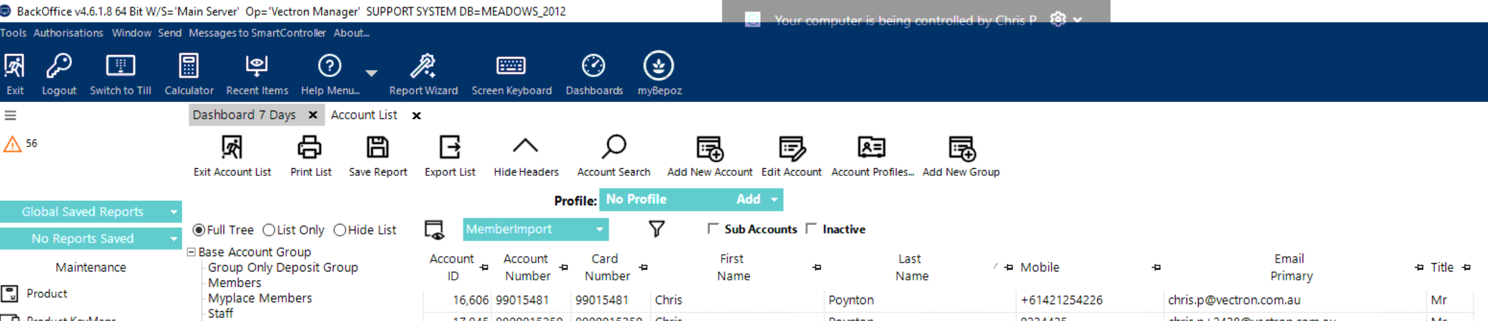
The operator can select the desired account group names, and/or use the filters to narrow down the list of members to just those intended to be imported into YourOrder.
Note that data in each column must match expected data type. E.g, Mobile numbers must be mobile numbers, not landline phone numbers, and email addresses must be in a valid email format.
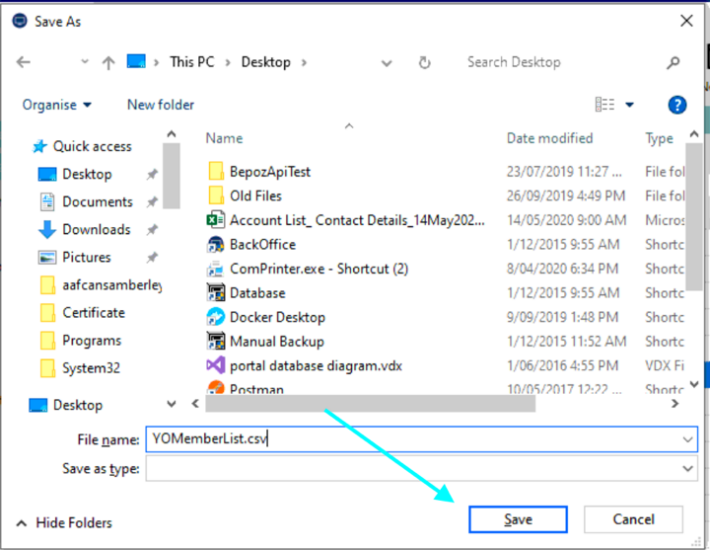
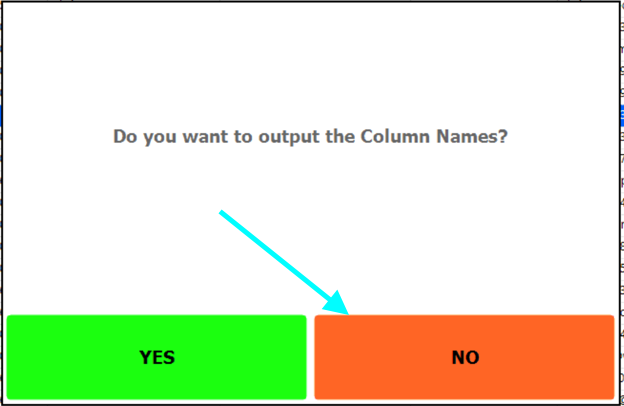
Once the desired list displays after clicking the ‘Export List’ tile, the operator can select the Comma list item under Export Formats and then click on the ‘Select Export Format’ tile to save the file.
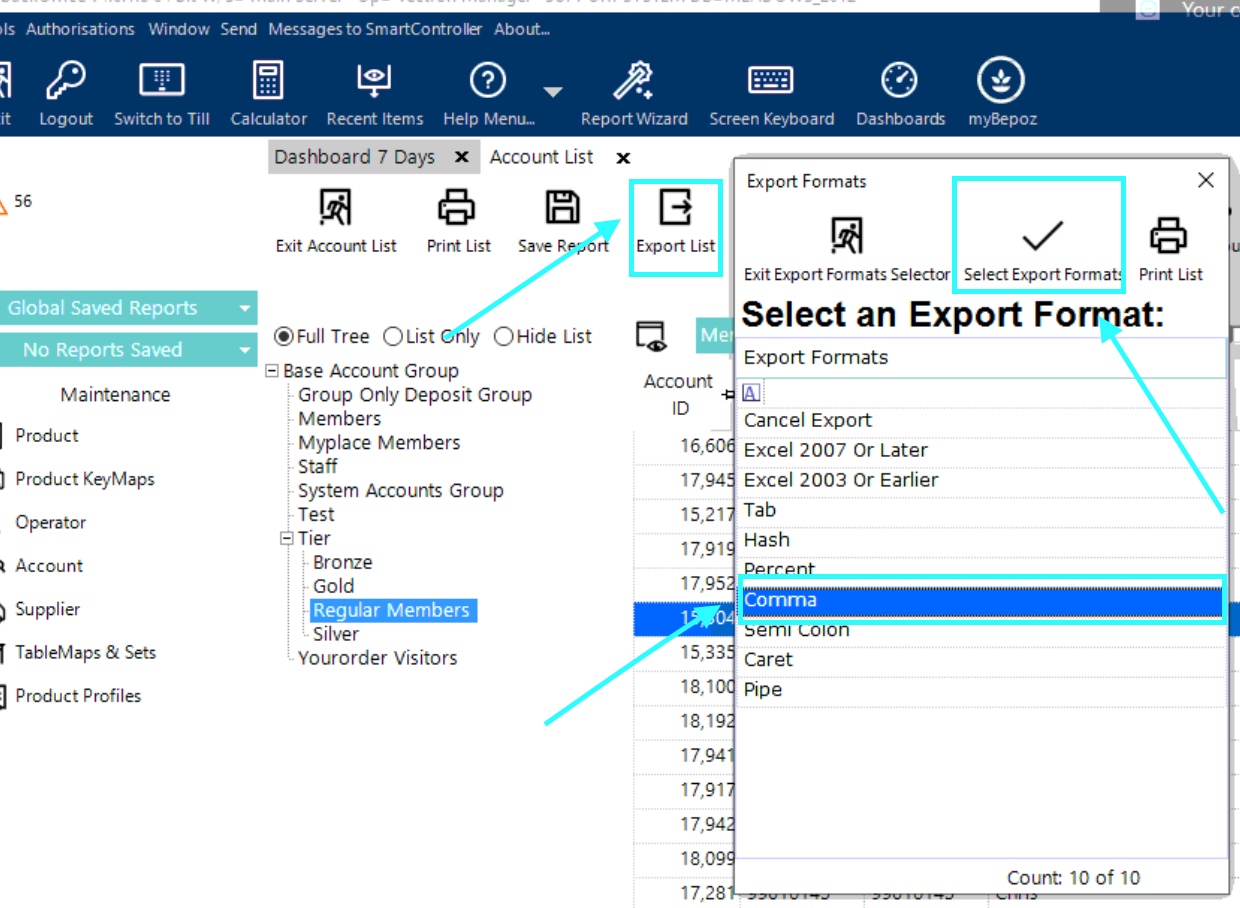
Steps to export member list in the correct format
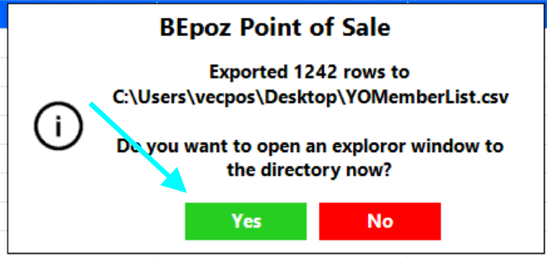


Note that progress bar will display while members are being imported. The process may take several minutes. Please DO NOT leave the browser until a popup displays to say the process was completed.