-
End-User | Products & SmartPOS
-
End-User | Stock Control
-
End-User | Table Service and Kitchen Operations
-
End-User | Pricing, Marketing, Promotions & Accounts
- Prize Promotions
- Points, Points Profiles and Loyalty
- Product Promotions
- Repricing & Discounts in SmartPOS
- Vouchers
- Account Till Functions
- Pricing, Price Numbers and Price Modes
- Raffles & Draws
- Marketing Reports
- Accounts and Account Profiles
- Rewards
- SmartPOS Account Functions
- Troubleshooting
- Product Labels
- Packing Slips
-
End-User | System Setup & Admin
-
End-User | Reporting, Data Analysis & Security
-
End-User | Membership & Scheduled Billing
-
End-User | Operators, Operator Permissions & Clocking
-
Interfaces | Data Send Interfaces
-
Interfaces | EFTPOS & Payments
- NZ EFTPOS Interfaces
- Linkly (Formerly PC-EFTPOS)
- Adyen
- Tyro
- ANZ BladePay
- Stripe
- Windcave (Formerly Payment Express)
- Albert EFTPOS
- Westpac Presto (Formerly Assembly Payments)
- Unicard
- Manager Cards External Payment
- Pocket Voucher
- OneTab
- Clipp
- eConnect-eConduit
- Verifone
- AXEPT
- DPS
- Liven
- Singapore eWallet
- Mercury Payments TRANSENTRY
- Ingenico
- Quest
- Oolio - wPay
-
Interfaces | SMS & Messaging
-
Interfaces | Product, Pricing, Marketing & Promotions
- Metcash Loyalty
- Range Servant
- ILG Pricebook & Promotions
- Oolio Order Manager Integration
- Ubiquiti
- Product Level Blocking
- BidFood Integration
- LMG
- Metcash/IBA E-Commerce Marketplace
- McWilliams
- Thirsty Camel Hump Club
- LMG Loyalty (Zen Global)
- Doshii Integration
- Impact Data
- Marsello
- IBA Data Import
- Materials Control
- Last Yard
- Bepoz Standard Transaction Import
-
Interfaces | Printing & KDS
-
Interfaces | Reservation & Bookings
-
Interfaces | Database, Reporting, ERP & BI
-
Interfaces | CALink, Accounts & Gaming
- EBET Interface
- Clubs Online Interface
- Konami Interface
- WIN Gaming Interface
- Aristocrat Interface
- Bally Interface
- WorldSmart's SmartRetail Loyalty
- Flexinet & Flexinet SP Interfaces
- Aura Interface
- MiClub Interface
- Max Gaming Interface
- Utopia Gaming Interface
- Compass Interface
- IGT & IGT Casino Interface
- MGT Gaming Interface
- System Express
- Aristocrat nConnect Interface
- GCS Interface
- Maxetag Interface
- Dacom 5000E Interface
- InnTouch Interface
- Generic & Misc. CALink
-
Interfaces | Miscellaneous Interfaces/Integrations
-
Interfaces | Property & Room Management
-
Interfaces | Online Ordering & Delivery
-
Interfaces | Purchasing, Accounting & Supplier Comms
-
SmartPOS | Mobile App
-
SmartPDE | SmartPDE 32
-
SmartPDE | Denso PDE
-
SmartPDE | SmartPDE Mobile App
-
MyPlace
-
MyPlace | myPLACE Lite
-
MyPlace | Backpanel User Guides
- Bepoz Price Promotions
- What's on, Events and tickets
- Staff
- System Settings | Operational Settings
- Vouchers & Gift Certificates
- Member Onboarding
- Members and memberships
- System Settings | System Setup
- Reports and Reporting
- Actions
- Offers | Promotions
- Messaging & Notifications
- System Settings | App Config
- Surveys
- Games
- User Feedback
- Stamp Cards
-
MyPlace | Integrations
-
MyPlace | FAQ's & How-2's
-
MyPlace | Release Notes
-
YourOrder
-
YourOrders | Backpanel User Guides
-
YourOrders | YourOrder Kiosk User Guide
-
YourOrders | Merchant App User Guide
-
WebAddons
-
Installation / System Setup Guides
- SmartPOS Mobile App | Setup
- SmartPOS Mobile App | SmartAPI Host Setup
- SmartPOS Mobile App | BackOffice Setup
- SmartPOS Mobile App | Pay@Table setup
- SmartKDS Setup 4.7.2.7 +
- SmartKDS Setup 4.6.x
- SQL Installations
- Server / BackOffice Installation
- New Database Creation
- Multivenue Setup & Config.
- SmartPOS
- SmartPDE
- Player Elite Interface | Rest API
- Interface Setups
- Import
- KDSLink
- Snapshots
- Custom Interface Setups
-
HOW-2
- Product Maintenance
- Sales and Transaction Reporting
- SmartPOS General
- Printing and Printing Profiles
- SQL
- Repricing & Discounts
- Stock Control
- Membership
- Accounts and Account Profiles
- Miscellaneous
- Scheduled Jobs Setups
- Backoffice General
- Purchasing and Receiving
- Database.exe
- EFTPOS
- System Setup
- Custom Support Tools
-
Troubleshooting
-
Hardware
1 | ANZ BladePay w/ Surefire Pay at Table - Device Setup
This article covers the device setup guide for ANZ BladePay. This system can be used for table transactions and billing processes(BETA 4.5.2). ANZ BladePay is mobile and easy to move around and Table and billing information displays directly on the device; the table is automatically closed off in Bepoz, so no more running back to your counter SmartPOS. Surefire works with the ANZ’s BladePay device to facilitate mobile payments.
This article covers the device setup guide for ANZ BladePay. This system can be used for table transactions and billing processes(BETA 4.5.2).
ANZ BladePay is mobile and easy to move around and Table and billing information displays directly on the device; the table is automatically closed off in Bepoz, so no more running back to your counter SmartPOS.
Surefire works with the ANZ’s BladePay device to facilitate mobile payments.
Partnering with Surefire Pay at Table to easily select bills, split bills, and take payments.
Patrons retain possession of their cards and enjoy faster, more responsive service.
Prerequisites
- Prior to using the ANZ BladePay unit, you will need to add and setup a New Device in BackOffice so that the Pay at Table App on the BladePay unit can communicate with your SmartController
- After a Device has been added in BackOffice, the BladePay unit itself will need to be paired via the Pay at Table App to the BackOffice Device prior to using the App to process Payments
Add New Device in BackOffice
- To get started, log in to BackOffice and select the Venue, Stores & Till option from the side menu within System Setup
- From the Venue list, select the desired Till that you would like to add the Device to
- Select the Add New Device button from the Header Section and select Blank Device when prompted to Select a Device to Copy
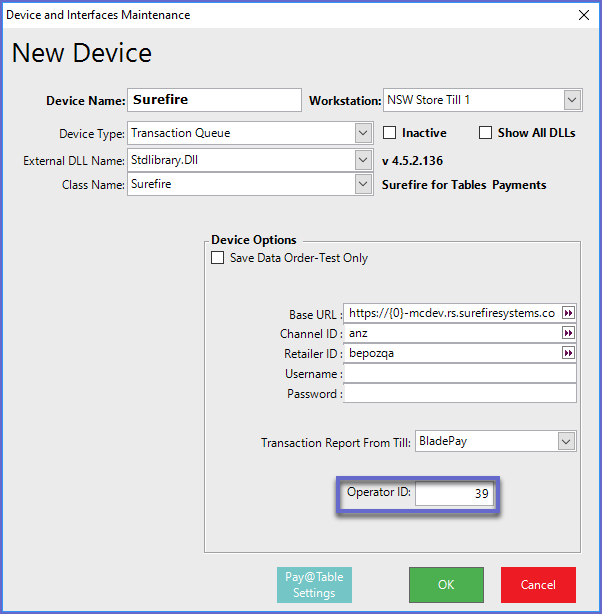
- This will open a Device and Interfaces Maintenance window for a New Device
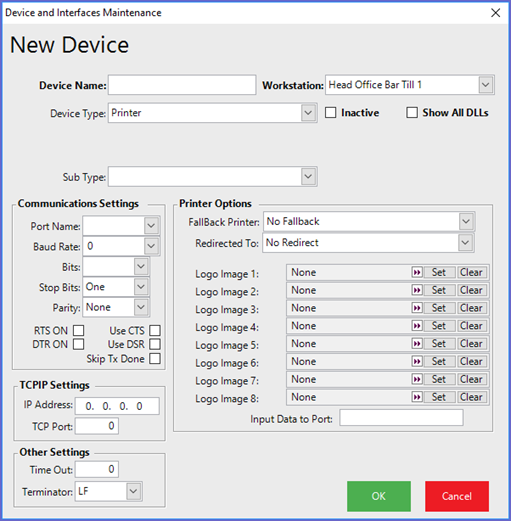
Configure New Device
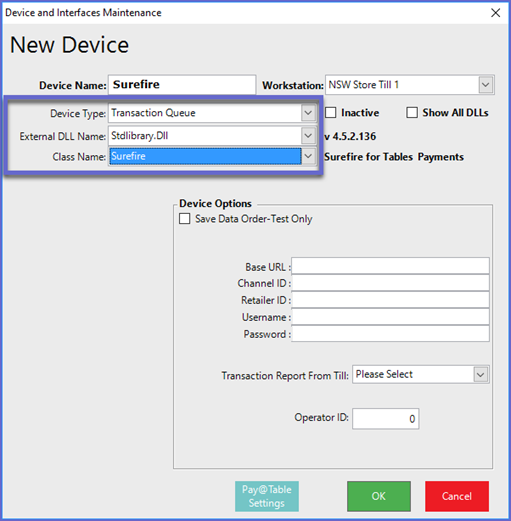
- Add a relevant Device Name
- From the Device Type drop-down, select Transaction Queue
- From the External DLL Name drop-down, select Stdlibrary.Dll
- From the Class Name drop-down, select Surefire
Device Options
- The following information should be provided from Surefire and will need to be entered into the relevant entry fields
- Channel ID
- Retailer ID
- Base URL
- The Base URL format from Surefire will contain the Channel ID
- Remove the Channel ID from the Base URL and replace it with "{0}" when entering the Base URL into the Device Options field
- For example, if the Channel ID is "anz", the Base URL would be "https://anz-mcdev.rs.surefiresystems.com"
- The Base URL would need to be changed to "https://{0}-mcdev.rs.surefiresystems.com" where "{0}" is replacing the Channel ID of "anz"
- Do not leave a space at the beginning or end of the Base URL
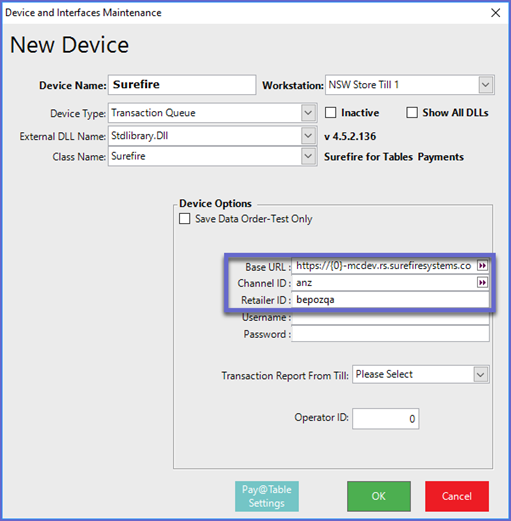
- The Username and Password will be auto-generated when the Device is paired; Do not Modify or Delete once they have been generated
Transaction Report from Till
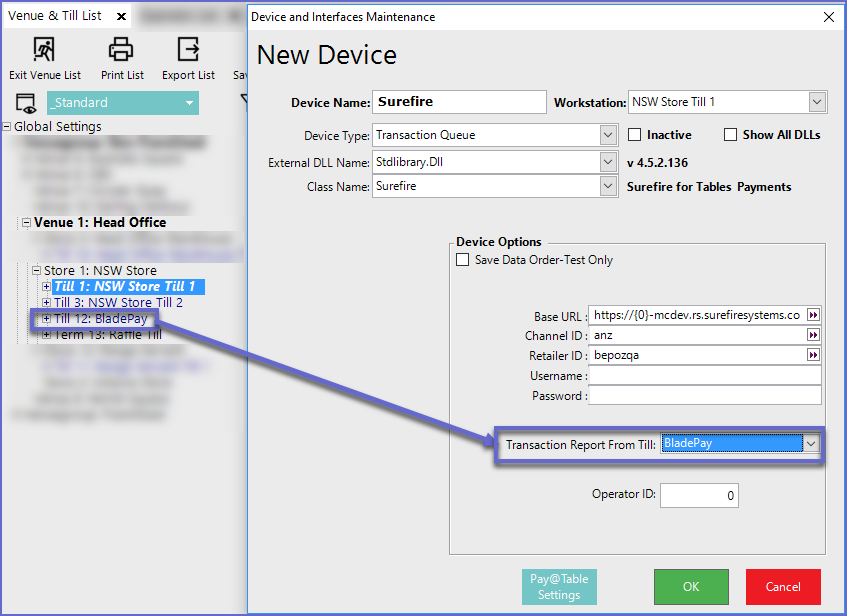
- Add a designated Till to the Store that the Device is intended to be used in
- The Device will use this Till to communicate with SmartController
- Select this Till from the drop-down list
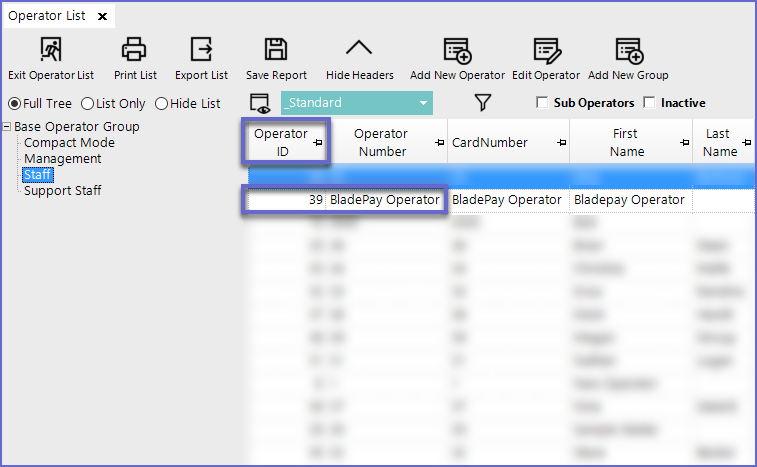
Operator ID
- Enter an Operator ID which will be used for Reporting
- In this example, a designated Operator has been created for this purpose; this is recommended but optional
- Enter the Operator ID into the field provided
Pay @Table Settings
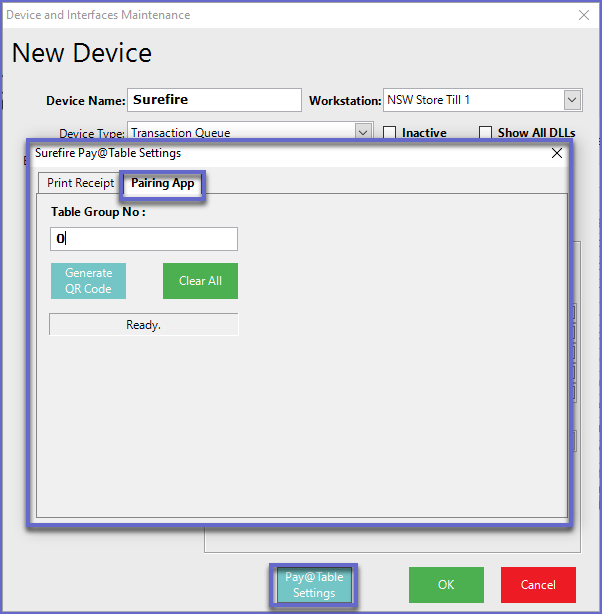
- Selecting the Pay @ Table Settings button will open a smaller window where additional settings can be figured
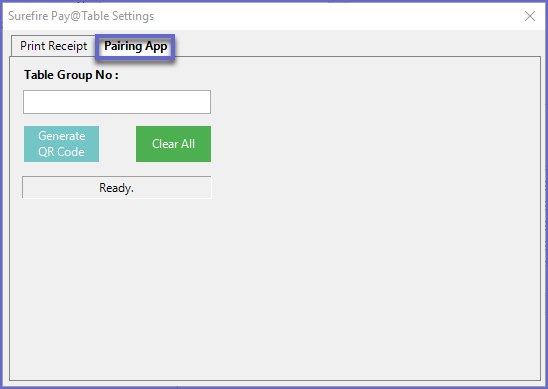
- This window is broken down into two tabs – Print Receipt and Pairing App
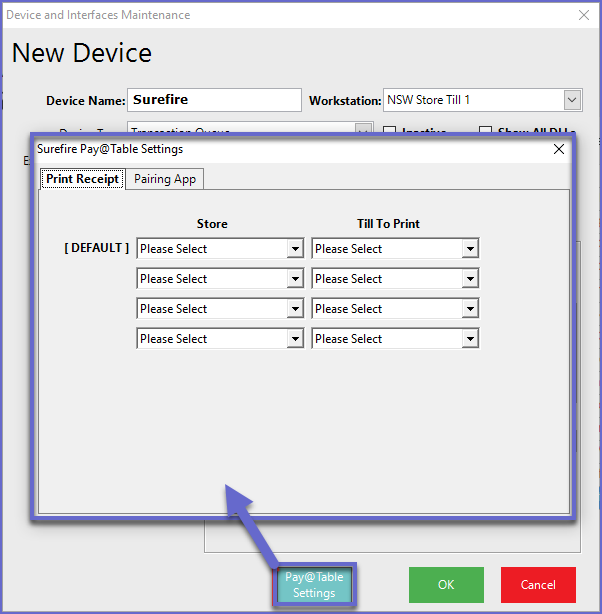
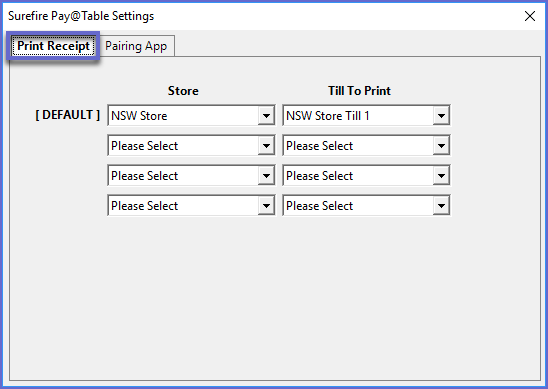
- Within the Print Receipt tab, four Stores & Tills can be selected which will be able to Print receipts from a remote printer after processing a payment with the Pay At Table App
- Use the drop-downs to select the available Stores and then Till To Print to
- The Pairing App tab will be used to Pair the BackOffice Device to the physical ANZ BladePAY Device
- This will be discussed further in the next section
Pay At Table App Setup
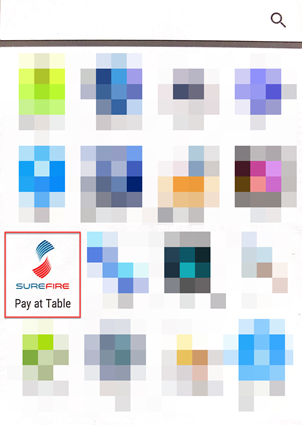
- Within the BladePay device, open the Surefire Pay at Table app
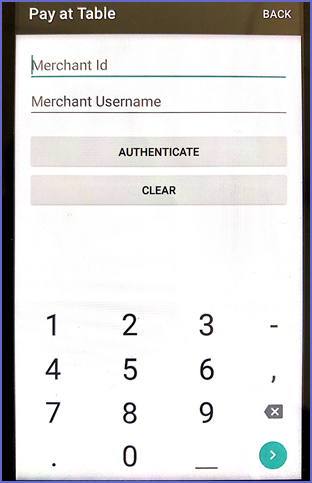
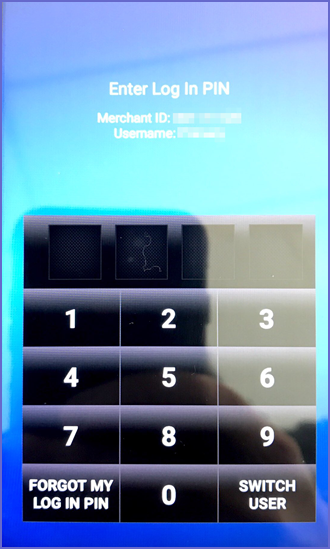
- You will be prompted to enter the provided Merchant ID and Username which will be provided from ANZ along with the Log In PIN
- Enter the provided Merchant ID and Merchant Username and select Authenticate
- Then enter the provided Log In PIN
- To continue within Pay at Table, you will next need to Pair the Device in BackOffice and generate a QR Code
Pair Device
BackOffice
- Back to the Device Maintenance window, select the Pay @ Table Settings button
- The Surefire Pay @ Table Settings window will open; select the Pairing App tab
- Enter the Table Group Number which relates to the Table Group Number from the Tables Tab in Venue Maintenance for the Venue that this device is configured in
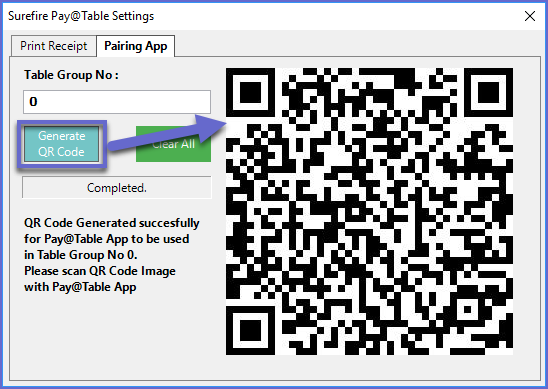
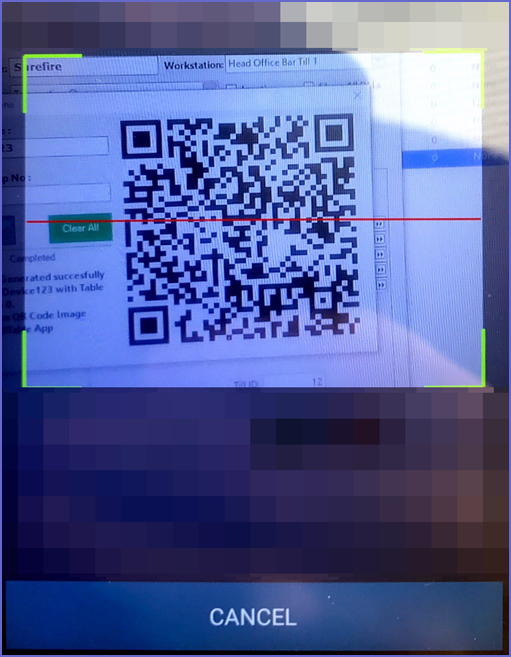
- After the Table Group Number has been entered, click on the Generate QR Code button to generate a QR Code to scan using the Pay at Table App
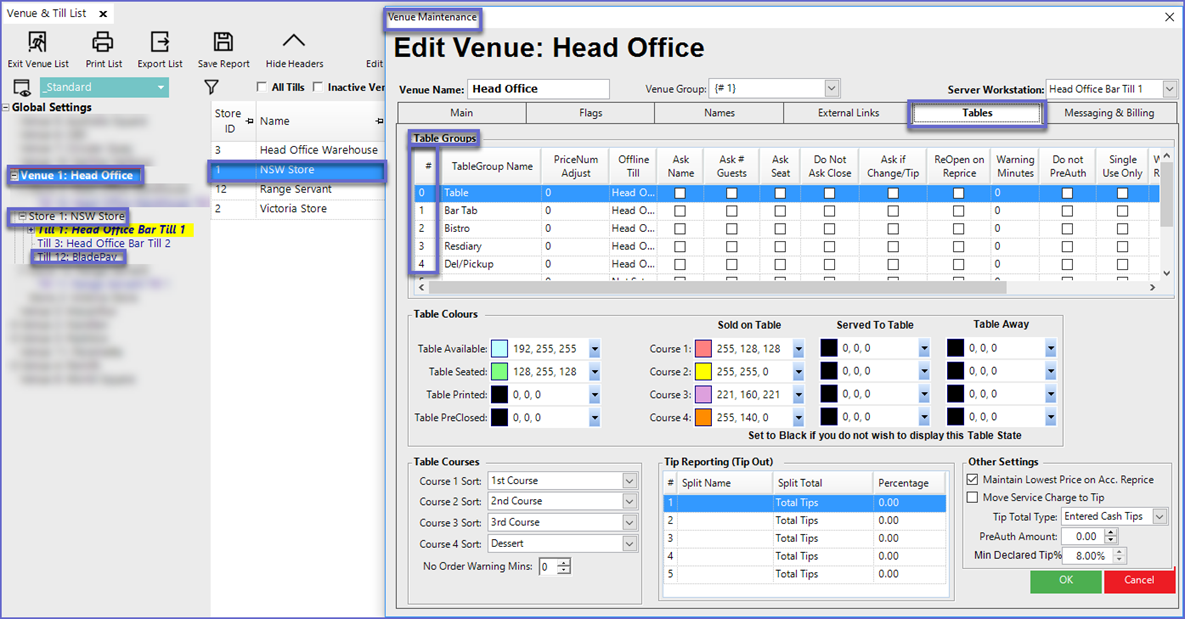
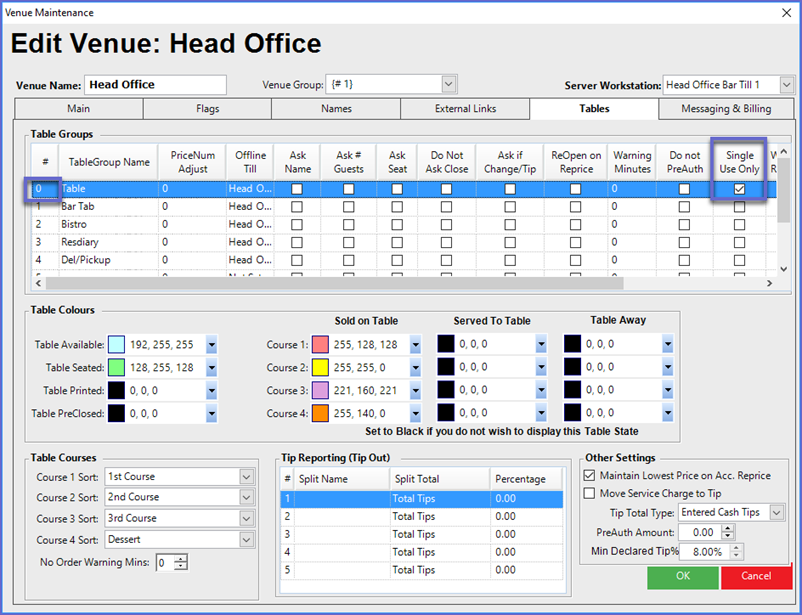
- While on the Tables Tab in Venue Maintenance, ensure that the Single Use only flag is enabled for the Table Group that will be used with the BladePay device
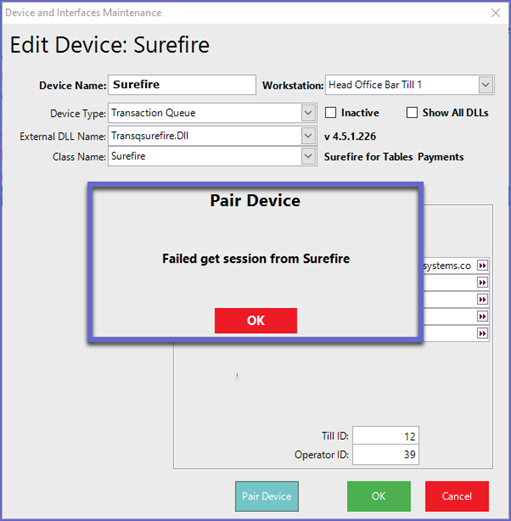
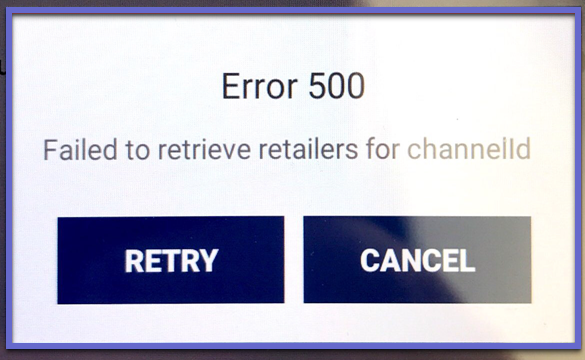
- If any of the following messages appear during the Pairing Process, there is an issue with the Surefire Server
Pay At Table App
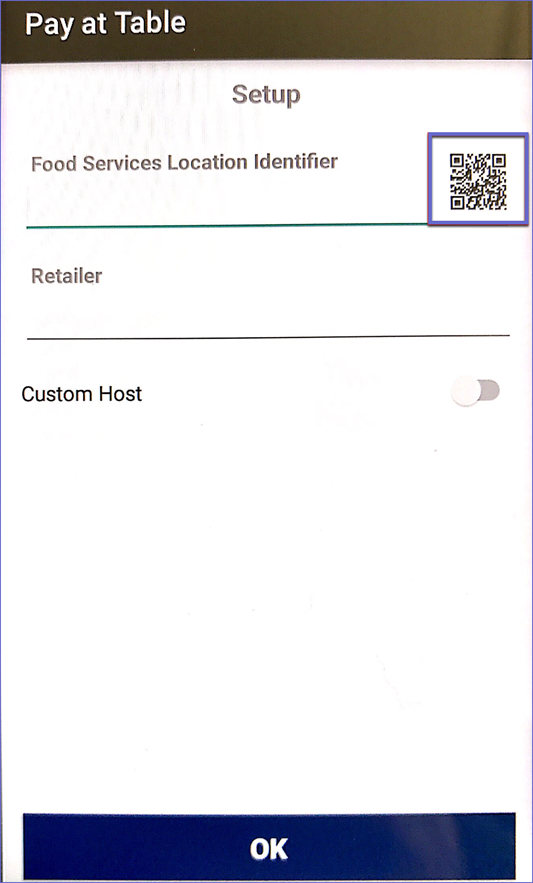
- After generating the QR Code, use the QR Scanner within the Pay at Table App to complete pairing
- After a few moments, the BladePay Device will now be Paired and ready to use
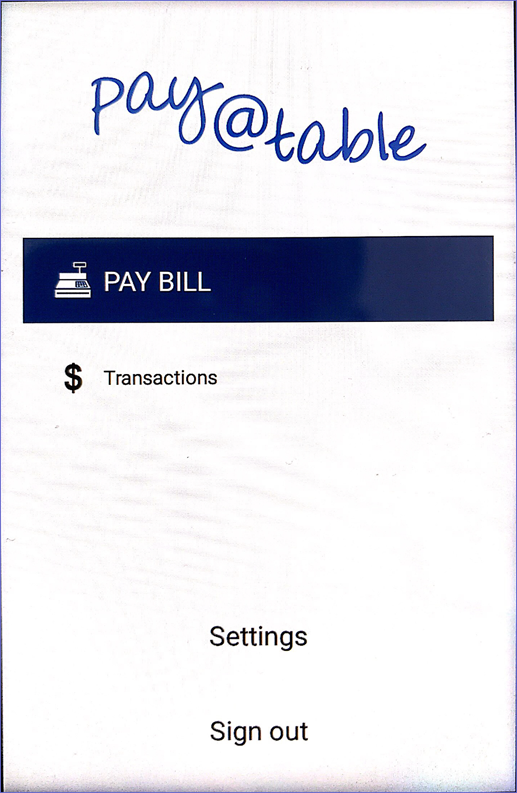
- Please proceed to the BladePay User Guide for further information
Printing
Note for Virtual Multi-Venues
- In a Virtual Multi-Venue environment, all Tables belonging to the configured Table Group for the BladePay Device will show in the Surefire Pay at Table App even if they are from different Venues
- For Example:
- If the BladePay/Surefire Device is setup to get Tables from Table Group #0
- A Virtual Multi-Venue has three (3) Venues and they all use Table Group #0
- Tables from all three (3) Venues' Table Group #0s will appear in the Pay at Table App
