
This lesson covers the Axept Software Installation guide for Bepoz. The supported functionality is PAX S300 and it does not support PAX S900.
This lesson covers the Axept Software Installation guide for Bepoz. The supported functionality is PAX S300 and it does not support PAX S900. Windows Setup- Before installation ensure that the device has not been activated on another
- For installation, you must be logged in with an administrator user
- For activation, you must be logged in with the user that will be assigned as the service logon account eg: BG-VM2-WIN10UK\admin (Domain\User)
- In order to run the service, the user that is assigned as the service logon account will need to have the ‘Log On As A Service’ permission. More information on this can be found at https://technet.microsoft.com/en-us/library/cc957141.aspx
- To install and activate the solution there is a dependency on .NET Framework v4.5. The MSI package will check that v4.5 is present and will advise if it is not
- To activate the solution axept will need internet access to the axept Platforms endpoints (detailed in the install document)
- To activate the solution axept will need the PED connected to the machine
- Windows Time zone must be set to UTC 0
- On the C:\ Create a directory called 'Release' and extract the contents into a folder on your c:\ drive called “Release”
- Once in place I need you to edit the batch file and replace the parameters with the following
- msiexec.exe /i "C:\PATH TO YOUR INSTALLER\WaS_Setup.msi" PLATFORM=2 /l*v C:\axeptInstallLog.txt
- Once saved we ‘right click’ on the Batch file and select “Run as Administrator”, if a previous installation is present this can then be uninstalled cleanly, if no other version is present you will see the following:
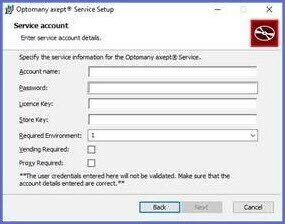
- You can just add the “Account Name” and “Password” leaving “Required Environment” set to “1” and all other input boxes empty
- Select next to proceed, the service will be installed
- Once the installation has completed select finish to close installation application
Installing Axept USB Drivers
- The driver files are extracted to C:\ProgramData\Optomany\Drivers\PaxUsb when the software was installed
- In the PaxUsb directory the is a file called posvcom.inf - right click the file and select install
- A message will display "The Operation completed successfully
Setting the Port Number
- There a 2 config files that contain Serial Port settings
- The default Com port assigned in the config files is com 7
- You will need to edit the port number in Windows Device manager
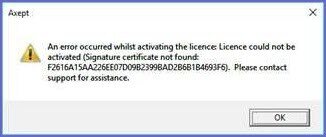
Installing Root Certificate
- The root certificate must be installed, if the certificate has not been installed then you will receive the following error
Activate the Service
- Once the software has been installed you can access the Application Activation tool from the following location:
- C:\Program Files (x86)\Optomany\Activation Application\Optomany.Terminal.ActivationApplication.exe
- Run Optomany.Terminal.ActivationApplication.exe The license Activation screen will appear. example below
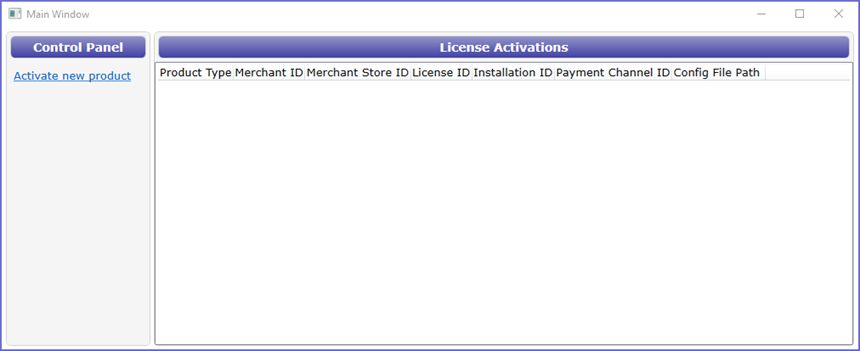
- Select “Activate New Product” on the left of the screen under Control Panel
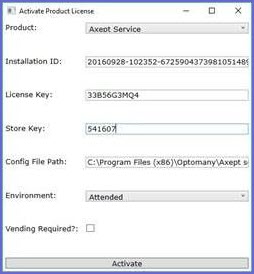
- After clicking on “Activate New Product” you will be presented with the screen below which will allow for you to enter all the required parameters manually:
- Below is an example of the "Activate Product License" screen
- Once successfully activate you will be returned to the "License Activations" Screen
- The sample below displays the activation details for the device

Starting the Service
- Once the service activation is successfully you will need to start the Optomany's axcept service. The service will not start until the service has been activated
- Open windows "Services" and search for Optomany's axcept service in the services list
- Once you have found the Optomany's axcept service you will see that the service is stopped
- To start the service right click on Optomany's axcept service and select Start

- If you are required to move/relocate the device and attach this to an alternative SmartPOS unit then you will need to contact AXEPT directly prior to beginning this process
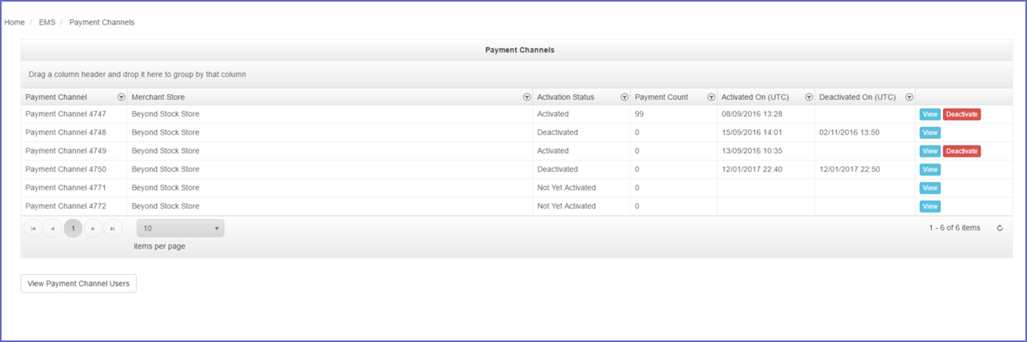
- Please take note of the “Payment Channel ID” for the device
- If you click on EMS > Payment Channels you will see that Payment Channel 4789 has an icon that indicates “Deactivate” and this confirms that the device has actually been activated
- By clicking “Deactivate” you can deactivate the PED and then, should you need to you can run the installer again to reactivate
- Should you try and reactivate whilst the PED is already active you will see an error message similar to the one you have already received, using this process listed above you can rectify this issue and continue
- Below is an example of the Payment channel Screen
Troubleshooting
- When starting smart POS and you receive an error message - Could not load Axept library please follow the steps below
- Stop the Axept Service
- Navigate to the following folder C:\ProgramData\Optomany\Axept\ConfigurationData and delete one of the .DLD files that you should find there
- Once deleted could you then restart the axept Service
- Once restart load the Remote Client
- Subscribe using the Remote Client
- This process should initiate a new Configuration Download. If this does not resolve the issue please email optomany for support. integration@optomany.com
Backoffice Setup Device Options
- The Device is generally connected to the till, the Axept software must be installed on each till that a device is connected to
Axept Standard
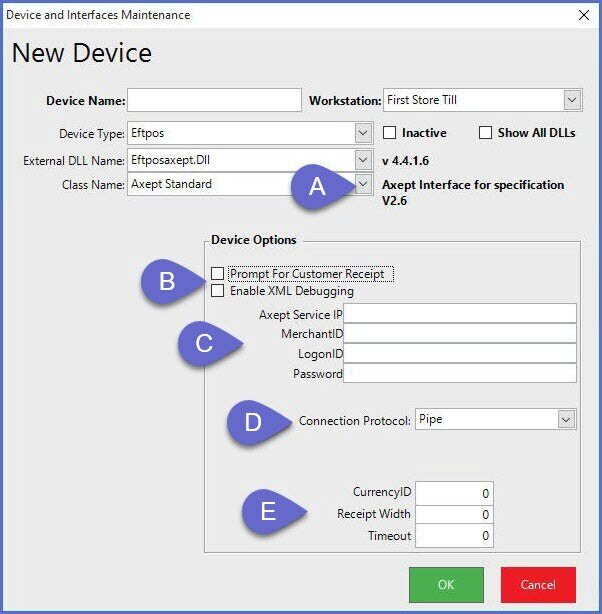
A |
Class Name |
|
B |
Flag Options |
|
C |
Setup & Login Details |
|
D |
Connection Protocol |
|
E |
Device Options |
|
Axept Subscription
A |
Class Name |
|
B |
Flag Options |
|
C |
Setup & Login Details |
|
D |
Connection Protocol |
|
E |
Device Option |
|
SmartPOS Setup
- The Axept software must be installed on the Till/s where the device will be connected too
- Axpet Software is configured to Comm 7 by default, if the device does not connect you will need to confirm with Axpet technician on what Comm port/s was configured for the till/s