
This article covers a step-by-step guide to configuring the BidFood Supplier Schedule Job in Backoffice.
This article covers a step-by-step guide to configuring the BidFood Supplier Schedule Job in Backoffice.
This schedule job is configured to run as per the given schedule and connect to BidFood server automatically to receive the PriceBook file and import to Bepoz
Prerequisites
- For an Operator to be able to setup BidFood Schedule job, the following Operator privileges must be enabled:
-
Venue Maintenance "Main" Tab (General Settings) - All “System Setup” Flags
-
Operator Maintenance 'General' Tab - System Setup: “Maintain Supplier Comms” Flag
- System Setup: “Maintain Schedule Job” Flag
- System Setup: “Access Venue, Stores, Tills” Flag
Scheduled Job Configuration
- Scheduled Job will have the ability to automatically update the PriceBook with the latest copy from BidFood server on a schedule
- Complete the following steps to set up the Scheduled Job for retrieving PriceBook File from BidFood server:
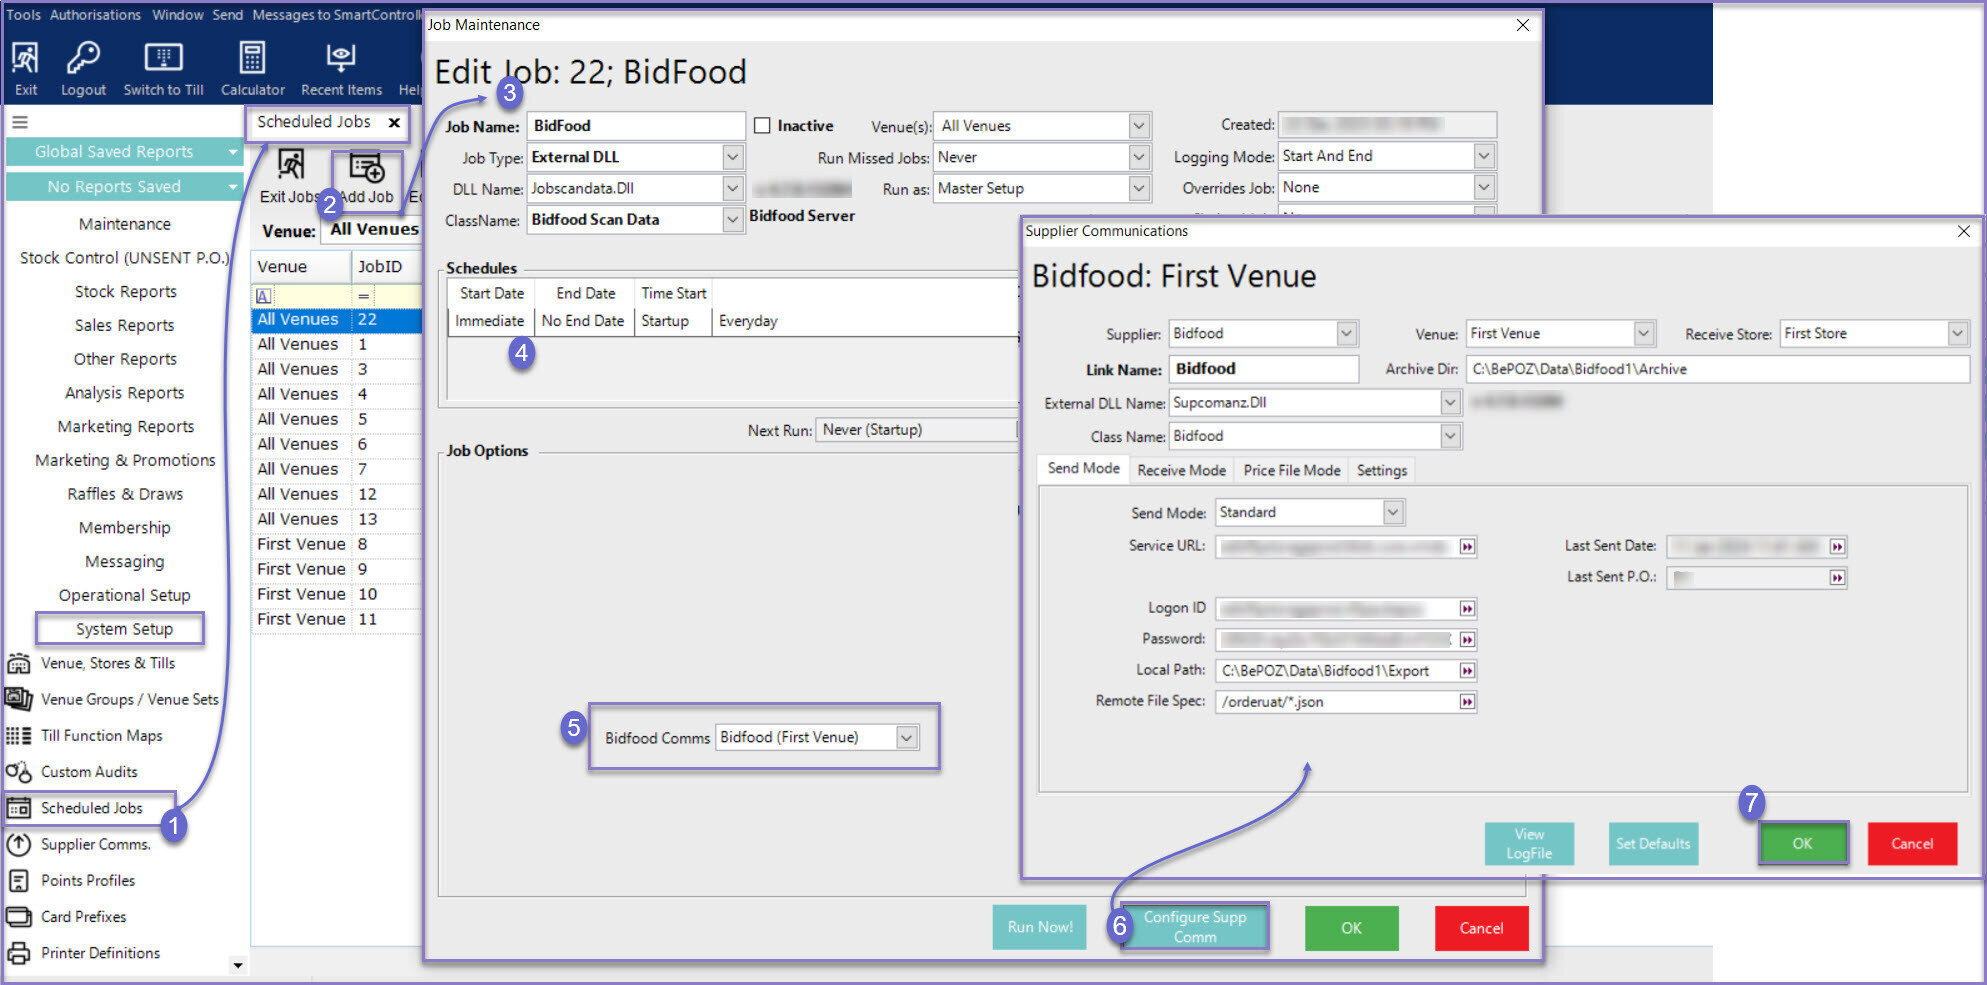
- Navigate to System Setup and select Scheduled Jobs
- Select the Add Job button and a new Job Maintenance window will open
- There are a number of credentials that need to input and they include:
- Job Name: Give the Job a relevant name
- Job Type: External DLL
- DLL Name: Jobscandata.Dll
- ClassName: Bidfood Scan Data
- Additional configuration options may be selected if desired; e.g., Venue(s), Run Missed Jobs, Chained Job, etc.
- Set up a Schedule or Schedules for when the Job will run automatically
- Configure the Job Options as follows:
- Select the Supplier Comms in the Bidfood Comm drop-down list; this will display a list that has been created from the Supplier Comms
- Click on Configure Setup Comms which opens the selected Supplier Comms window
- Click OK to save the Scheduled Job
- After re-opening the Job and selecting 'Run Now!', SmartController will show that the Job has Started and then will show when the Job has Finished OK; alternatively, this will occur per the Job's Schedule