
Overview
This is a step by step guide in order to configure a Virtual printer via emulated Com Ports on a Windows system, which allows you then to print to three virtual printers, primarily you will have a Reciept Printer, and two Remote Printers at the end of the Setup.
Prerequisites
ComPrinter Installation files
Null-modem emulator (Com Ports)
Frameworks 3.5 (includes .NET 2.0 AND 3.0)
Stage 1 - Download and Installation
Download the ComPrinter.sfx (Self Extracting Archive)
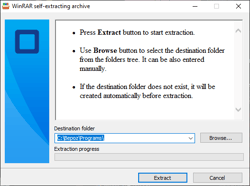
Run the ComPrinter.sfx
Which should prompt to extract the file to the 'C:\\Bepoz\\Programs\\' Directory
Once Extracted you can navigate to 'C:\\Bepoz\\Programs\\' Directory and create a shortcut onto your desktop of ComPrinter.exe
Download the Virtual Com port emulator - com0com
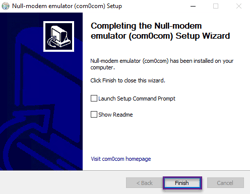
Once com0com has been installed you will now have access to the Setup utility
Click Finish
To access the Setupg.exe, navigate to C:\\Program Files (x86)\\com0com
Run Setupg.exe
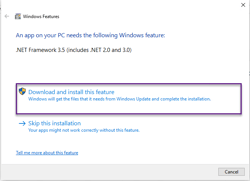
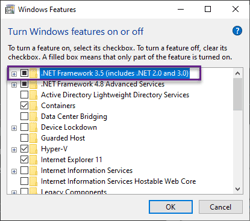
If the Setup Application does not load you will need to install .NET Framework 3.5
This should automatically prompt when running the com0com Setup Application.
If it does not auto prompt then type Features in the Windows Start Menu
Check .NET Framework 3.5 and click OK
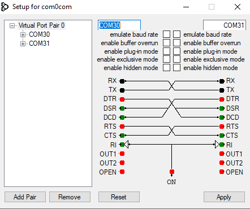
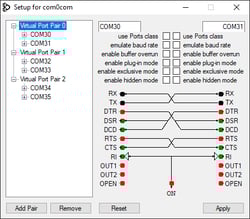
· ComPrinter.exe support a maximum of 3 Virtual printers you will have to configure 3 Virtual Com Pairs
· Edit the Virtual Port Pair 0 from CNCA0 and CNCB0 to COM30 and COM31
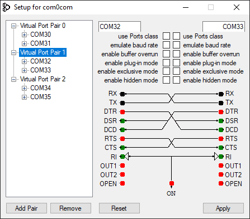
· Edit the Virtual Port Pair 1 from COM3 and COM4 to COM32 and COM33
· Add Pair
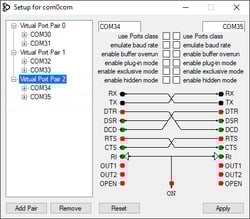
· Edit the Virtual Port Pair 2 from CNCA2 and CNCB2 to COM34 and COM35
· Click Apply
· Exit out of the Setup for com0com
Stage 2 - ComPrinter Setup
Barcode Font Installations
To ensure that barcodes print or are shown then you MUST ensure that the correct fonts are installed within Windows:
Double click the EAN-13 file and then Click Install
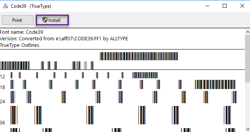
Double click the Code39 File and then Click Install
Configuring ComPrinter
Run the ComPrinter application
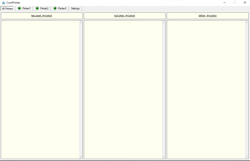
You should now see the following screen
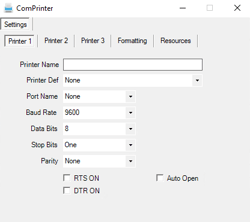
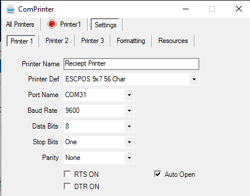
Printer 1 should be setup as the following Right-hand screenshot
o Printer Name: Reciept Printer
o Printer Def: ESCPOS 9x7 56 Char
o Port Name: COM31
o Auto Open Check
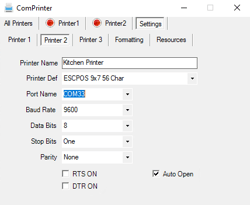
Printer 2 should be setup as the following Right hand screenshot
o Printer Name: Kitchen Printer
o Printer Def: ESCPOS 9x7 56 Char
o Port Name: COM33
o Auto Open Check
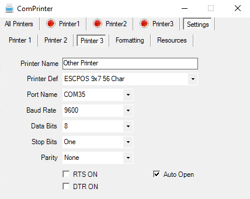
Printer 3 should be setup as the following Right hand screenshot
o Printer Name: Other Printer
o Printer Def: ESCPOS 9x7 56 Char
o Port Name: COM35
o Auto Open Check
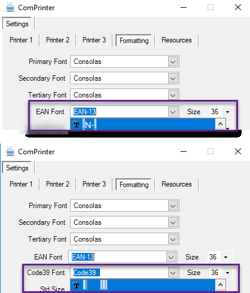
· Navigate to the Formatting Tab
· Ensure you set the above Fonts to the following
· EAN FONT: EAN-13
· CODE39 FONT: CODE39
· Exit ComPrinter to Save the settings
· Rerun ComPrinter
All Printers should now show and have a Green Dot - meaning they are Online
Stage 3 - BackOffice Settings
· Now Open BackOffice
· Navigate to Venue Stores and Tills
· Highlight the POS/Workstation you want to Add Devices too
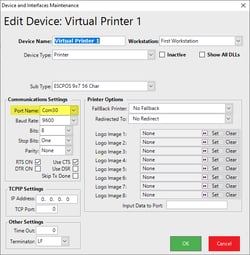
· Create a new device for each Virtual Printer required
· Although any other Sub Types work, we have found that ESCPOS 9x7 56 Char has the best UI
· Reciept Printer should be set to COM30 as the pair is COM30 <-> COM31
· Kitchen Printer should have COM32 as the pair is COM32 <-> COM33
· Other Printer should have COM34 as the pair is COM34 <-> COM35
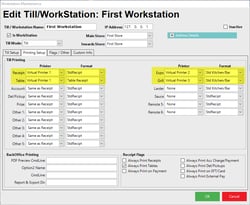
· Edit the POS/Workstation
· Assign the new virtual printers within the workstation Maintenance -> Printing Setup Tab as well as any printer profiles
· Set Reciept to Reciept Printer
· Click OK
· Close BackOffice
Stage 4 - Test Receipt at SmartPOS
Ensure ComPrinter is running
Run SmartPOS
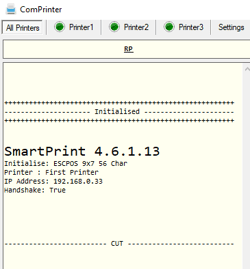
Run SmartPrint
If correctly configured you should now receive your first test print
This completes the guide for installing ComPrinter