This article covers an overview of Common Device Types and how they can be configured within BackOffice.
This article covers an overview of Common Device Types and how they can be configured within BackOffice.
Throughout myBepoz, every effort is made to explain different Devices and their configurations when necessary - whether in the context of adding a Device for an Interface, a new Workstation peripheral, or a BackOffice Extension. However, as the aim of this article is to present base knowledge that users can take with them to set up common Device Types, some of these are outlined below.
As the Device configuration options will vary depending on the Device Type, External DLL, Class Name, and/or Sub Type selected, it's not possible to cover all Device options in one article.
Detailed explanations of varying Devices and their configurations are incorporated in supplementary articles when required.
Prerequisites
- To access Workstation Device Settings, the applicable Operator Privileges
-
Operator Maintenance 'General' Tab - System Setup: "Access Venue, Stores & Tills" Flag
- System Setup: "Maintain Venue, Stores & Tills" Flag
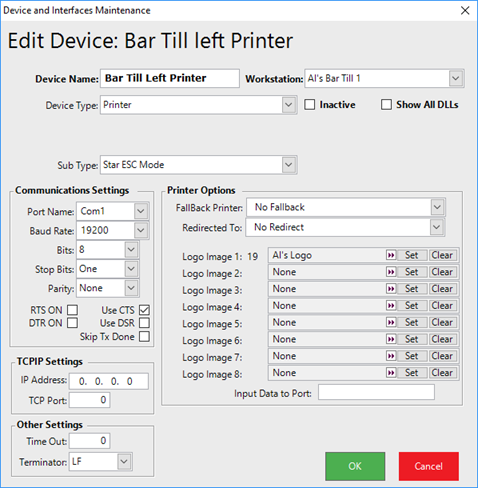
Printer
- When configuring a Printer, the Sub Type should be set accurately to the Make and Model of the physical Printer being used
- Ensure that all Communication Settings are configured as required for the occurrence at hand; i.e., the Port Name will not always be the same as it will need to be set to the Communication Port that the Device is using; the Baud Rate, Bits, Stop Bits, Parity, and Communication flags will depend on the specific Device
- The TCPIP Settings, when necessary should be correctly entered as the IP Address and TCP Port of the Device
- The Printer Options are standard no matter which Sub Type is selected:
- Set the FallBack Printer and Redirected To Printer to other Printers, as preferred or required; these are not mandatory and can be left as "No Fallback" or "No Redirect", respectively
- Set any desired Logo Images from the System's Image Library
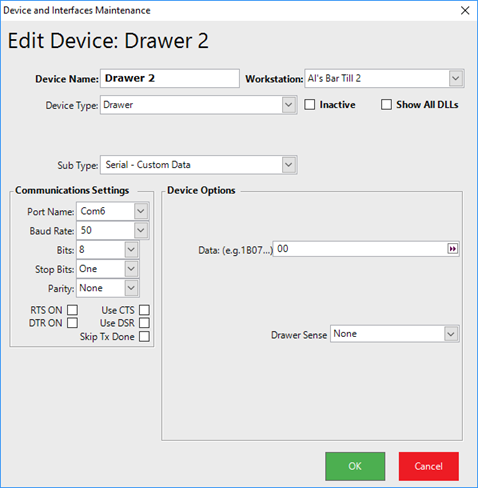
Drawer
- Drawers may or may not have Communication Settings to be configured depending on the Sub Type selected
- If Communication Settings are required ensure that all are configured as required for the occurrence at hand; i.e., the Port Name will not always be the same as it will need to be set to the Communication Port that the physical Drawer is using
- The Device Options will change dynamically depending on the Sub Type being used
Customer Screen
- A Customer Screen is a 2nd-screen peripheral of the Till that is Customer-facing and commonly displays Transaction and/or Account information as well as a Media slideshow
- As the only Sub Type available for a Customer Screen is Standard, the following Device Options apply and should be configured as needed:
- Stop Show in Sale - if the Customer Screen is configured to play a media slideshow, enabling this flag will stop the slideshow when a Transaction has been started; the slideshow will then restart when the Transaction is finalized
- Display Sale - this flag controls whether or not the actual Transaction will display on the Customer Screen; enable the flag to hide the Transaction or disable to show the Transaction
- Hide Account Details - if this flag is enabled, Account Name and other Account Details will not be displayed on the Customer Screen
- Hide Header - this flag controls whether or not the Header will display on the Customer Screen
- Media Zipname - Enter the file directory into this field where the Media Zip file is located; the default directory is the Shared Data Directory (C:\bepoz\data)
- The zip file should contain files of Photos and/or Videos that will be displayed as a Slideshow on the Customer Screen
- The file types supported are .jpg, .gif, .bmp, .avi, .wmv however, .jpg and .wmv are preferred due their compression
- Please see below for further information regarding media files
- Server Alternate Text - the Customer Screen will normally display 'Server, however, that can be replaced with other text entered here
- Media Delay - enter the number of seconds for an image to be displayed on the Customer Screen before changing
- Use the Check Settings button to ensure that the Media ZipFile can be accessed

Images & Media
- There are standard Photo filenames that will be displayed based on actions performed on the till which will be displayed if they exist in the Till's Local Data Directory (or are in the Tills Media File zip file):
- TransStart.jpg - displays when a new Transaction is started
- TransEnd.jpg - displays when a Transaction finalized
- TransAccount.jpg - displays when an Account Transaction is Started
- TransTraining.jpg - displays when a Training Transaction is started
- TransSubtotal.jpg - displays when the Subtotal key is hit
- TransPayment.jpg - displays when the Payment Screen is displayed in the main SmartPOS screen
- TransLogout.jpg - displays when an Operator logs out and when the Till starts
- TransLogin.jpg - displays when an Operator logs in
- AccountRenewal.jpg - displays if an Account is past Renewal Date
- AccountExpire15.jpg - displays if an Account will expire in the next 15 days
- AccountExpire30.jpg - displays if an Account will expire in the next 30 days
- AccountExpire60.jpg - displayed if an Account will expire in the next 60 days
- All above filenames with the extension .wmv will be looked for and displayed if the .jpg does not exist
- Also, each Account has a Media Filename field that can be set up in BackOffice in the Account Maintenance record; if this contains a filename then that media will be displayed
- If an Account has no entry in this field, and it has the Use Group Settings flag on, its Parent Group will be checked for a Media Filename and will be used if present
- Failing all this, the standard TransAccount.jpg will be displayed if present
- Similarly, each Product also has a Media Filename field that can be set up in BackOffice in the Product Maintenance record; if this contains a filename that exists at the Till, this media will be displayed
- It's important to note that any Photo or Video filename starting with TRANS, ACCOUNT or PRODUCT will not be displayed as part of the Slideshow because they are reserved filenames for the above purposes only
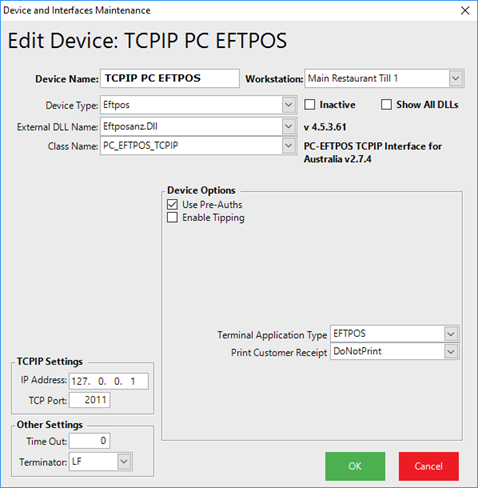
EFTPOS
- EFTPOS Devices are used to interface with EFTPOS Payment Systems and their physical devices to obtain and Process Payments for Transactions
- Depending on the External DLL Name, the Class Name and the Sub Type being used, the EFTPOS Device may or may not need Communication Settings, TCPIP Settings, and/or Other Settings configured
- When the aforementioned settings are required, configure as needed on a case-by-case basis
- Similarly, the Device Options will be populated dynamically dependant on the specific Device being configured and some will not require any additional Device Options to be set
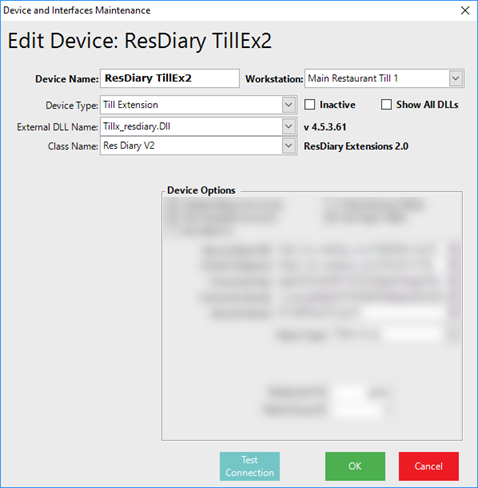
Till Extension
- Till Extension Devices are commonly created and added for interface purposes and as such, every interface will have a different External DLL Name and potentially varying Class Names
- As noted previously in this article, the Communication Settings and Device Options will change dynamically depending on the above-mentioned Device Type Names
- Each interface, and therefore, each Till Extension will have different Device Options that are distinct to the interface
Transaction Queue
- Similar to Till Extensions, Transaction Queue Devices are commonly created and added for interface purposes meaning that the Device Options, Communication Settings, etc. will vary per interface instance
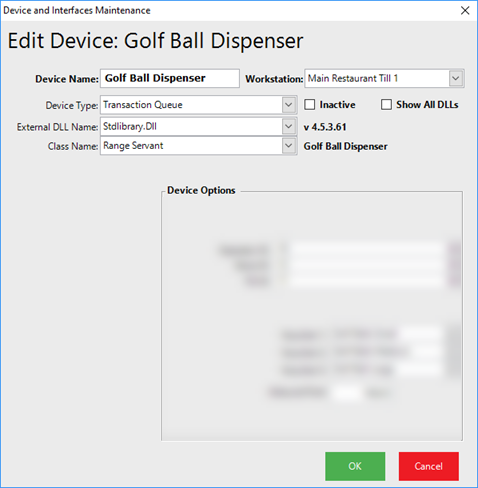
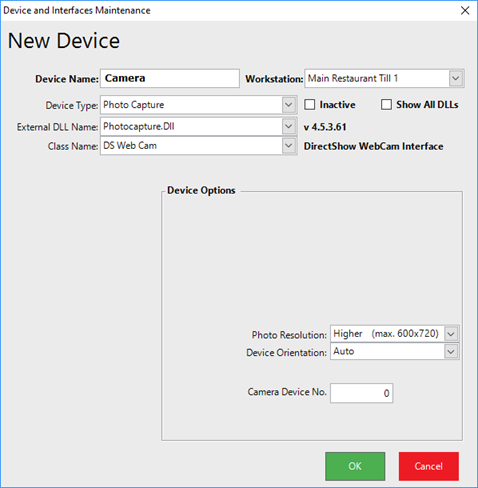
Photo Capture
- When being used, Photo Capture Devices (Web Cams) are created for physical Web Cams that are attached to Tills to allow Operators to take Member Photos to add to Accounts, Product images, etc.
- Currently, two (2) Class Names are supported: "Web Cam" & "DS Web Cam"
- The Device Options for both are very similar, with the DS having 2 additional options:
- Photo Resolution can be set to either "Low", "Medium" or "Higher" and will affect the resolution of the captured images
- This is limited by the camera used and will not produce high-resolution images from a low-resolution camera
- The Device Orientation controls the orientation of captured images; select from the following:
- Auto
- Portrait
- Portrait Flipped
- Landscape
- Landscape Flipped
- Enter the Camera Device Number when applicable