Till Function Maps & Till Functions

3 | Configuring Till Function Maps

This article covers an overview of the tools and features that can be used for configuring Till Function Maps in BackOffice. Each Till Function Map consists of multiple Till Function Panels which can be configured with the necessary Till Function buttons and mapped to one another as required. BackOffice provides a variety of options when configuring the look, layout, and mapping of Till Function Maps and Panels.

This article covers an overview of the tools and features that can be used for configuring Till Function Maps in BackOffice.

Each Till Function Map consists of multiple Till Function Panels which can be configured with the necessary Till Function buttons and mapped to one another as required.

BackOffice provides a variety of options when configuring the look, layout, and mapping of Till Function Maps and Panels.

Configurations such as Sizing, Functionality,  Color Schemes and Design can all be applied to Till Functions Maps.

Prerequisites 
  • To configure Till Function Maps, the following Operator Privileges will need to be enabled 
    • Operator Maintenance 'General' Tab
      • System Setup: "Maintain Till Function Maps" Flags
    • Operator Maintenance 'Maintenance' Tab
      • Operators: "View Operators" Flag 
      • Operators: "Edit Operators" Flag
    • Operator Maintenance 'Till Privileges' Tab
      • "Till Button Privileges" Flags

Configuring Till Function Maps 
  • Whether opening an existing Function Map or immediately after creating a new Function Map, the overall options/workflows for editing and maintaining a Function Map remains the same
  • Once the Function Map is opened, the name of the Function Map will be displayed on the actual tab itself as well as at the top of the tab in the Function Map Name field; use these to confirm that the correct Function Map has been opened for maintenance
  • There are two (2) configuration sections for Till Function Maps and they include Panel Settings and Button Settings
  • The Panel drop-down and Panel Settings will appear on the right side of the screen and allow for selecting the current Panel being maintained and will contain configuration options

  • On the left side of the screen, the  Button Settings section will change dynamically when a button in the current Panel is selected

    • The configuration options largely remain the same, however, the descriptions of what some of the options control will change depending on the Button's current Function and/or Sub-Function

  • Each Function Map can have many Panels which can be accessed from SmartPOS using Panel Selection Till Functions and other pre-defined Till Functions that have been built for accessing specific default Panels; e.g., there is a pre-defined Till Function that will open the Stock & Product Menu

  • Buttons are placed within Panels and are then configured to perform individual Till Functions

Panels and Settings
  • Panels contain a variety of Till Function Buttons which can then be added and edited to the Till Function Map 
  • There are a number of Panels that can be selected, each with its own set of Till Function Buttons  
  • Panels can be edited by using the drop-down menu and then selecting the desired Panel 
  • Selecting the Add New Panel button will display any default Panels that don't already exist in the current Function Map
    • New Panels can also be created by selecting the Enter Name Button 
  • To delete an active Panel on the current function map, simply select the Delete Panel Button
 

Configuration Option

Description 

Visuals (if applicable)

Draw Buttons Horizontally
  • Used to control whether Buttons on the Till Screen will be displayed horizontally or vertically
  • To have a double-size Button appear on the Till, two (2) Buttons that have been configured exactly the same must be next to each other on the Panel
    • If this flag is ENABLED: Buttons (that are configured the same) that are next to each other vertically will appear double-wide
    • If this flag is DISABLED: Buttons (that are configured the same) that are next to each other horizontally  will appear double-high

Buttons Wide & Buttons High
  • Sets the number of buttons that will be available horizontally & vertically on the respective Panel
    • E.g., If a Panel is configured with five (5) Buttons Wide three (3) Buttons High, there will be a total of fifteen (15)  buttons available on the Panel

Default Forecolor
  • Configures the default color font of the Buttons Text within the selected Panel
  • Individual Function Button Forecolors can be configured separately within these settings

Default Backcolor
  • Configures the default color of the Button's background within the Panel
  • Individual Function Button Back colors can be configured separately within these settings

==============TABLE====================


Buttons and Settings

  • To configure individual Function Buttons, they first need to be selected within the active Panel 
  • Once selected, the Function Button's current configuration will then be displayed in the Button Settings Section 
  • All fields within the Button Settings will remain the same, however, as explained further below, some of these will control different things depending on the Sub-Function


Buttons and Settings
  • To configure individual Function Buttons, they first need to be selected within the active Panel 
  • Once selected, the Function Button's current configuration will then be displayed in the Button Settings Section 
  • All fields within the Button Settings will remain the same, however, as explained further below, some of these will control different things depending on the Sub-Function
 

Configuration Option

Description

Visual/s (if applicable)

Button Text 
  • Enter the text into this field to be displayed on actual Till Function Button itself
 
Function drop-down
  • Provides a list of categories of Button Functions 
 
Sub-Function drop-down
  • After a Function has been selected, a Sub-Function can then be selected if applicable 
  • Information about that Sub-Function will be displayed below and will change dynamically for the selected Sub-Function 
    • Directly below the Sub-Function drop-down, a description and/or further information regarding the Sub-Function will be provided
    • The Item, SubItem, and Key may or may not be applicable to the selected Sub-Function, however, when these are applicable descriptions of how these fields can be used to affect the behavior of the Till Function Button will be shown

Find Function 
  • This Function will allow Operators to locate available Functions & Sub-Functions 
  • All of the Sub-Functions matching the search will be listed; from this window:
    • Select one of the Sub-Functions
    • Search again
    • Show Details of one of the Sub-Functions
    • Cancel

Item
  • As mentioned above, the behavior that this field controls (if any) will be displayed dynamically when a Sub-Function is selected
  • More often than not, this is a number-entry field and the number that is entered will determine a certain behavior when the Till Function Button is used in SmartPOS
  • For example, in the image to the right, if "2" is entered into the field, Costs will be included in the Monthly PLU Journal
  • If the Sub-Function's Item has multiple numbered options available, numbers can be added together to configure the multiple options to affect the Till Function's behavior
    • E.g., to attribute the behaviors of 1, 2, and 4: enter "7" into the field (1+2+4)
  • Alternatively, this field can sometimes be used to enter things such a Table Group ID, Account Group ID, Printer Type Number, etc. for controlling the Till Function's behavior

SubItem
  • The description of the Item field also applies to the SubItem field
 
Key
  • The description of the Item field also applies to the Key field
  • Alternatively, this field is sometimes used to enter the text that will be associated with the Till Function
 
Operator Privilege drop-down
  • This drop-down is used to select one of the system's Operator Privilege flags which each Operator may or may not have enabled
  • For example, if the Till Function Button is configured with Operator "Privilege Flag 1", only Operator with that Till Privilege flag enabled will be able to use the Till Function Button
  • Other Operator privilege flags such as "Manager Functions" and "Table  Sales"  are still necessary when applicable - this works as an and function with existing Operator privilege flags


"Manager Override OK" Flag
  • This determines whether an Operator without the required privilege flag be prompted to enter a Manager Override code - if this flag is enabled the prompt will appear
  • If this flag is disabled, the Function won't be accessible unless the logged-in Operator has the required privilege flag/s enabled

"No Manager Required" Flag
  • If this flag is enabled, then the Function Button does not require Manager Privileges 
  • For example, if a Till Function normally requires an Operator to have the "Manager Functions" privilege flag enabled for an individual Operator to perform the Function, enabling this flag will allow an Operator without that privilege to perform the Function
 
Forecolour 
  • This configures the color of the Button' s text/forecolor and will override the Panel Default
    • Click on the color rectangle to open a color-selection window
  • Alternatively, enable the Default Colour flag to use the Panel's Default Forecolour

Backcolour 
  • This configures the color of the Function Button's background and will override the Panel Default
    • Click on the color rectangle to open a color-selection window 
  • Alternatively, enable the Default Colour flag to use the Panels Default Backcolour

Please see above.

Font
  • This section allows Operators to configure the Font Format on Till Function Buttons
  • If configuring a Custom Font for this button as opposed to using a Default, a Font edit window can be opened to do so

Image Display Mode drop-down
  • For any Function Buttons that includes an Image/Icon, this configuration allows them to be displayed in a certain way such as: 
    • Scaled 
    • Non-Scaled
    • Icon Above 
    • Small Icon Above 
    • Icon Behind 
    • Icon Left 
  • Enabling the "Show Text with Image" flag will also display the Button Text in addition to the Image


Saving Maps 
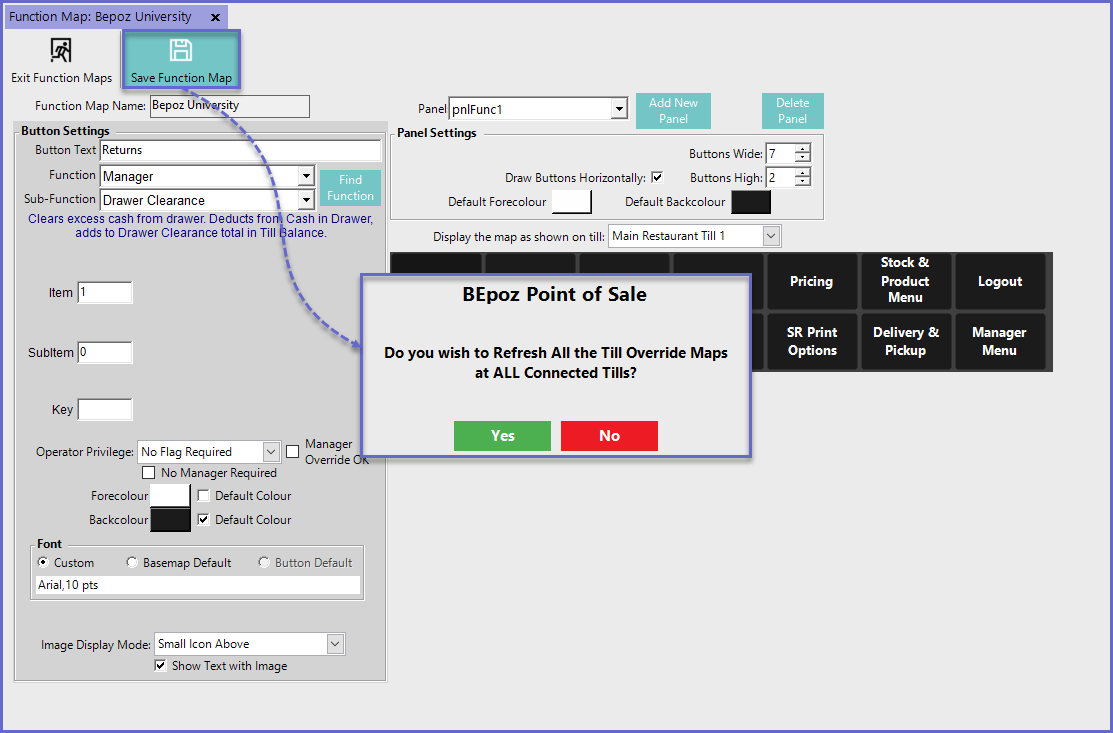
  • Till Function Maps can be saved by selecting the Save Function Map Button above the Tab
  • Override Maps that are connected to a Till will need to be refreshed and a Message Prompt will appear for the Operator to complete the Saving Process