Overview
This guide will take you through the steps in order to configure Tyro Pay At Table Emulator for Bepoz.
Prerequisites
Tyro Pay at Table Emulator
Tyro Emulator Setup
Download and Run the Tyro Pay at Table Emulator.exe
This should automatically specify your Desktop and self extract
Run the Tyro Emulator
The Utility should load with a default configs
Backoffice Setup Workstation Setup
Login to Backoffice
Navigate To System Setup -> Venue Stores and Till
Select the POS/Workstation
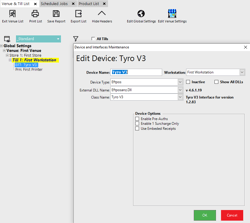
Add a New EFTPOS Device
DEVICE TYPE: EFTPOS
External DLL: Eftpossanz.dll
Class Name: Tyro V3
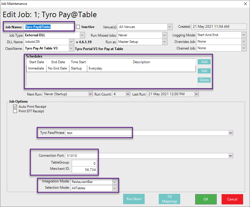
Backoffice Setup Schedule Job Setup
Navigate to System Setup -> Schedule Jobs
Create a New Job
Set the following:
Job a Name: Tyro Pay@Table
A Schedule: Run at Startup
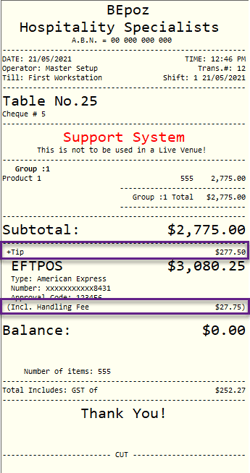
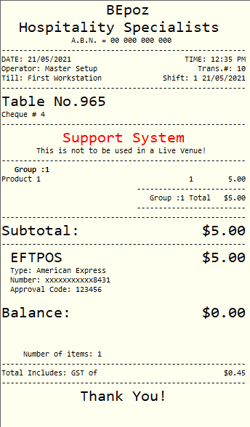
Auto Print Reciept
Tyro PassPhrase: test
Connection Port: 51010
TableGroup: 0
Merchant ID: 56734
Integration Mode: RestaurantBar
Selection Mode: AllTables
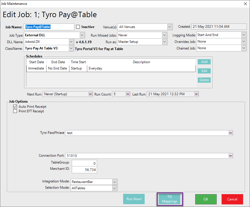
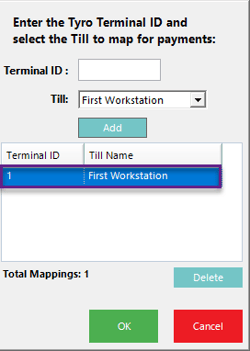
Till Mapping
Click the Till Mappings button
Enter 1 for Terminal ID:
Click Add
Click OK
Click OK again to Save the Schedule job
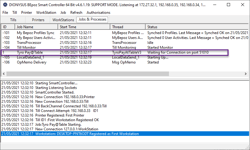
Restart Smartcontroller
Navigate to the Jobs & Processes Tab
Tyro Pay@Table should now be showing as Waiting for Connection
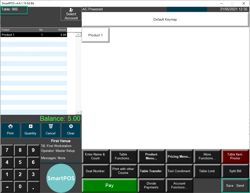
SmartPOS Test
Login to SmartPOS
Create a Table Transaction
Sell and Item
Save the Table
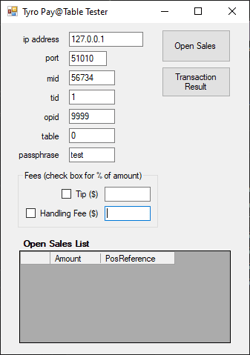
TyroPayAtTableTester
Open Sales, will bring back a List of all Open Tables
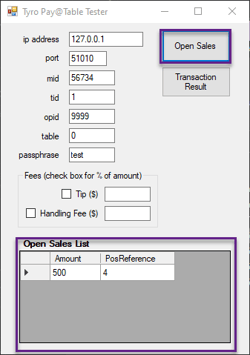
Highlight the Row (Table) you would like to Pay
Click Transaction Result
This will pay the table and print a Receipt if configured
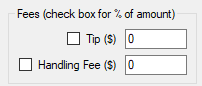
TyroPayAtTableTester Additional Options
You can specify Handling Fees and Tip amounts as % or $ amount before clicking the Transaction Result