
Overview
Lightyear receives some data from Bepoz by manually importing data, and it also sends data to Bepoz by creating a .csv file in a pre-defined format that you download from Lightyear.
This will be saved in a specific location for Bepoz to import.
Bepoz has a very intuitive import routine that allows you to:
Import multiple bills from multiple suppliers at once
Create new suppliers in Bepoz upon import - no need to have the Supplier in Bepoz prior to import.
Create new items in Bepoz upon import - no need to have the products already in Bepoz prior to import.
Prerequisites
Bepoz Version 4.6.x
Set-up in Bepoz
Firstly, in Bepoz, you will need to have the relevant supplier name and supplier number existing in back office setup. Please Refer to Bepoz Operation manual on how to setup suppliers.
Eg, Supplier ALM, Supplier Number 1234
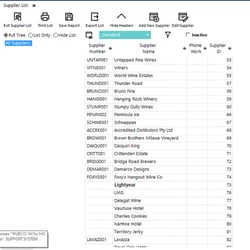
Next, you MUST create a supplier in Bepoz called Lightyear* without a supplier number. The screenshot below shows how you should have all your suppliers setup including Lightyear.
Set-up in Lightyear
Once you have completed the steps above you now need to create a list of your suppliers in Bepoz that you can upload to Lightyear.
This needs to be a 2-column format with both the Supplier Name AND the Supplier Number. Once you have the list, save it as a .csv file.
In Lightyear, choose Settings on the left-hand ribbon, then choose

and then choose Bepoz
Click on Supplier Cards > Setup
Click on Browse, find the .csv file you saved with the list of Supplier Names and Supplier Numbers and follow the prompts.
After import you should then have a list showing Supplier Name & Card ID
VERY IMPORTANT
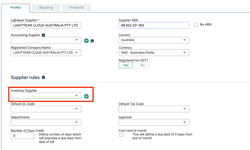
Note - it is very important that you associate each Supplier Card in Lightyear to an Inventory Supplier from the uploaded Bepoz list, allowing
Bepoz to recognise which supplier Lightyear is sending data to.
In Lightyear, on the left-hand ribbon choose

Select the supplier, then assign the Inventory Supplier from the drop-down list to it
DO NOT EXPORT TO BEPOZ WITHOUT A Supplier Card (BEPOZ) being assigned to a Supplier within Lightyear first.
Also, it should be noted that you do not need to assign a POS Code to items in Lightyear's Inventory tab as Bepoz will
recognise the product code and will associate with the correct product in Bepoz after import.
For more information on this please see the Completing details about a product prior exporting it here.
Adding Lightyear to supplier comms in Bepoz
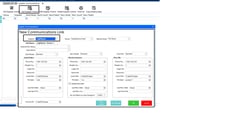
Under system setup you must click on supplier comms. Below is a sample image of what you should see appear.
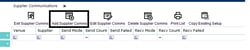
Click on Add Supplier Comms. A window will pop up called New Communication LINK.
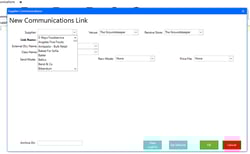
Select Lightyear from the Supplier drop-down. Once you have done so a box will appear.
Select Yes to set the defaults.
Link Name: this field will be generated automatically
External DLL Name: select .dll.
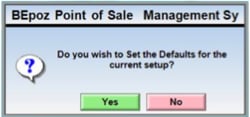
Once you have done so, the following prompt will appear
Once again, select Yes to set the defaults and continue.
Class Name: select Lightyear, then the following prompt will appear.
Once again, click Yes to continue.
Venue: this is only for multi-venue use. If you have a multi venue set-up please select the venue that Lightyear will be using.
If you are running a multi-venue database, and you wish for separate Lightyear accounts to write/connect to each of those
venues you will need to set up a separate supplier comms for each Bepoz venue.
Received store: This is your default inward store for stock.
Once you have gone though these steps above you should see a setup that is similar to the below.
Set-up is now complete.
Please note, when the Supplier Comm is setup the Local Path name is automatically generated by Bepoz. For example, if Bepoz is installed on C:\\ then the path name will be C:\\Bepoz\\data\\Lightyear*\\import
Importing into Bepoz from Lightyear
When you click the Export button from the Lightyear inventory tab, one single file will be created by Lightyear. You should save that file in BEpoz\\Data\\Lightyear*\\import directory.
Once you have saved the file there you will be able to import into BEpoz BackOffice:
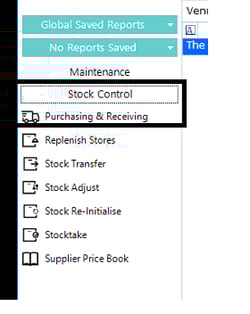
In BEpoz Back Office you will need to select Stock Control, then click on Purchasing and Receiving.
The following window will appear. To the right of the screen you will see Receive Invoices.
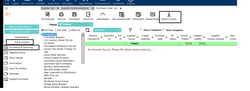
Important! - Highlight Lightyear* in the Supplier list before you click Receive Invoices.
Once you have selected Lightyear, click on Receive Invoices. The following window will appear.
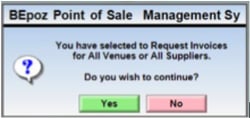
Click Yes to continue.
You will now see the invoices that were saved in the directory will begin to import into Bepoz BackOffice.
The invoices will import via the Lightyear* supplier you set up, but will automatically be assigned to each supplier according to the Supplier Card matching that you have assigned within Lightyear.