
Once you are logged in the first page you will see is the orders board. This board is displayed in four columns as follows: SCHEDULED ORDERS PREPARING EN ROUTE / READY TO COLLECT DELIVERED / COLLECTED Display future orders.
| SCHEDULED ORDERS | PREPARING | EN ROUTE / READY TO COLLECT | DELIVERED / COLLECTED |
| Display future orders. Once it’s time to start preparing this order, it will be automatically moved to the ‘Preparing’ column. |
Display orders that are being made, cooked, assembled and/or packaged.
|
Display orders
that are ready for the delivery driver or patron to pick up from the collection point/service area.
After the preset number of minutes in this column (as configured in Admin Backpanel), the customer will receive an SMS (or email in some cases if these notifications are enabled).
*You can return the order to preparing within the allocated minutes so that the notification will not be sent to the customer when
notifications are otherwise enabled
|
Display orders that are complete and collected by customer
|
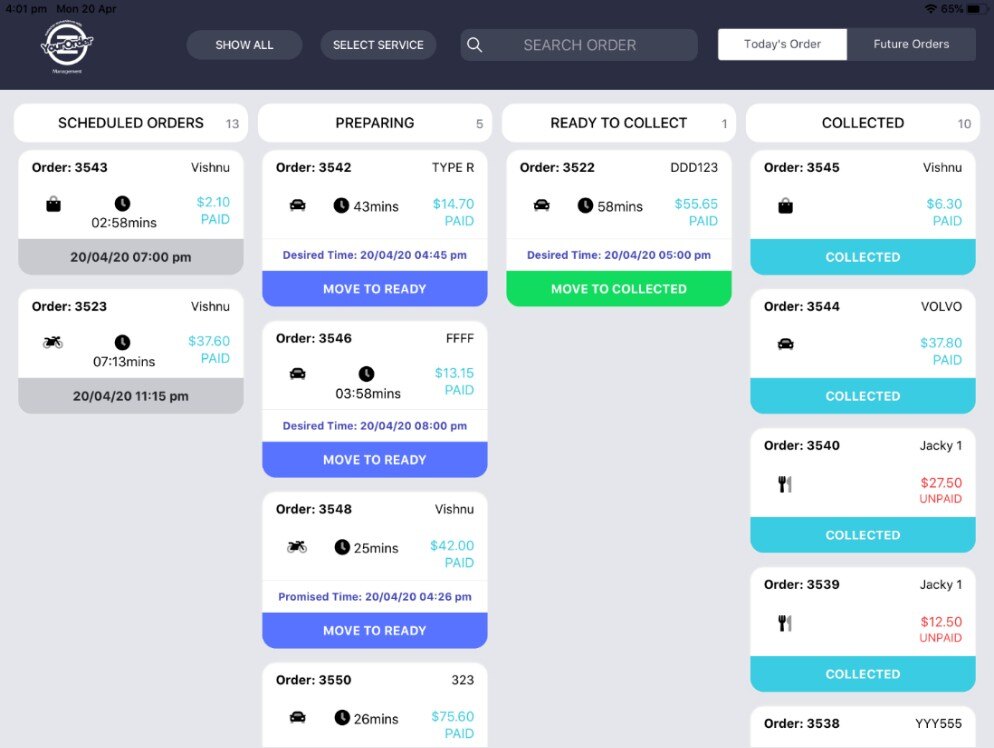
Board Header

(1) Settings/Dashboard – Tap on the YourOrder icon to access the settings page.
(2) Service Selection – By tapping the SELECT SERVICE button you can filter the orders by service type (Dine In, Pickup by Counter, Pickup by Car or Delivery). The SHOW ALL button will clear the filters and display all service types.
(3) Search – Enter the order details to search. (Order Number, Car Registration Number, Mobile Phone Number, First Name, etc.)
(4) Today’s Order – Is the default view, which display todays orders, and the Preparing, En Route/Ready to Collect and Delivered/Collected columns.
PLEASE NOTE: Orders will be emptied at the start of the next day. You can search old orders on the search section, inside the Settings/Dashboard page.
(5) Future Orders – Tap the Future Orders button to see future orders (scheduled for tomorrow onward).
Board Order Card

(1) Order Number – Displays the order number.
(2) Name/REGO – If service mode is Pickup by Car, this field displays the vehicle registration number related to this order. Otherwise, this field displays the name of the patron on this order.
(3) Service Mode
![]() Dine In
Dine In
![]() Pickup by Counter
Pickup by Counter
![]() Pickup by Car
Pickup by Car
![]() Delivery
Delivery
(4) Payment – This field displays the total order amount on top and if order was paid in advance or not underneath. If PAID text displays, it means the order was paid for at order checkout. If UNPAID text displays, it means the order was not paid for at order checkout.
(5) Card Action – Tap the Future Orders button to see future orders (scheduled for tomorrow onward).
| Column | Appearance | Action |
| SCHEDULED ORDERS | DATE & TIME | Informative only. Display expected time order is received by customer |
| PREPARING |
MOVE TO READY TO COLLECT MOVE TO SERVE MOVE TO EN ROUTE |
Press and drag this tab over to the next column to move the card to the En Route/Ready to Collect/Serve queue. |
|
EN ROUTE / READY TO COLLECT/ READY TO SERVE |
MOVE TO COLLECTED MOVE TO SERVED MOVE TO DELIVERED | Press and drag this tab over to the next column to move the card to Delivered/Collected/Served area. |
| Column | Appearance | Action |
| DELIVERED/ COLLECTED/ SERVED | COLLECTED SERVED DELIVERED | Informative only. Display orders marked as completed (“Collected” or “Delivered”). |
(6) Time – Display time remaining until customer expects to receive order (or first available estimate based on time customer placed order).
(7) Drag & Drop – Tap here (on the coloured part of the card) to drag and drop and move the card to a different column.
(*) Order Details – Tap on the card to see full order details. (more information below)
Order Details
By tapping on the order card, you will be able to see full order details as below.

(1) Promised Time – This is the date and time selected by the end customer for scheduled orders or the estimated time for ASAP orders.
(2) Order Items – Lists the items on this order, their quantities and prices. In addition, the total price and total Product Tax, GST or VAT included in this order are displayed.
(3) Contact Number – Display the contact mobile phone number for this order.
(4) Order Comments and Notes – Display the customer’s additional requests/order comments.
(5) Address – If order is for delivery, this field displays the delivery address related to this order.
(6) Refund – Button displays above the order status tab so that staff can initiate a refund for the order on behalf of the business or customer.
PLEASE NOTE:
- In versions: v2.7.0.177 or above, whenever an order is manually moved from the scheduled order column to another section, the order's status will be updated to exported in the backpanel.
For example, if a customer has made an order for 5pm but wants to pick it up at 4pm and the staff manually moves this order from the scheduled orders section to preparing at 2.30pm, then the order will update in the backpanel and display that it has exported to Bepoz at 2:30pm.
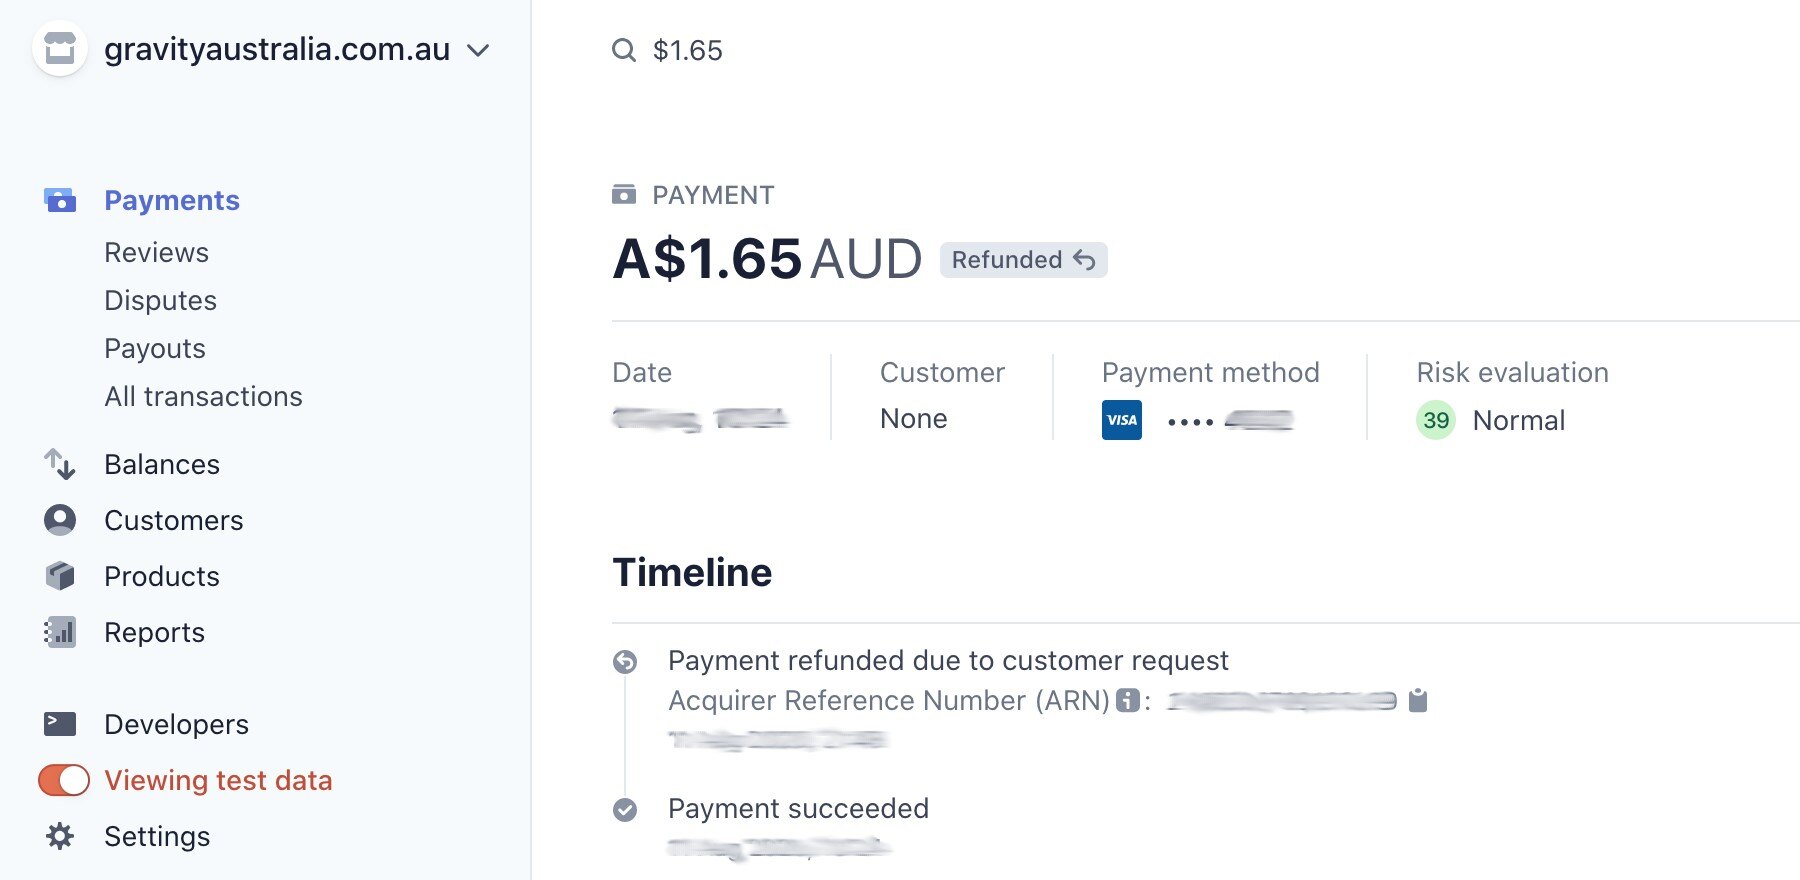
Refund
Pressing on the refund button enables staff to process refunds back to the customer via Stripe and the stock back to BEPOZ if requested (e.g, if refund due to insufficient stock). When the operator presses the Refund button on the order card they will be taken to the Refund & Comp screen where type of refund, reason and comment should be provided for traceability.

In the first available section, there are two refund options presented to the operator: ‘Refund’ (standard) and ‘Comp’ (complete).

These options function as follows:
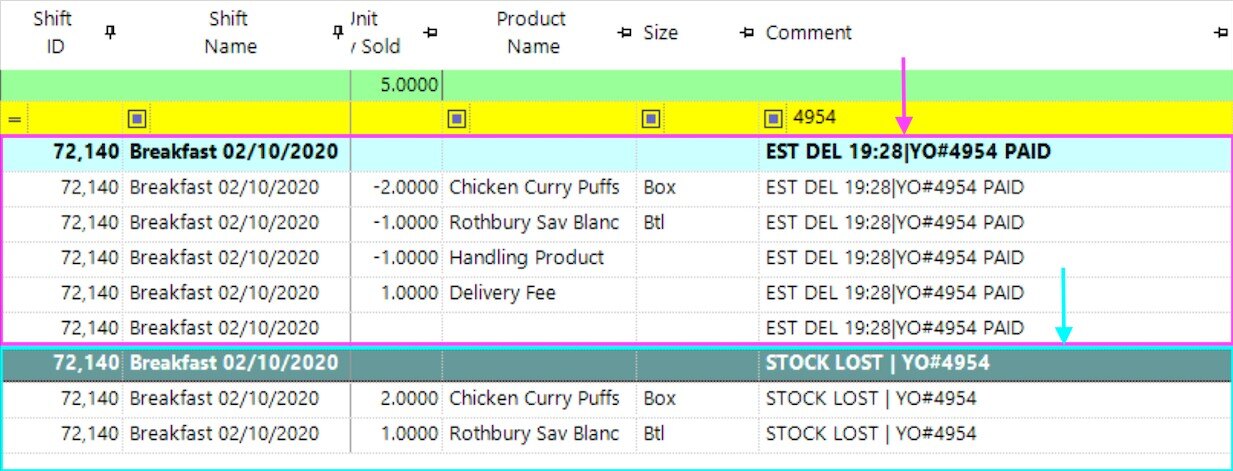
- Refund - selected by default, generates a refund in Stripe which returns money back to the customer’s credit card, stock stays deducted in YourOrder and BEPOZ, and a refund is added to the report in BEPOZ. This is best used in instances where ingredients were lost as items were already prepared. Note, for the correct figures to be reported in BEPOZ, the operator should enter a new transaction with any negative quantities for stock that wasn’t lost at the BEPOZ Point of Sale
- Comp – short for ‘Complete, also returns money back to the customer’s credit card and adds the refund into BEPOZ but this time since the food wasn’t yet prepared, a restock request was sent to BEPOZ to return the ingredients back to their original stock level
Scrolling down to next section allows the operator to pick a reason for actioning the refund.

The member of staff may elect to press one of the quick comments as justification for the refund, e.g ‘other’ should be selected so that that button turns blue if refund wasn’t due to ‘out of stock’, ‘customer request’ or ‘poor quality’. The comment box underneath the buttons should be tapped once to popup the onscreen keyboard and add any additional justification before the user scrolls to the next section.
Tapping on the ‘Complete Refund’ button and the additional prompt(s) that display triggers the refund. Conversely ‘Cancel’ may be selected if there’s a change of heart.


Completed Refund:
Restock Request displays as Yes (in pink above) only if a ‘Complete’ refund was issued
BEPOZ - Refund and Restock Transaction (for COMP)
PLEASE NOTE:
- Partial refunds are not currently supported. If a partial refund is required then the refund should be initiated in BEPOZ (and/or Stripe).