This article serves as a "cheat sheet" for many common processes and procedures related to QSR.
This article serves as a "cheat sheet" for many common processes and procedures related to QSR.Prerequisites
- A minimum Bepoz version of 4.6 is required for this functionality
- To access KDS features and configuration options in BackOffice, the following Operator Privileges will need to be enabled
-
Operator Maintenance 'General' Tab - System Setup: "Access Venue, Stores & Tills" Flag
- System Setup: "Maintain Venue, Stores & Tills" Flag
- System Setup: "Maintain Till Function Maps" Flag
-
Operator Maintenance 'Maintenance' Tab - Products: "View Products" Flag
- Products: "Edit Products" Flag
Operation Period for Reporting
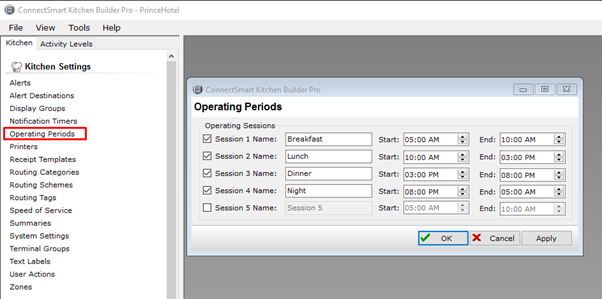
- These will need to match with Bepoz Periods
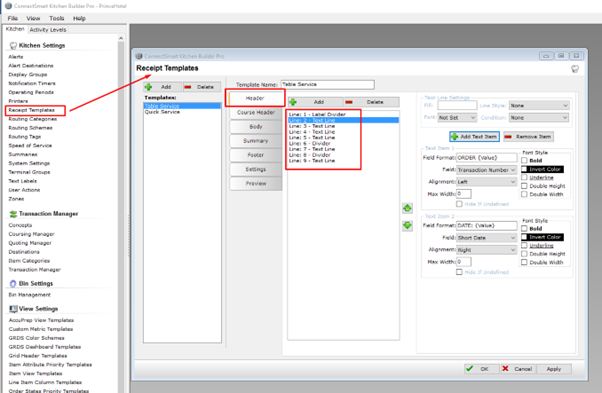
Receipt Template
- This is a printer format
- When you bump the order from the pass screen a (CHIT) receipt can print out
- You can select what will show; some examples can be:
- Operator Name
- Till ID
- Comments
- Transaction Number
- Table Number
- Time
- Customer Name
- Course Number
- And More
Routing Categories
- This is where we link the Bepoz and QSR; where we route the Products and select where they should print
- The following below is how it's mapped:
- Department Number – this is mapped back to Bepoz Printer Profile
- e.g.: as in the below image
- Grill links to Printer Profile 44 in Bepoz – if there is more than 1 Printer Profile to link, use a symbol , to add additional between each Printer Profile
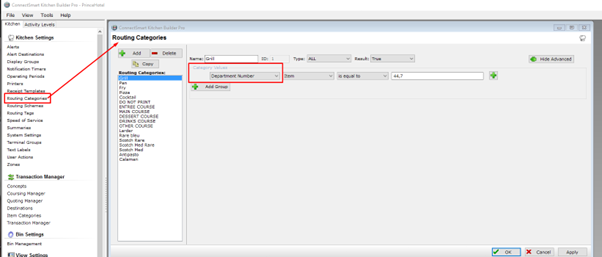
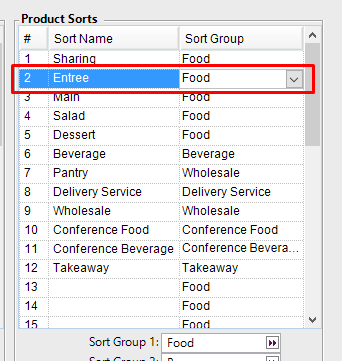
- Item Categories – this is linked to the Course Sort number in Bepoz
- Please take note that in Bepoz we start from 0 in our Sort list, so if you want to link Entrée it would link as 1 in QSR even though its 2 in Bepoz
- Item ID – this can be used as a demand counter
- This can be used for a summary screen on a prep station to have a quick link to what is coming up
- More details are below as this requires Bin Management and GRDS Dash Board Templates
- You also do have the default Summaries you can link within QSR but this can be confusing if you have a sale like the one below:
- 1 x 200g Rump, Rare, Chips and Salad
- On the Grill, the default will display as:
- 1 x 200g Rump
- 1 x Rare
- This will not display on the same line combined, hence why we need to use Bin Management
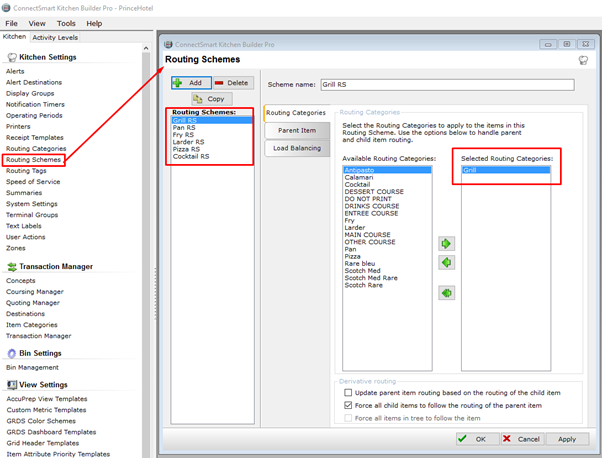
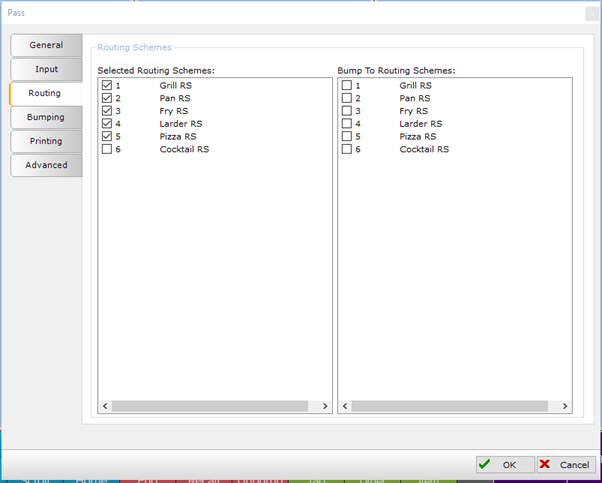
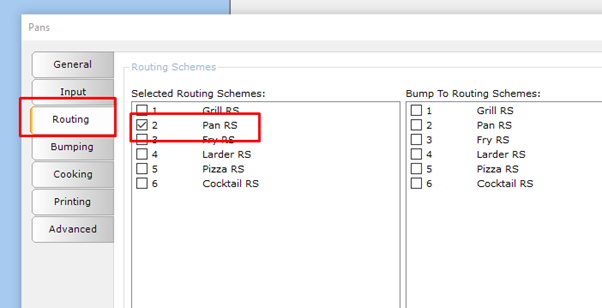
Routing Schemes
- This is where you select the Routing Categories to display on which screens
- Under Routing Schemes, you add each screen name
- Then on the selected routing categories, you allocate the available routing categories to show on this screen
Derivative Routing
- Selecting "Force all child items to follow the routing of the parents' item" will display the condiments as well on the same QSR Prep Screen
- This is where the Rare of a steak will show on the same line
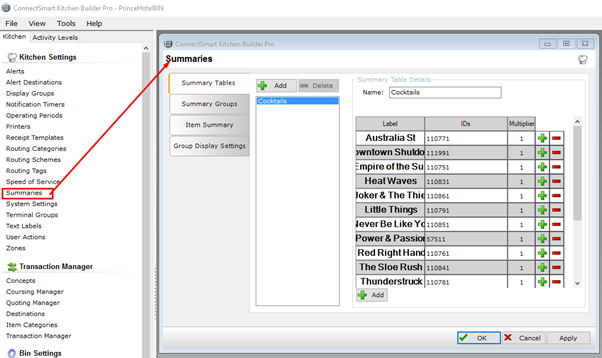
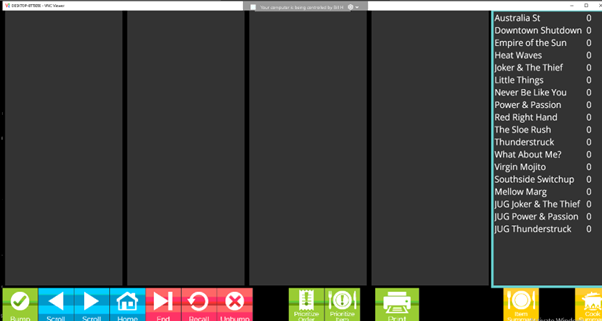
Summaries
- This is 1 type of Summaries used on a touch screen
- This can be placed on the right-hand side as a fixed column to show you the total per item
- Below is how you would setup cocktail summaries (keep in mind this will not show any condiments or comments, so it's used for items that will not change and on touch screen version only)
- Label - the Label can be different to Bepoz
- ID - this is the Bepoz ID; e.g., Australian ID is 11077 then the last digit is the size
- This must be entered so the right size can be displayed
- Even if its 1 size this is still added to each ID area within QSR ALWAYS
- Australia Cocktail – 110771 Size 1 sold in Bepoz = 110771 will be the QSR ID Code
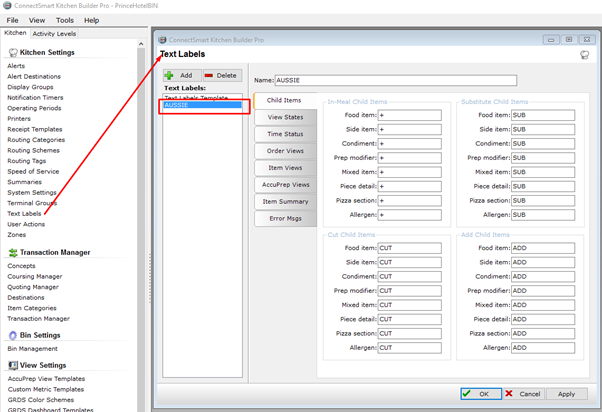
Text Labels
- This is where you can translate American nomenclature to Australian nomenclature
- Always use an existing database so the settings are done and minor adjustments are required for deployment
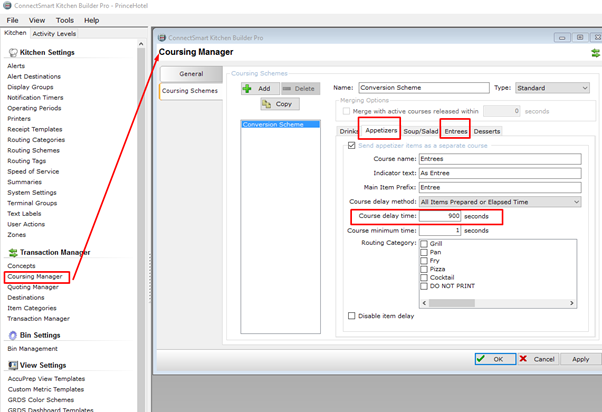
Coursing Management
- This is where you can select the delay in showing the items on QSR depending on the course
- Be aware, the nomenclature is American:
- Appetizer = Entrée
- Entrée = Mains
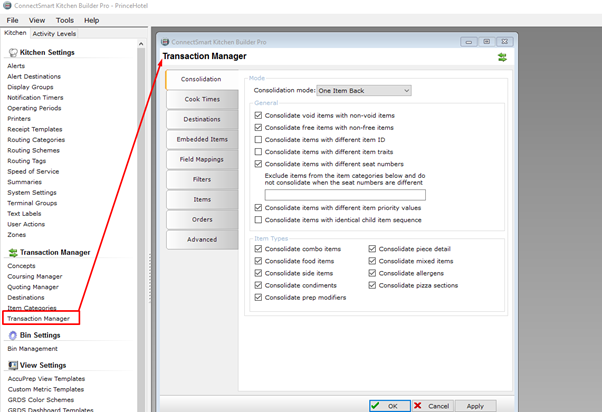
Transaction Manager
- This is where you can identify how the transaction bundles and works within QSR
- The system has been set up as below as this is the best solution for Australian venues
- Changes can be made but must be tested depending on customer requirements
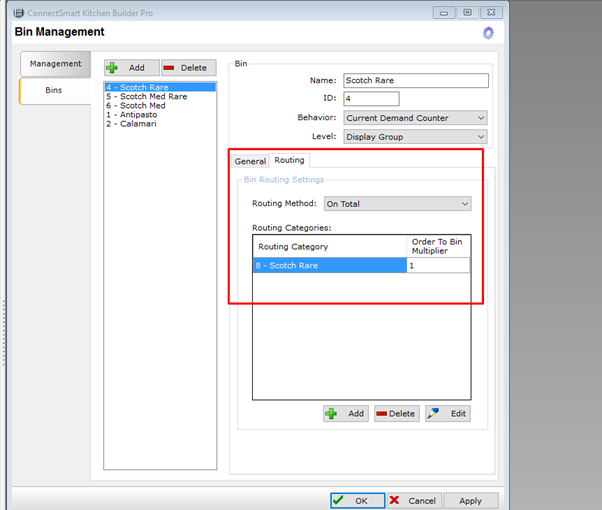
Bin Management
- This is where you can create customised demand counter lists for line display views
- The line display view is the bump pads with monitors
- As this is non-touch you create a Special View that you change to show the customised Demand Counter
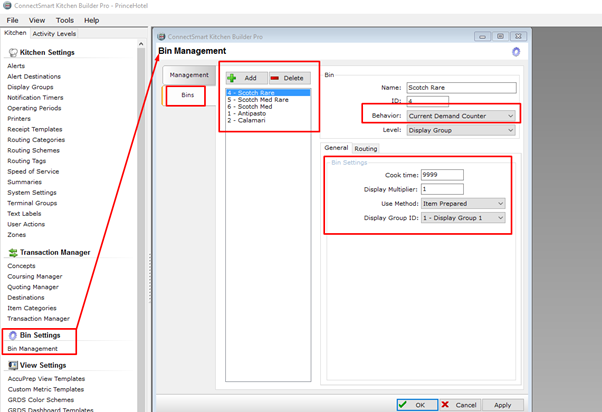
- Create the Routing Categories first then select each type as below; the Multiplier can be increased if you wish
- E.g.: Chips can be 1 for 1 value, but if you link multiple IDs you can have the following:
- Small – 1 Mulitplier
- Medium = 1.5
- Large = 2
- In the Routing Categories is where you will add each Bepoz Product ID including the size as displayed above
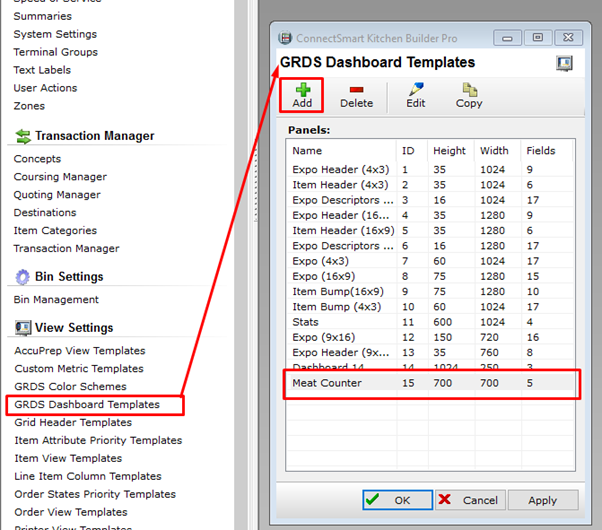
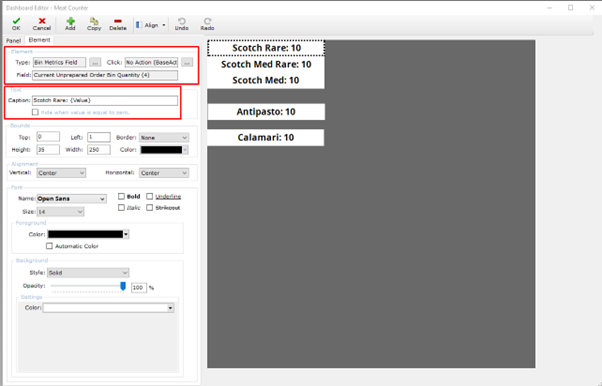
- When you have the Routing Categories and Bin Management created, you then create the dashboard as shown below
- Height and Width are depended on the screen the venue uses
- Make this the right width and height otherwise, it will not allow you to add to the dashboard screen before you add each label type as shown below
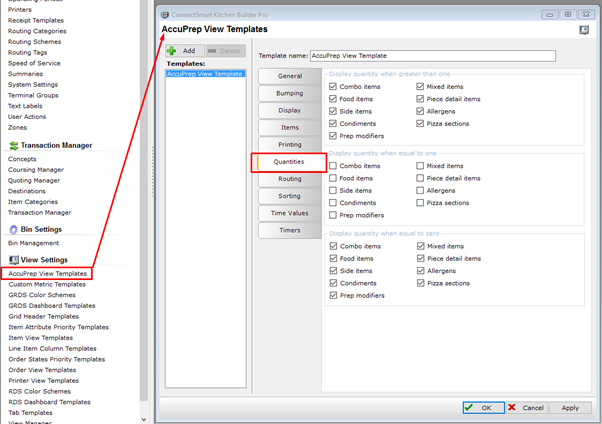
AccuPrep View Template
- This is for the touch screens and how the data is shown
- Again using an existing database will have these configured, and make minor changes as required
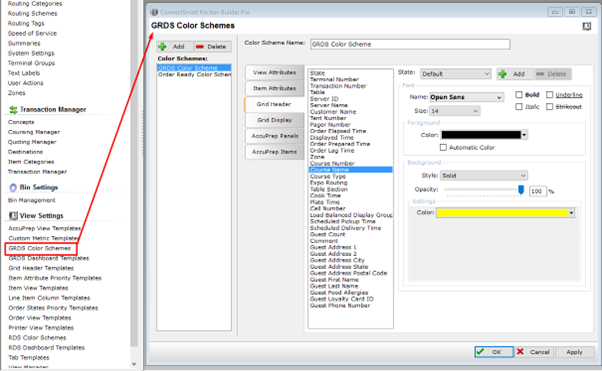
GRDS Color Scheme
- This is again preconfigured
- This is the section where you can coordinate the colour displayed on the Pass Touch and Bump View Screens
- The current defaults when using Feros Prince and others will be as follows (this is under Grid Display)

- Purple – New Order
- Orange – Item Cooking
- Green – Item Bumped from prep screen
- Red – Priority or Rush item
- Again try not to change so support can be managed easier
- Train the customer on the colour codes
Grid Header
- This is the Pass colour codes
- As above, the Receipt Template will show as seen below and then you can highlight and make certain fields pop so they know what they are looking for
- E.g.: Course Name can highlight in Yellow if the venue needs to return the buzzer back if Entrée is served first
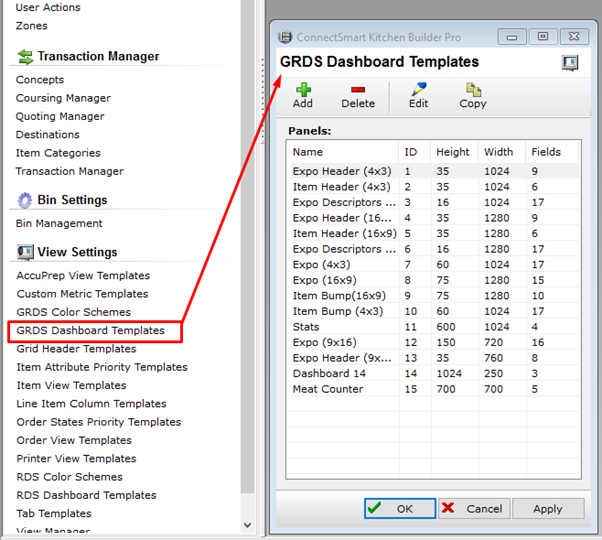
GRDS Dashboard Templates
- This is where you can adjust what is displayed, what functions to show and how the layout looks
- See the screenshots below of how the screens can be viewed
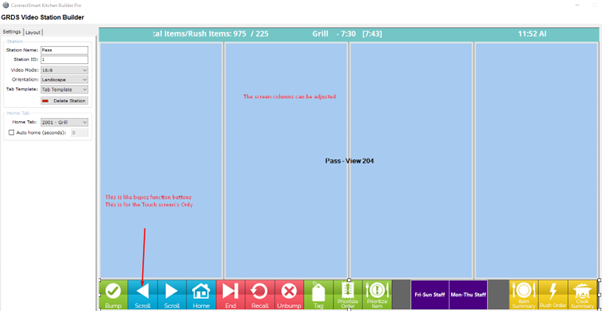
- Right-clicking on the screen is where you apply the following:
- Routing – Select Routing Schemes; this allows you to select what items will show on the Pass screen
- The pass will show all kitchen items as shown below
- Bumping – This allows you to auto-bump on a duplicate screen if you have 2 pass screens set up and configured
- You will need to do the same on each screen so they can be in sync with each other
- Printing – This is where you can select the printer to print the CHIT receipt once bumped from the pass so the staff can take the docket with them
- General - This is where the below options are:
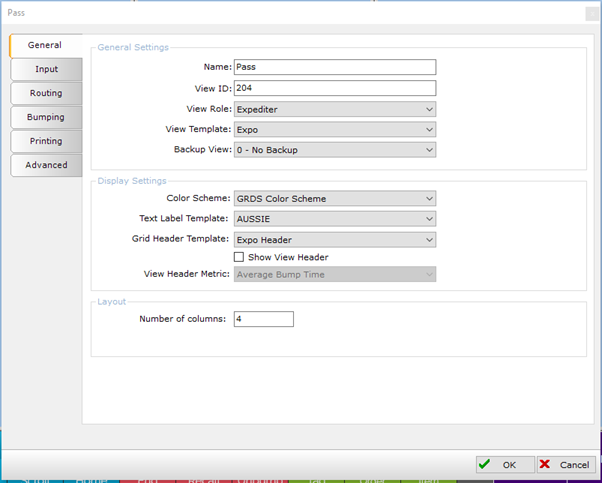
- Single-line prep screens will look like below
- They can be landscape or Portrait view
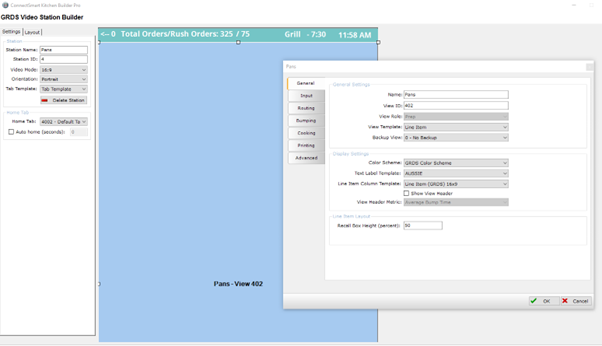
- Routing – This will only be the items you want to show on this screen
- If you had a burger section where you pass the items down the line, this is where you can allocate the item to bump off the screen and display on the next screen for the salads etc. to be added
- Under the Bumping Tab you select where you want to go next
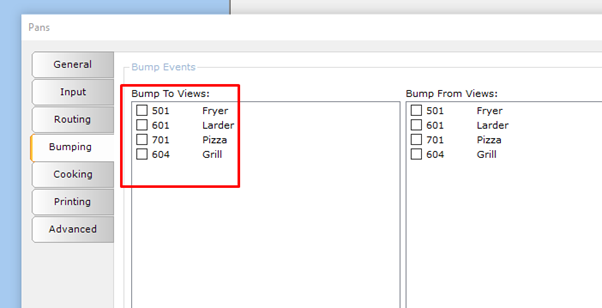
- In a live environment, you could have the following:
- Grill to start if a steak sandwich
- Bump to Fryer for onion rings add
- Bump to Larder for salad add
- Bump from Larder and Pass screen will show Green colour ready to server
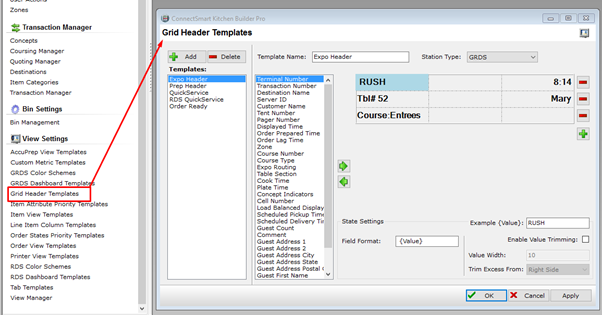
Grid Header Template
- This is where you edit the fields displayed on the Expo (Pass Screen)
- As you can see below, you add a field and select the field detail to display
- GRDS Colour scheme is where you will need to go back to adjust the colour mode display
- Below is just the data to display:
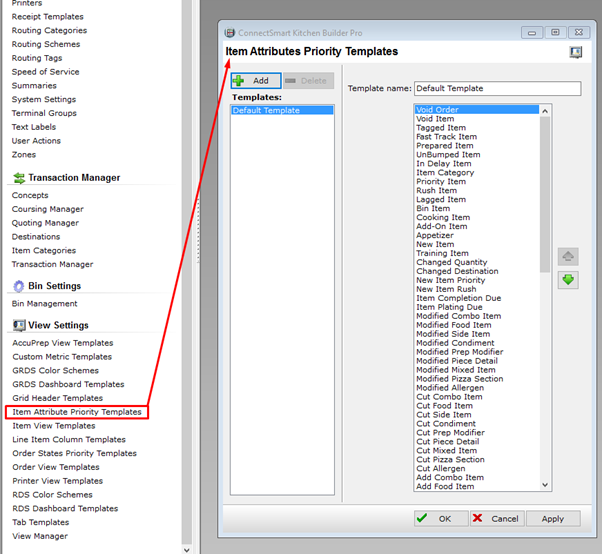
Item Attributes Priority Template
- This is where QSR will determine when and what will be triggered
- This has been set as a default as below, but think of it as the Void item is above fast-tracked
- If you have a fast-tracked item and void on the same screen, the Void colour scheme will come into play
- You will not have both shown at the same time
Item View Template / Order View Template
- Item is for the Line Prep Screens
- Order is for the Touch screens
- Same as the Coursing Manager, but this is where you allocate the warning and rush times
- The rest are defaults but can be adjusted as required
- Entrée = Mains
- Below is set for 1920sec for Priority and 2100 sec for rush
- This can be set as per venue requirements
- This determines when the system notifies the Chef/Cook that the item is about to hit a warning as you are falling behind
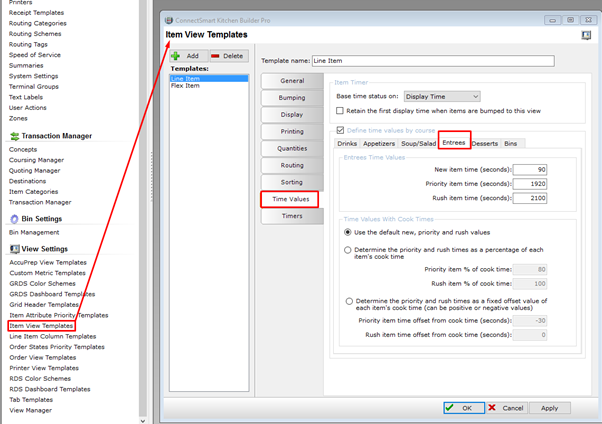
- Other options in this area need to be played with for understanding
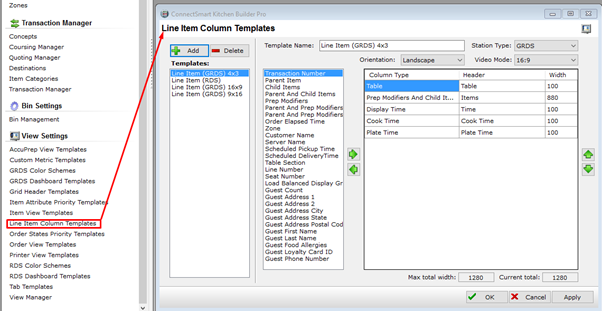
Line Item Column Template
- This is where you can display what the first line of the prep screen information will be shown
- Below is an example:

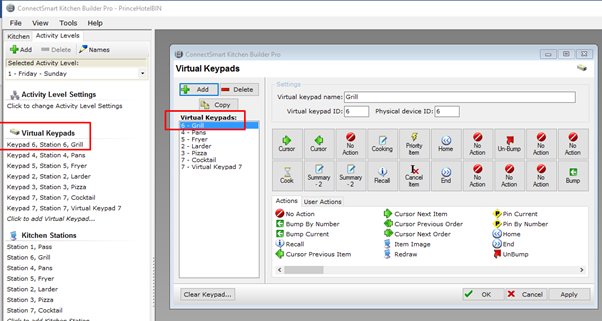
Virtual Keypads
- This can be found under 'Activity Levels'
- Below is where you can create the bump pads
- These are Bepoz Function buttons for non-touchscreen QSR
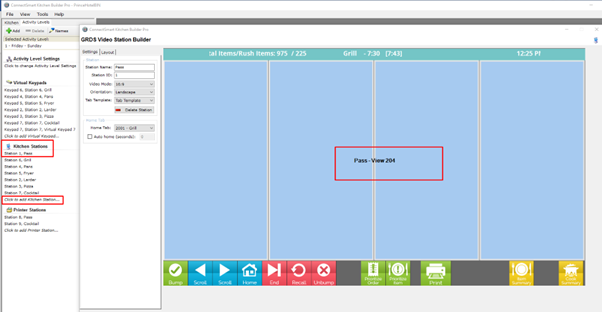
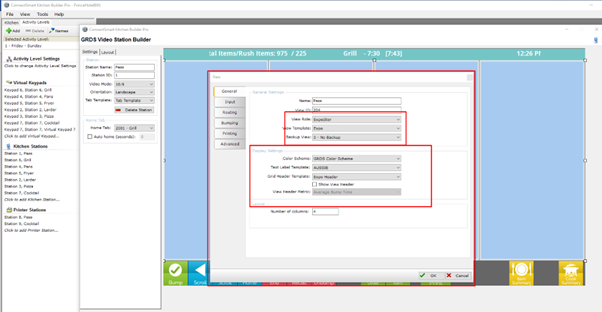
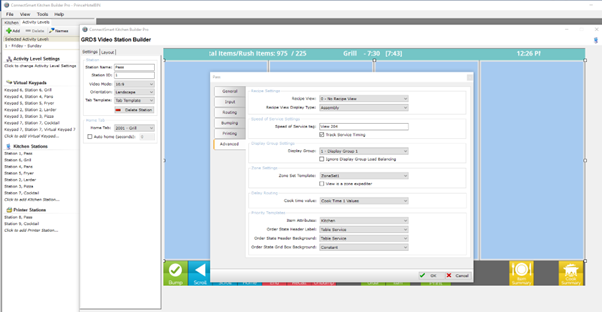
Kitchen Station
- This is where you add the Kitchen screens and configure the settings to display
- Each screen requires the kitchen display to be created and configured
- Settings are below for reference:
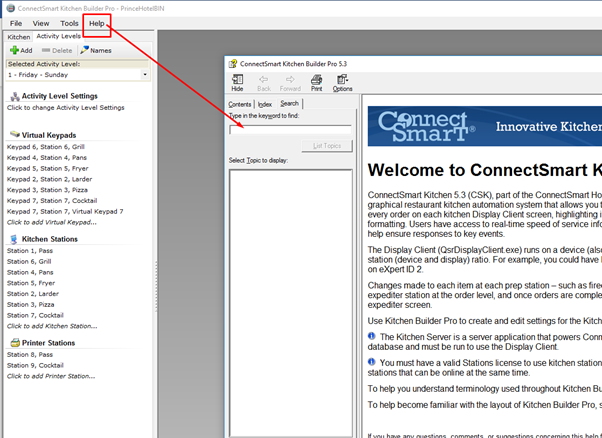
Help
- This is where you can search how-to functions
- You will need to search and type QSR terminology to get the right answers