- INTERNAL - Bepoz Help Guides
- End-User | Stock Control
- Internal Stock Movements
-
End-User | Products & SmartPOS
-
End-User | Stock Control
-
End-User | Table Service and Kitchen Operations
-
End-User | Pricing, Marketing, Promotions & Accounts
- Prize Promotions
- Points, Points Profiles and Loyalty
- Product Promotions
- Repricing & Discounts in SmartPOS
- Vouchers
- Account Till Functions
- Pricing, Price Numbers and Price Modes
- Raffles & Draws
- Marketing Reports
- Accounts and Account Profiles
- Rewards
- SmartPOS Account Functions
- Troubleshooting
- Product Labels
- Packing Slips
-
End-User | System Setup & Admin
-
End-User | Reporting, Data Analysis & Security
-
End-User | Membership & Scheduled Billing
-
End-User | Operators, Operator Permissions & Clocking
-
Interfaces | Data Send Interfaces
-
Interfaces | EFTPOS & Payments
- NZ EFTPOS Interfaces
- Linkly (Formerly PC-EFTPOS)
- Adyen
- Tyro
- ANZ BladePay
- Stripe
- Windcave (Formerly Payment Express)
- Albert EFTPOS
- Westpac Presto (Formerly Assembly Payments)
- Unicard
- Manager Cards External Payment
- Pocket Voucher
- OneTab
- Clipp
- eConnect-eConduit
- Verifone
- AXEPT
- DPS
- Liven
- Singapore eWallet
- Mercury Payments TRANSENTRY
- Ingenico
- Quest
- Oolio - wPay
-
Interfaces | SMS & Messaging
-
Interfaces | Product, Pricing, Marketing & Promotions
- Metcash Loyalty
- Range Servant
- ILG Pricebook & Promotions
- Oolio Order Manager Integration
- Ubiquiti
- Product Level Blocking
- BidFood Integration
- LMG
- Metcash/IBA E-Commerce Marketplace
- McWilliams
- Thirsty Camel Hump Club
- LMG Loyalty (Zen Global)
- Doshii Integration
- Impact Data
- Marsello
- IBA Data Import
- Materials Control
- Last Yard
- Bepoz Standard Transaction Import
-
Interfaces | Printing & KDS
-
Interfaces | Reservation & Bookings
-
Interfaces | Database, Reporting, ERP & BI
-
Interfaces | CALink, Accounts & Gaming
- EBET Interface
- Clubs Online Interface
- Konami Interface
- WIN Gaming Interface
- Aristocrat Interface
- Bally Interface
- WorldSmart's SmartRetail Loyalty
- Flexinet & Flexinet SP Interfaces
- Aura Interface
- MiClub Interface
- Max Gaming Interface
- Utopia Gaming Interface
- Compass Interface
- IGT & IGT Casino Interface
- MGT Gaming Interface
- System Express
- Aristocrat nConnect Interface
- GCS Interface
- Maxetag Interface
- Dacom 5000E Interface
- InnTouch Interface
- Generic & Misc. CALink
-
Interfaces | Miscellaneous Interfaces/Integrations
-
Interfaces | Property & Room Management
-
Interfaces | Online Ordering & Delivery
-
Interfaces | Purchasing, Accounting & Supplier Comms
-
SmartPOS | Mobile App
-
SmartPDE | SmartPDE 32
-
SmartPDE | Denso PDE
-
SmartPDE | SmartPDE Mobile App
-
MyPlace
-
MyPlace | myPLACE Lite
-
MyPlace | Backpanel User Guides
- Bepoz Price Promotions
- What's on, Events and tickets
- Staff
- System Settings | Operational Settings
- Vouchers & Gift Certificates
- Member Onboarding
- Members and memberships
- System Settings | System Setup
- Reports and Reporting
- Actions
- Offers | Promotions
- Messaging & Notifications
- System Settings | App Config
- Surveys
- Games
- User Feedback
- Stamp Cards
-
MyPlace | Integrations
-
MyPlace | FAQ's & How-2's
-
MyPlace | Release Notes
-
YourOrder
-
YourOrders | Backpanel User Guides
-
YourOrders | YourOrder Kiosk User Guide
-
YourOrders | Merchant App User Guide
-
WebAddons
-
Installation / System Setup Guides
- SmartPOS Mobile App | Setup
- SmartPOS Mobile App | SmartAPI Host Setup
- SmartPOS Mobile App | BackOffice Setup
- SmartPOS Mobile App | Pay@Table setup
- SmartKDS Setup 4.7.2.7 +
- SmartKDS Setup 4.6.x
- SQL Installations
- Server / BackOffice Installation
- New Database Creation
- Multivenue Setup & Config.
- SmartPOS
- SmartPDE
- Player Elite Interface | Rest API
- Interface Setups
- Import
- KDSLink
- Snapshots
- Custom Interface Setups
-
HOW-2
- Product Maintenance
- Sales and Transaction Reporting
- SmartPOS General
- Printing and Printing Profiles
- SQL
- Repricing & Discounts
- Stock Control
- Membership
- Accounts and Account Profiles
- Miscellaneous
- Scheduled Jobs Setups
- Backoffice General
- Purchasing and Receiving
- Database.exe
- EFTPOS
- System Setup
- Custom Support Tools
-
Troubleshooting
-
Hardware
14 | "Restock" & "Stock Transfer" Till Functions
This article covers an overview of the "Restock" "Stock Transfer" Functions and how it is used within SmartPOS. The Restock function allows an authorized Operator to enter Product Restocks from SmartPOS Workstations. The Stock Transfer Function is very similar to the Restock function.
This article covers an overview of the "Restock" & "Stock Transfer" Functions and how it is used within SmartPOS.
The Restock function allows an authorized Operator to enter Product Restocks from SmartPOS Workstations.
The Stock Transfer Function is very similar to the Restock function.
The key difference is that for a Restock, the To Venue and the To Store are preset to be the Workstation's Local Store; for a Stock Transfer, the Operator can select any To Store and any From Store that they have access to.
This function is used to Transfer Stock from the Local Store to another Store rather than to receive Stock to the Local Store.
Prerequisite
- To access Product and Stock Control Features, the applicable Operator Privileges
-
Operator Maintenance 'Till Privileges' Tab - General: "Operate Tills" Flag
- General: "Stock Functions at Till" Flag
- An Operator must have the correct privilege flags enabled to be authorized to complete a Restock procedure via SmartPOS
Restock
Creating Restock Transaction
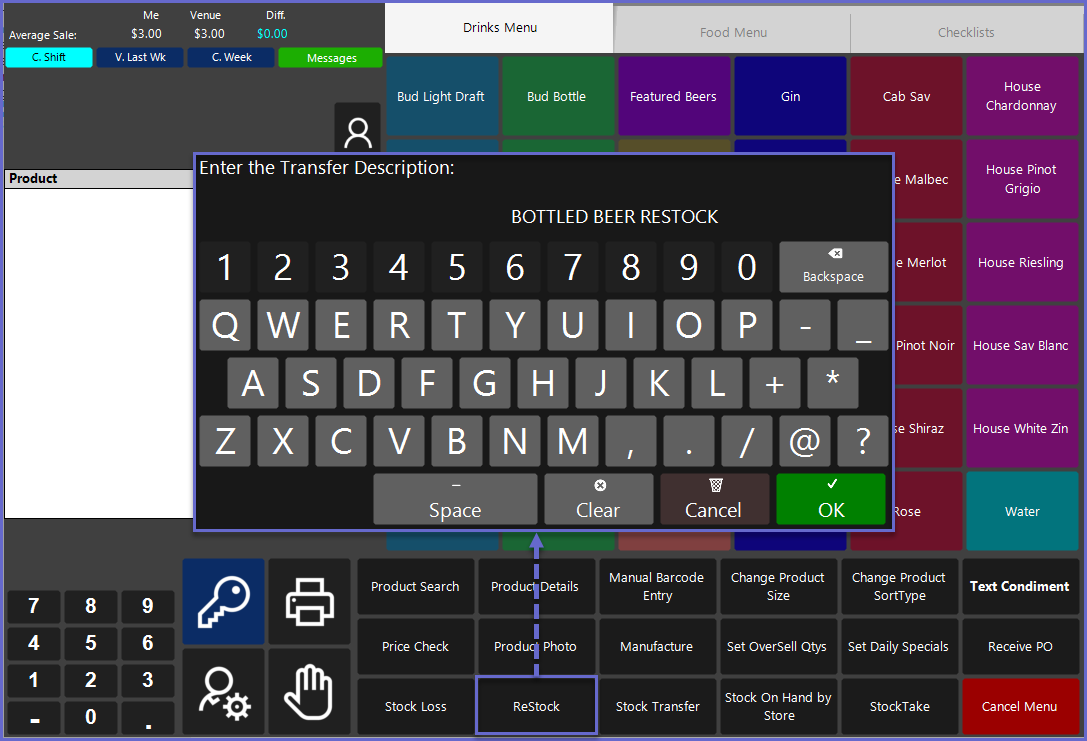
- After tapping on the Restock function button, a Transfer Description window will open displaying an alphanumeric keyboard allowing the Operator to enter a description for the Transfer
- After a description has been entered and OK is tapped, a Stock Transfer window will take over the Workstation screen
Adding Products for Transfer
- First, the Operator will need to select the Store from which the Product/s will be Restocked to the Workstation's Local Store
- Next, tap the Search Product button to open a window allowing the Operator to select a Product to be Restocked
- The Operator can navigate through the Group List, Search by Name, or Enter a Number associated for the desired Product
- If the selected Product has multiple Selling Sizes or Base Purchase Sizes, the Operator will be prompted to select a Size for Restocking; Selling Sizes are displayed in the window and Purchase Sizes are shown to the right of the Select button
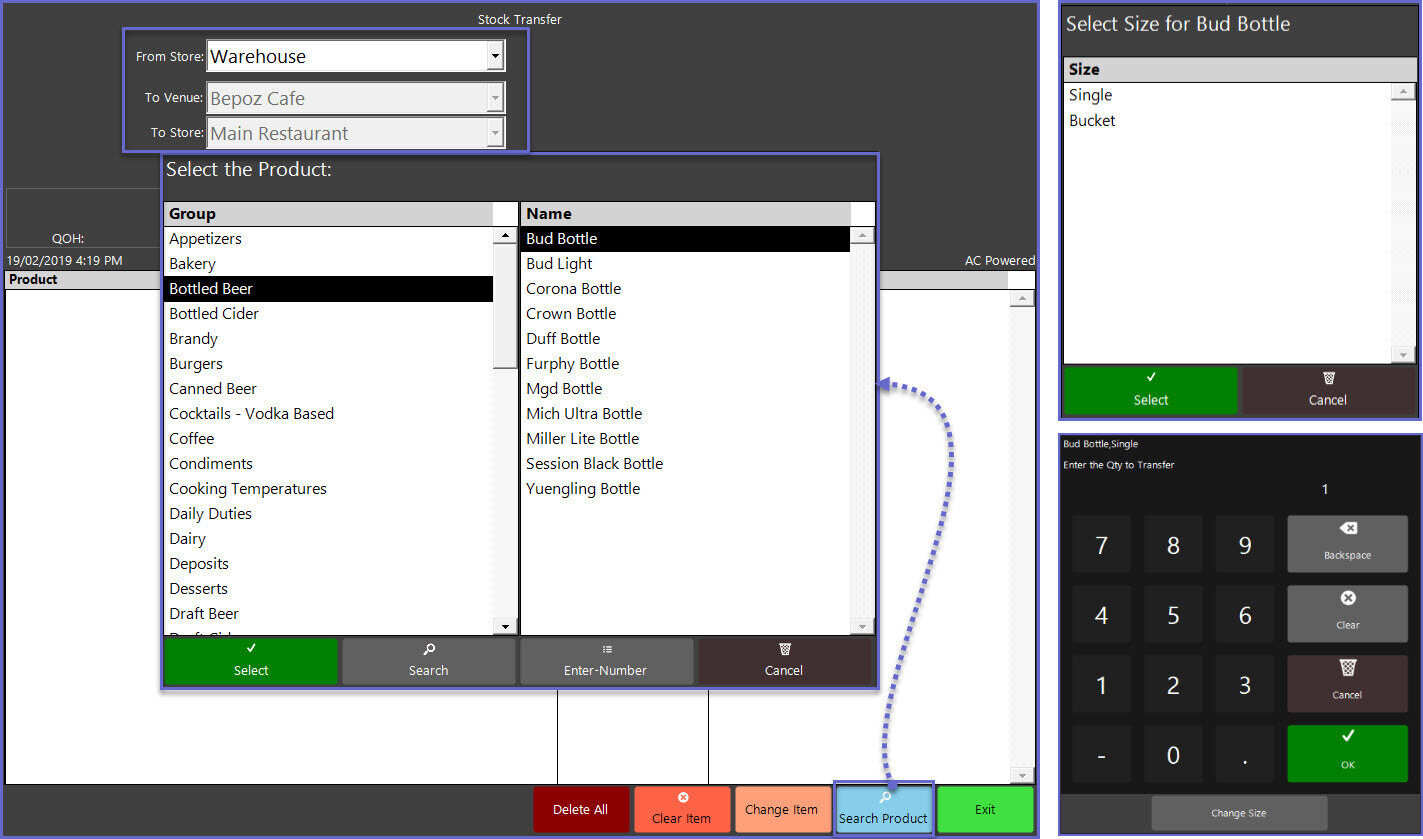
- After selecting the desired Size/Unit, the Operator will be prompted to enter the Quantity to Transfer; if the wrong Size had been selected, the Operator can change it using the button at the bottom
- The Product Name, Unit, and Quantity will now appear in the Stock Transfer Window
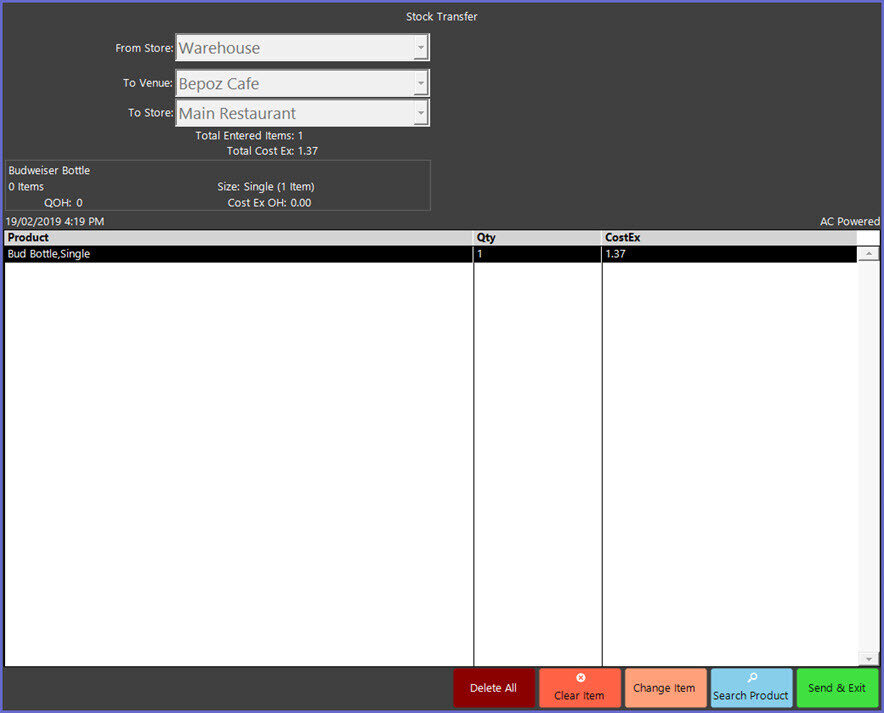
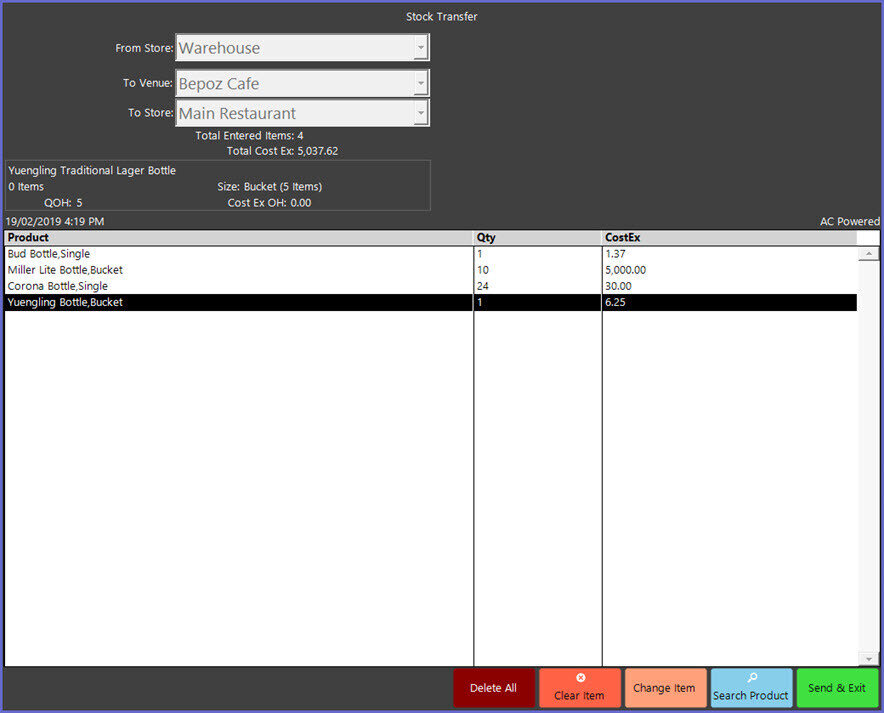
- Repeat the above steps to add all of the desired Products to the Restock
- If a mistake has been made for a Product, either highlight the Product and tap the Change Item button or double-tap on the Product and the Enter Quantity window will reopen
Removing and Changing Products
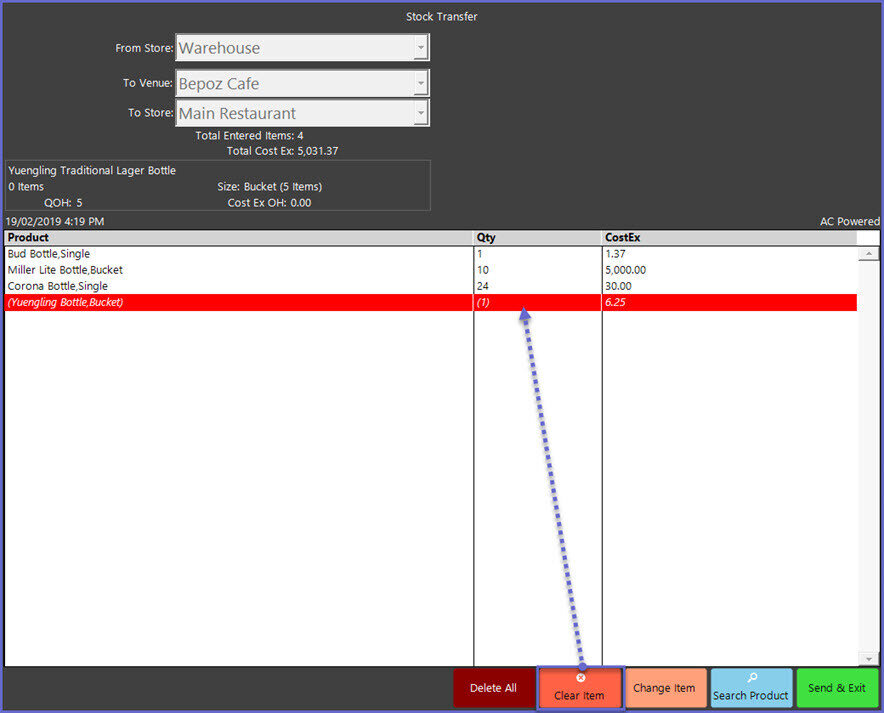
- If a Product needs to be removed completely from the Transfer, highlight the Product and tap the Clear Item button
- A prompt will open for the Operator to confirm removal of the Product
- The removed Product will now be displayed on the screen highlighted in red and italicised along with the Name and Quantity in parenthesis
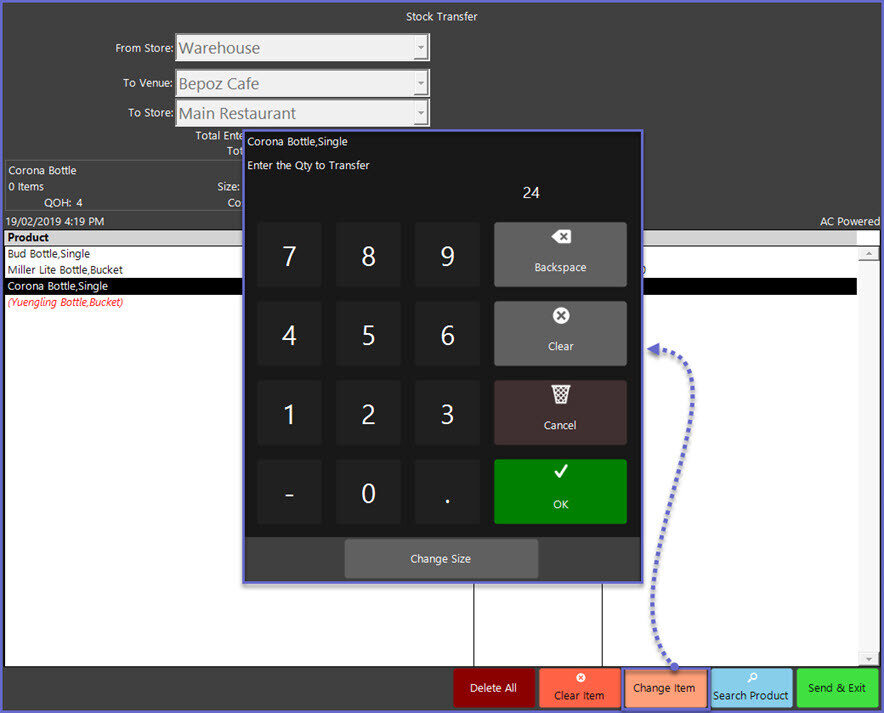
- If a Product needs to be changed, highlight the Product and tap the Change Item button
- A prompt will open for the operator to enter the quantity to be transferred
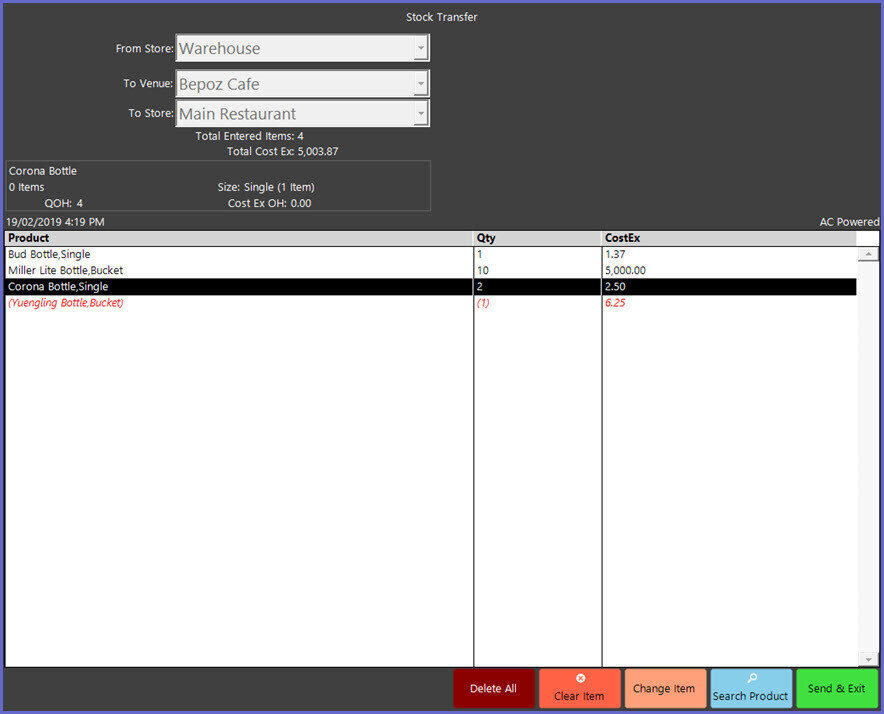
- The Product Quantity will be updated in the List
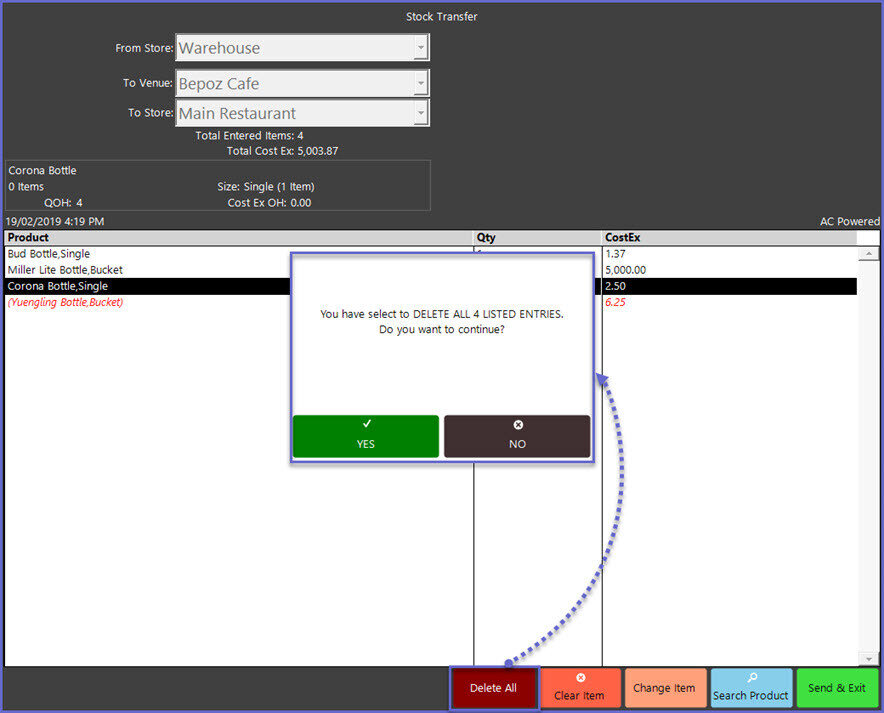
- The entire Transfer can be cancelled by selecting the Delete All button
- A warning prompt will display for the Operator to confirm that all of the entries will be deleted; this may require a Manager's Override
- To Save the Restock Transfer, tap on the Send & Exit button
- A prompt will display for the Operator to confirm transmittal of the Transfer; this provides a final chance for the Operator to go back to make any changes
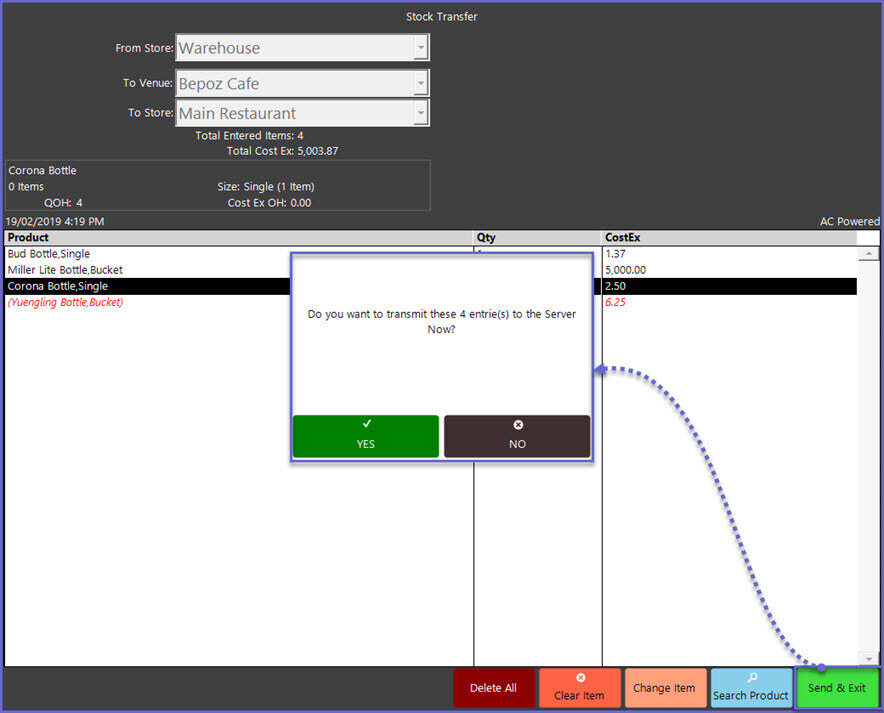
- After the transmittal has been sent, a prompt will display to confirm the Transfer; this will include the Transaction ID
A Receipt for the Restock will also be Printed from the Workstation's designated Receipt Printer showing each Product included in the Restock Transfer as well as a field for the Operator to enter a signature
- Restock Transfers will need to be confirmed in BackOffice before being finalized
Stock Transfer
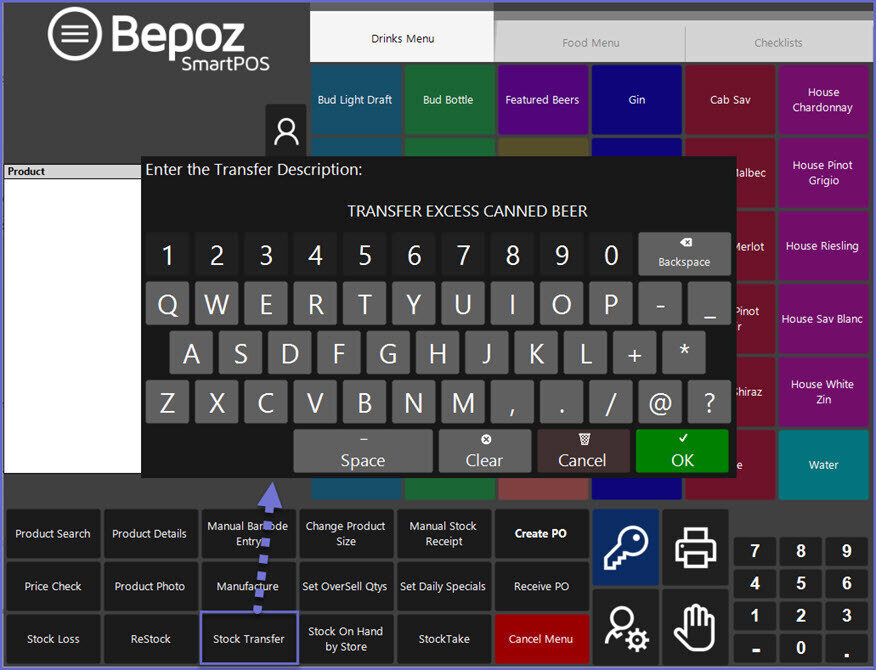
- After tapping the Stock Transfer button, a Transfer Description window will open displaying an alphanumeric keyboard allowing the Operator to enter a description for the Transfer
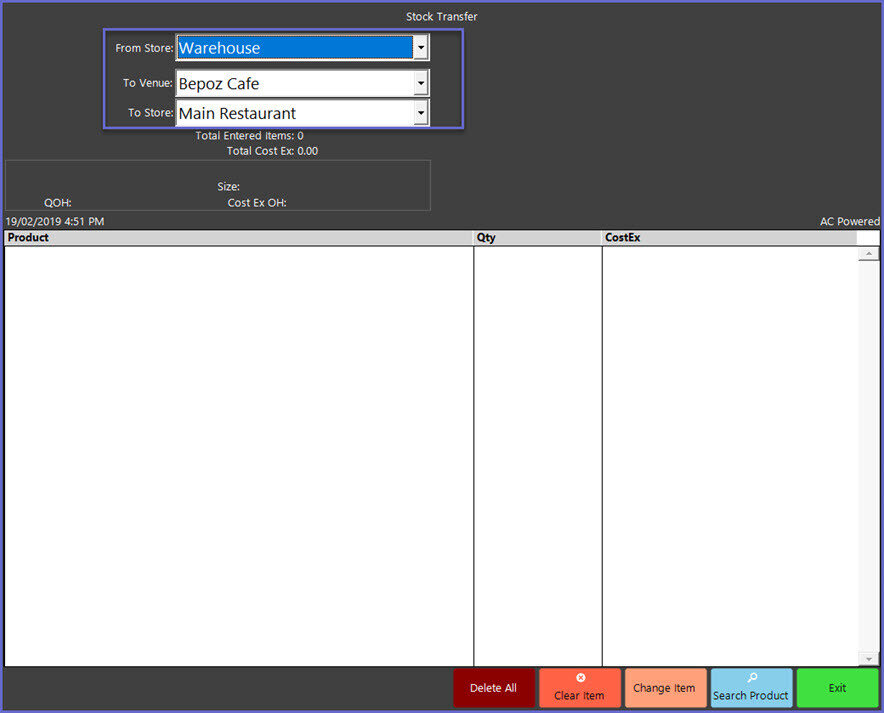
- After a description has been entered and OK is selected, a Stock Transfer window will take over the SmartPOS Workstation screen
- First, the Operator will need to select the Stores where the Product will be Transferred From and To
- After the Stores have been selected, follow the steps listed above for a Restock until the Transfer is complete
- Stock Transfers will need to be confirmed in BackOffice before being finalized
