- INTERNAL - Bepoz Help Guides
- SmartPDE | SmartPDE 32
- SmartPDE Stocktake
-
End-User | Products & SmartPOS
-
End-User | Stock Control
-
End-User | Table Service and Kitchen Operations
-
End-User | Pricing, Marketing, Promotions & Accounts
- Prize Promotions
- Points, Points Profiles and Loyalty
- Product Promotions
- Repricing & Discounts in SmartPOS
- Vouchers
- Account Till Functions
- Pricing, Price Numbers and Price Modes
- Raffles & Draws
- Marketing Reports
- Accounts and Account Profiles
- Rewards
- SmartPOS Account Functions
- Troubleshooting
- Product Labels
- Packing Slips
-
End-User | System Setup & Admin
-
End-User | Reporting, Data Analysis & Security
-
End-User | Membership & Scheduled Billing
-
End-User | Operators, Operator Permissions & Clocking
-
Interfaces | Data Send Interfaces
-
Interfaces | EFTPOS & Payments
- NZ EFTPOS Interfaces
- Linkly (Formerly PC-EFTPOS)
- Adyen
- Tyro
- ANZ BladePay
- Stripe
- Windcave (Formerly Payment Express)
- Albert EFTPOS
- Westpac Presto (Formerly Assembly Payments)
- Unicard
- Manager Cards External Payment
- Pocket Voucher
- OneTab
- Clipp
- eConnect-eConduit
- Verifone
- AXEPT
- DPS
- Liven
- Singapore eWallet
- Mercury Payments TRANSENTRY
- Ingenico
- Quest
- Oolio - wPay
-
Interfaces | SMS & Messaging
-
Interfaces | Product, Pricing, Marketing & Promotions
- Metcash Loyalty
- Range Servant
- ILG Pricebook & Promotions
- Oolio Order Manager Integration
- Ubiquiti
- Product Level Blocking
- BidFood Integration
- LMG
- Metcash/IBA E-Commerce Marketplace
- McWilliams
- Thirsty Camel Hump Club
- LMG Loyalty (Zen Global)
- Doshii Integration
- Impact Data
- Marsello
- IBA Data Import
- Materials Control
- Last Yard
- Bepoz Standard Transaction Import
-
Interfaces | Printing & KDS
-
Interfaces | Reservation & Bookings
-
Interfaces | Database, Reporting, ERP & BI
-
Interfaces | CALink, Accounts & Gaming
- EBET Interface
- Clubs Online Interface
- Konami Interface
- WIN Gaming Interface
- Aristocrat Interface
- Bally Interface
- WorldSmart's SmartRetail Loyalty
- Flexinet & Flexinet SP Interfaces
- Aura Interface
- MiClub Interface
- Max Gaming Interface
- Utopia Gaming Interface
- Compass Interface
- IGT & IGT Casino Interface
- MGT Gaming Interface
- System Express
- Aristocrat nConnect Interface
- GCS Interface
- Maxetag Interface
- Dacom 5000E Interface
- InnTouch Interface
- Generic & Misc. CALink
-
Interfaces | Miscellaneous Interfaces/Integrations
-
Interfaces | Property & Room Management
-
Interfaces | Online Ordering & Delivery
-
Interfaces | Purchasing, Accounting & Supplier Comms
-
SmartPOS | Mobile App
-
SmartPDE | SmartPDE 32
-
SmartPDE | Denso PDE
-
SmartPDE | SmartPDE Mobile App
-
MyPlace
-
MyPlace | myPLACE Lite
-
MyPlace | Backpanel User Guides
- Bepoz Price Promotions
- What's on, Events and tickets
- Staff
- System Settings | Operational Settings
- Vouchers & Gift Certificates
- Member Onboarding
- Members and memberships
- System Settings | System Setup
- Reports and Reporting
- Actions
- Offers | Promotions
- Messaging & Notifications
- System Settings | App Config
- Surveys
- Games
- User Feedback
- Stamp Cards
-
MyPlace | Integrations
-
MyPlace | FAQ's & How-2's
-
MyPlace | Release Notes
-
YourOrder
-
YourOrders | Backpanel User Guides
-
YourOrders | YourOrder Kiosk User Guide
-
YourOrders | Merchant App User Guide
-
WebAddons
-
Installation / System Setup Guides
- SmartPOS Mobile App | Setup
- SmartPOS Mobile App | SmartAPI Host Setup
- SmartPOS Mobile App | BackOffice Setup
- SmartPOS Mobile App | Pay@Table setup
- SmartKDS Setup 4.7.2.7 +
- SmartKDS Setup 4.6.x
- SQL Installations
- Server / BackOffice Installation
- New Database Creation
- Multivenue Setup & Config.
- SmartPOS
- SmartPDE
- Player Elite Interface | Rest API
- Interface Setups
- Import
- KDSLink
- Snapshots
- Custom Interface Setups
-
HOW-2
- Product Maintenance
- Sales and Transaction Reporting
- SmartPOS General
- Printing and Printing Profiles
- SQL
- Repricing & Discounts
- Stock Control
- Membership
- Accounts and Account Profiles
- Miscellaneous
- Scheduled Jobs Setups
- Backoffice General
- Purchasing and Receiving
- Database.exe
- EFTPOS
- System Setup
- Custom Support Tools
-
Troubleshooting
-
Hardware
1 | SmartPDE Enter Stocktake
This article covers a step-by-step guide to Entering Stocktake on SmartPDE.
This article covers a step-by-step guide to Entering Stocktake on SmartPDE.Overview
- This lesson provides a guide for entering a Stocktake via SmartPDE
- Entering Stocktake via SmartPDE will perform a Partial Stocktake if the Stocktake has not been already started in BackOffice
Prerequisites
N/A
How-To Guide
- After selecting the Enter Stocktake button the system will prompt to select a Venue
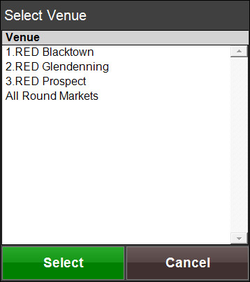
- After selecting a Venue, the following message will appear
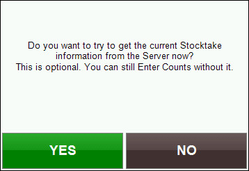
- To perform a Partial Stocktake, select NO
- To perform a Full Stocktake, select YES
- Always ensure that the Stocktake has been started for the desired Store
- After selecting Yes, another message will appear
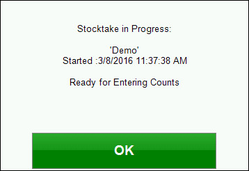
- Select OK to proceed with the Stocktake
- Next, enter an Operator Number to proceed
- The Stocktake screen will display ready for counts to be entered
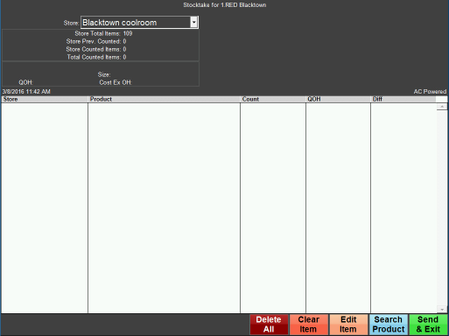
Delete All
- This button will allow for deletion of all current Stocktake entries
- After selecting, a window with the message, 'You have selected to Delete all * Entries. Do you want to continue?' will appear
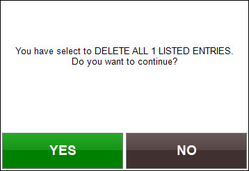
- Select Yes to Proceed or No to Cancel deletion
- After a Yes selection, a Manager's Operator Number will need to be entered to proceed with the deletion
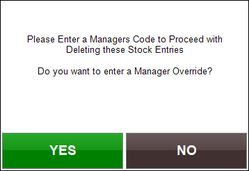
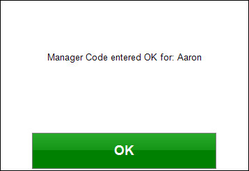
- A window will confirm that a Manager Code has been entered
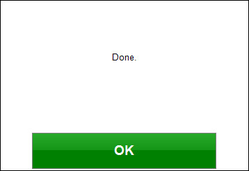
- Another window will prompt 'Done'
- Select OK to continue and return back to the main menu screen
Clear Item
- Selecting this button will allow for Clearing a line Item from the Stocktake
- To clear a line item, select a Product from the list and select the Clear Item button
- A window will appear to confirm that the item selected is going to be removed from the Stocktake
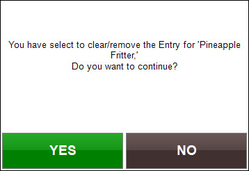
- Select YES to remove the item or select NO to cancel the removal of the item
- Notice that the Cleared item is in red
- The Product can be Un-Cleared by selecting Edit Item
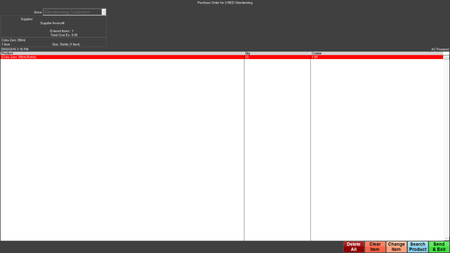
Edit Item
- Selecting this button will allow for changing the Counted Amount entered of a Product
- To change a Counted Amount, highlight the desired Product and select the Edit Item button
- A window will appear to allow for changing the entered amount
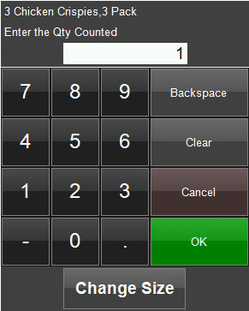
- Enter the new amount and select OK
Search Product
- A Product can be manually added to the Transfer by selecting the Search Product button
- The system will prompt a Product Selection screen
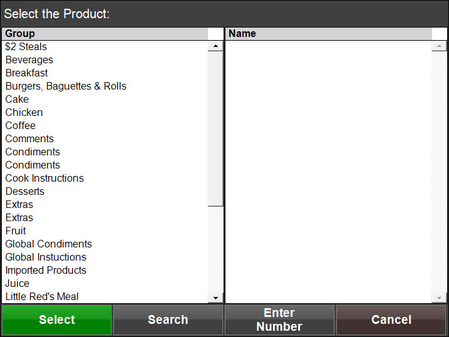
- After selecting a Product Group from the Group column, a list will populate in the Name column
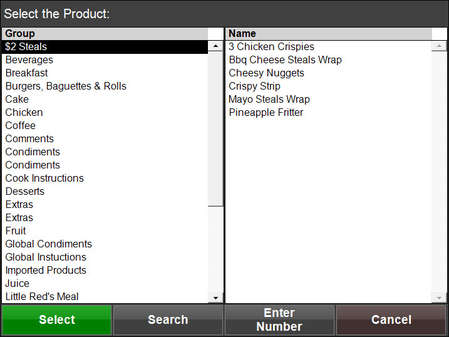
- Select a Product to continue with adding it to the Stocktake
- The system will prompt for entering a Quantity; enter an amount and select OK
Send & Exit
- Selecting the Send & Exit button will send all changes to the Server and exit the Stocktake screen
- A window will appear with a message, 'Do you want to transmit these *** entries to the Server Now?'
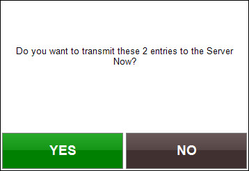
- Select YES to Continue or select NO to Cancel
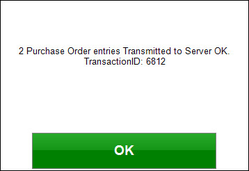
- After selecting Yes, another window will appear with a Confirmation and Transaction ID number
- Select OK to continue and return back to the main menu screen
