Overview
Summary
This article explains the process of restoring a Database to a PDE via the USB Xfer Method.
SmartPDE
Step-by-step Guide
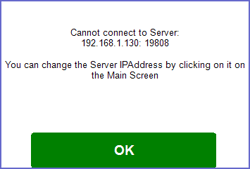
To load/Update a Database via USB Xfer you mist first attempt to obtain the Database via a network connection, to do this press the "Get New Database" Aqua function button from the main SmartPDE32 home screen
If a connection can not be obtained then a message similar to that shown below will be presented to the operator
The operator should press the green OK button at this point
The operator will now be presented with the below screen, to proceed the user should press the green YES button
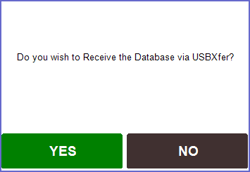
It is possible to force (the above screen) this action by setting the Server IP Address to 0.0.0.0
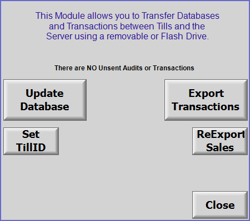
The user will now be presented with the same Update/Export screen that is used from SmartPOS when performing similar functionality
The function required to load a new database is the "Update Database" button
Prior to performing the above process you must have a valid copy of the "LocalPDEDataToSend.zip" file
This file first need to be renamed, this can be done by right clicking on the file and choosing the properties option
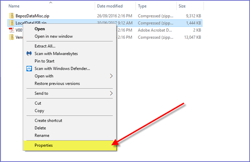
This file MUST be named "LocalDataUSB.zip"
This file must then be placed in a directory named "BepozXfer"
This "BepozXfer" directory may be located on the device or on an external storage device
If an external storage option is inserted into the PDE then SmartPDE will look at this location as opposed to any local directory with the same name
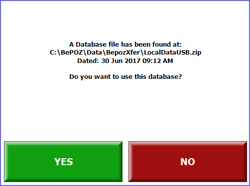
SmartPDE32 will scan the device and present a message similar to that shown below
At this point the operator should press the Green "YES" Button
'
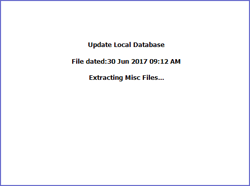
SmartPDE will Extract the files and load the new Database
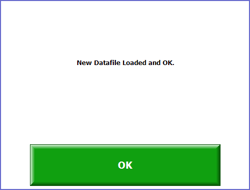
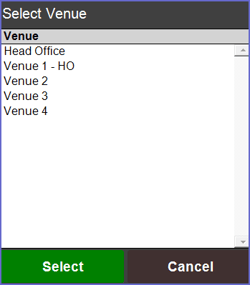
Upon completion the below 2 screens will be presented to the operator the 1st been a confirmation window the 2nd been a venue selection dialog