
Overview
This article covers the guide to set up the SmartPOS in Self Test mode which creates multiple instances of SmartPOS generating test Transactions at a user-defined time interval.
Overview
Following is the summary of steps to setup SmartPOS in Self Test mode:
Create a new KeyList named 'SelfTest' in the Products KeyMaps to store Possible products that are sold at random
Change SmartPOS "Properties" settings to allow Tills to generate tests transactions
Change Smart Controller "Properties" settings to allow testing multiple tills and printers simultaneously
Use Database.exe program to start the number of tills running Self Test Mode
Prerequisites
To create a new KeyList, the Operator must have applicable privileges
To enable the Operator privileges to create KeyList:
Operator Maintenance 'Maintenance' Tab
Products "Maintain KeyMap Settings" Flag
Workflow
Creating a KeyList
To create a KeyList, log into BackOffice and follow the steps:
From the Maintenance menu, select Product KeyMaps
Click on the 'View/Edit KeyList' button in the Header Section
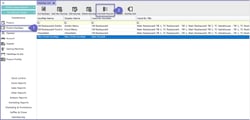
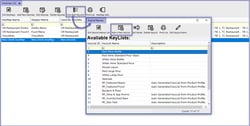
This will open a new window titled 'KeyList Names'
Click the 'Add A New KeyList' button in the Header Section
A prompt will appear asking to Enter the Name of the KeyList
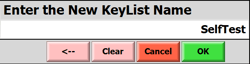
Enter the KeyList name as "SelfTest" and click on the OK button
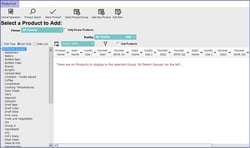
This will open a new window titled "KeyList Items List" which will display a list of all of the Products added to the KeyList; since this is a new KeyList, the KeyList window will be empty
Click 'Add Another Product' button in the Header Section
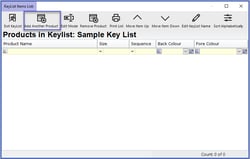
A Product List window will now open allowing to select the desired product for testing purposes
Note: Only Products without Condiments can be selected for the SelfTest mode setup
If the selected Product has multiple sizes, then a window will appear asking to select the size
Note: A product size must be selected for the SelfTest Mode
Repeat the above steps to add at least one more product to the 'SelfTest' KeyList
When finished, click on the Exit KeyList button which will save the updated KeyList
Setup SmartPOS Properties
To enable SmartPOS to create test Transactions,
Go to the SmartPOS icon and right click on it
Then click on 'Properties' Option
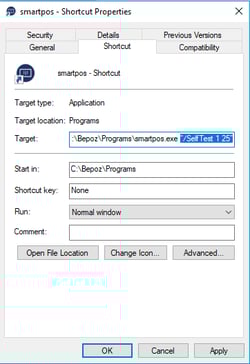
A new Properties window will now appear; in this window look for the 'Target' option under 'Shortcut' tab and add “/SelfTest TillID TransactionDelay” to the existing text in the box
Note: The TillID should be replaced with the numeric ID of the SmartPOS TillID; the TillID information can also be found by starting the SmartController
The TransactionDelay is the number of seconds between each transaction while the SelfTest Mode is running
Once finished, click on the Apply button at the bottom and then click on OK
The SmartPOS settings are now set to generate test Transactions at user-defined time intervals
Setup Smart Controller Properties
To enable Smart Controller to run multiple instances of Tills in SelfTest Mode,
Go to the Smart Controller icon and right click on it
Then click on the 'Properties' Option
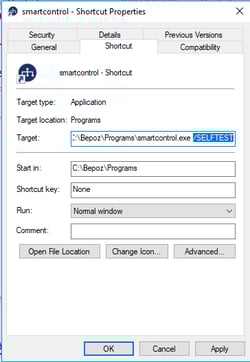
A new Properties window will now appear; in this window look for 'Target' option under 'Shortcut' tab and add "/SELFTEST" to the existing text in the box
Once finished, click on the Apply button at the bottom and then click on OK
The Smart Controller settings are now set to allow multiple Tills and Printers run simultaneously for testing
Start Multiple Tills using Database.exe Program
To start the SelfTest Mode with Multiple Tills,
Go to the Database.exe program; this is usually located in the C drive of the computer
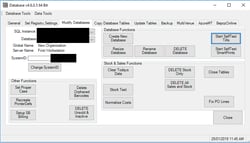
Open the Database.exe program and if prompted, login into the database using the Database Username and Password
Go to Modify Database tab, and click on 'Start SelfTest Tills'
A new window will pop up asking to enter the Starting Till ID
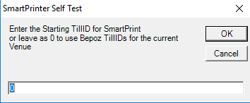
This option is set to Zero (0) by default
Leave this option as '0' to use the current Bepoz TillID; otherwise, enter a valid TillID number and click OK
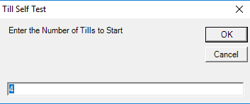
A new window will pop up again asking to enter 'The Number of Tills' to start
Enter the number desired Till instances to run and click OK
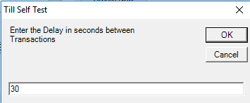
A third window will pop up asking to enter 'The Delay in Seconds Between the Transactions'
Enter the transaction delay time in seconds and click OK
This will then start the SelfTest mode with the desired number of Tills running simultaneously and generating tests Transactions at the defined intervals of time