Overview
Prerequisites
Need to setup a static public IP address from the ISP and setup router to forward traffic from this IP address and point back to the Bepoz server.
To get the public IP address for the venue, you can run what is my IP in Google search or click here.
Avoid using the common ports like 80, 8080, 25, etc. when selecting TCP port to use.
You can test and run open port check tool: http://www.canyouseeme.org to check and see if the selected port is already accessible.
Setup in CMP Portal
Login to Bepoz CMP and navigate to the account you are attempting to setup
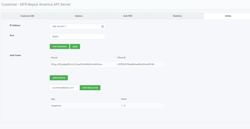
Within client record, you will need to navigate to the Online Tab
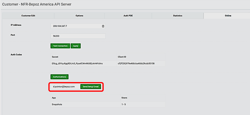
Insert the static public IP address of the venue as well as the port number pre-configured
Press apply and CMP will create both a Secret and Client ID
Setup in Bepoz
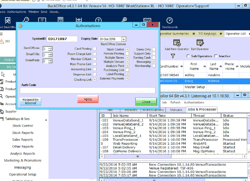
Open Back Office and go to System Setup - Scheduled Jobs
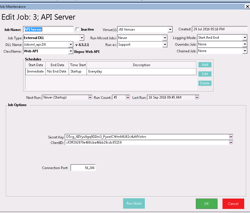
Create a new job as per below and enter the Secret key, Client ID, and Port
Set schedule for Everyday and at Startup
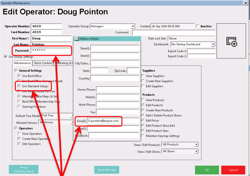
Control Desk Admin privileges are controlled via the Use Standard Setup operator flag. This must be flagged TRUE on the operator that is about to complete the next step. Make sure the operator have a valid email address and password set within Back Office
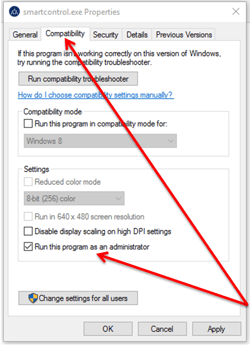
Make sure SmartController is running in Admin mode. This is required for the Web API to run. This can be checked and done in the Compatibility Tab within Properties of the application.
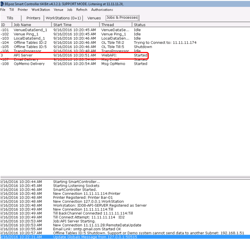
Restart Smart Controller and run the job created earlier. Make sure the API job is running from Jobs & Processes tab
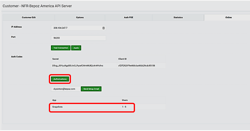
Now you need to go back to CMP and go to client's record once again. Under the section where the IP and Port are entered, click the Test Connection button. If the message Connection Successful is not shown, please check all security settings that could prevent communication.
Bepoz Online Activation
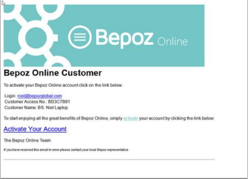
From the Online Tab within CMP, you need to complete the setup of the operator and send them an Email to activate Control Desk. A confirmation message will show that the email was successfully sent.
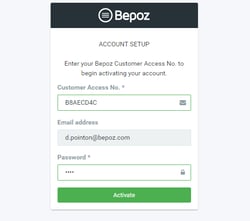
Check for the email and follow the Activate Your Account link button
Type the Custom Access No in the box provided as written on the activation email. Click on Validate button and you will now be prompted to login. Use the email address and password set within Back Office and click on Activate button. This operator will now have access to Bepoz Online. Any additional operators that require access should be configured within Control Desk.
Application Authorization
From CMP choose the client record and go to Online Tab
Press the Authorization button and select the App you would like to Authorize and also the relevant number of user licenses.
The client's record has now been updated and will now be billed appropriately
Bepoz Control Desk
After activating your account, you can now logon to Bepoz Control Desk
Here you will setup the user(s) that will be allowed to use Snapshots.
Click on Admin on the left side menu. Then click on Application Access and add Snapshots. Only then you can use and set users to use this app.
Now set the users to access Snapshots by clicking on Operator Management. Then select group and then select the user. Note by default only first 10 users are visible. Click Next if user is not found.
Click Access tab and tick Snapshots flag. Click on Send Welcome Email button and click Save button