- INTERNAL - Bepoz Help Guides
- End-User | Stock Control
- Purchasing & Receiving
-
End-User | Products & SmartPOS
-
End-User | Stock Control
-
End-User | Table Service and Kitchen Operations
-
End-User | Pricing, Marketing, Promotions & Accounts
- Prize Promotions
- Points, Points Profiles and Loyalty
- Product Promotions
- Repricing & Discounts in SmartPOS
- Vouchers
- Account Till Functions
- Pricing, Price Numbers and Price Modes
- Raffles & Draws
- Marketing Reports
- Accounts and Account Profiles
- Rewards
- SmartPOS Account Functions
- Troubleshooting
- Product Labels
- Packing Slips
-
End-User | System Setup & Admin
-
End-User | Reporting, Data Analysis & Security
-
End-User | Membership & Scheduled Billing
-
End-User | Operators, Operator Permissions & Clocking
-
Interfaces | Data Send Interfaces
-
Interfaces | EFTPOS & Payments
- NZ EFTPOS Interfaces
- Linkly (Formerly PC-EFTPOS)
- Adyen
- Tyro
- ANZ BladePay
- Stripe
- Windcave (Formerly Payment Express)
- Albert EFTPOS
- Westpac Presto (Formerly Assembly Payments)
- Unicard
- Manager Cards External Payment
- Pocket Voucher
- OneTab
- Clipp
- eConnect-eConduit
- Verifone
- AXEPT
- DPS
- Liven
- Singapore eWallet
- Mercury Payments TRANSENTRY
- Ingenico
- Quest
- Oolio - wPay
-
Interfaces | SMS & Messaging
-
Interfaces | Product, Pricing, Marketing & Promotions
- Metcash Loyalty
- Range Servant
- ILG Pricebook & Promotions
- Oolio Order Manager Integration
- Ubiquiti
- Product Level Blocking
- BidFood Integration
- LMG
- Metcash/IBA E-Commerce Marketplace
- McWilliams
- Thirsty Camel Hump Club
- LMG Loyalty (Zen Global)
- Doshii Integration
- Impact Data
- Marsello
- IBA Data Import
- Materials Control
- Last Yard
- Bepoz Standard Transaction Import
-
Interfaces | Printing & KDS
-
Interfaces | Reservation & Bookings
-
Interfaces | Database, Reporting, ERP & BI
-
Interfaces | CALink, Accounts & Gaming
- EBET Interface
- Clubs Online Interface
- Konami Interface
- WIN Gaming Interface
- Aristocrat Interface
- Bally Interface
- WorldSmart's SmartRetail Loyalty
- Flexinet & Flexinet SP Interfaces
- Aura Interface
- MiClub Interface
- Max Gaming Interface
- Utopia Gaming Interface
- Compass Interface
- IGT & IGT Casino Interface
- MGT Gaming Interface
- System Express
- Aristocrat nConnect Interface
- GCS Interface
- Maxetag Interface
- Dacom 5000E Interface
- InnTouch Interface
- Generic & Misc. CALink
-
Interfaces | Miscellaneous Interfaces/Integrations
-
Interfaces | Property & Room Management
-
Interfaces | Online Ordering & Delivery
-
Interfaces | Purchasing, Accounting & Supplier Comms
-
SmartPOS | Mobile App
-
SmartPDE | SmartPDE 32
-
SmartPDE | Denso PDE
-
SmartPDE | SmartPDE Mobile App
-
MyPlace
-
MyPlace | myPLACE Lite
-
MyPlace | Backpanel User Guides
- Bepoz Price Promotions
- What's on, Events and tickets
- Staff
- System Settings | Operational Settings
- Vouchers & Gift Certificates
- Member Onboarding
- Members and memberships
- System Settings | System Setup
- Reports and Reporting
- Actions
- Offers | Promotions
- Messaging & Notifications
- System Settings | App Config
- Surveys
- Games
- User Feedback
- Stamp Cards
-
MyPlace | Integrations
-
MyPlace | FAQ's & How-2's
-
MyPlace | Release Notes
-
YourOrder
-
YourOrders | Backpanel User Guides
-
YourOrders | YourOrder Kiosk User Guide
-
YourOrders | Merchant App User Guide
-
WebAddons
-
Installation / System Setup Guides
- SmartPOS Mobile App | Setup
- SmartPOS Mobile App | SmartAPI Host Setup
- SmartPOS Mobile App | BackOffice Setup
- SmartPOS Mobile App | Pay@Table setup
- SmartKDS Setup 4.7.2.7 +
- SmartKDS Setup 4.6.x
- SQL Installations
- Server / BackOffice Installation
- New Database Creation
- Multivenue Setup & Config.
- SmartPOS
- SmartPDE
- Player Elite Interface | Rest API
- Interface Setups
- Import
- KDSLink
- Snapshots
- Custom Interface Setups
-
HOW-2
- Product Maintenance
- Sales and Transaction Reporting
- SmartPOS General
- Printing and Printing Profiles
- SQL
- Repricing & Discounts
- Stock Control
- Membership
- Accounts and Account Profiles
- Miscellaneous
- Scheduled Jobs Setups
- Backoffice General
- Purchasing and Receiving
- Database.exe
- EFTPOS
- System Setup
- Custom Support Tools
-
Troubleshooting
-
Hardware
21 | "Stock Receipt" Till Function
This article covers an overview of the "Stock Receipt" Function and how it is used within SmartPOS.
This article covers an overview of the "Stock Receipt" Function and how it is used within SmartPOS.
The Stock Receipt Till Function allows an authorized Operator to Manually Receive Stock from a Supplier via SmartPOS Workstations without a Purchase Order. Additionally, the Receive PO piece of this Till Function allows an authorized Operator to Receive Purchase Orders through SmartPOS. While both of these capabilities are available within BackOffice, these Till Functions allow Operators to accept Stock directly from a Till without the need to access a computer and log into BackOffice.
Prerequisites
- To Receive Manual Stock & Purchase Orders in SmartPOS, the System will need to be authorized for Stock Control and the applicable Operator Privileges
-
Operator Maintenance 'Till Privileges' Tab - General: "Operate Tills" Flag
-
Operator Maintenance 'Stock Control' Tab - Purchasing & Receiving: "Receive Purchase Orders" Flag
- Purchasing & Receiving: "Receive My Created Orders" Flag (if the Operator also Created the PO)
- Additionally, the SmartPOS Workstation being used will need to have a
Till Function Map assigned to it with the "Receive Stock" Till Function button configured and on a panel that is accessible to the Operator
How-To Guide
- After locating and tapping the Stock Receipt function button, the Operator will be able to choose from creating a Manual Receipt or Receiving an Existing Purchase Order
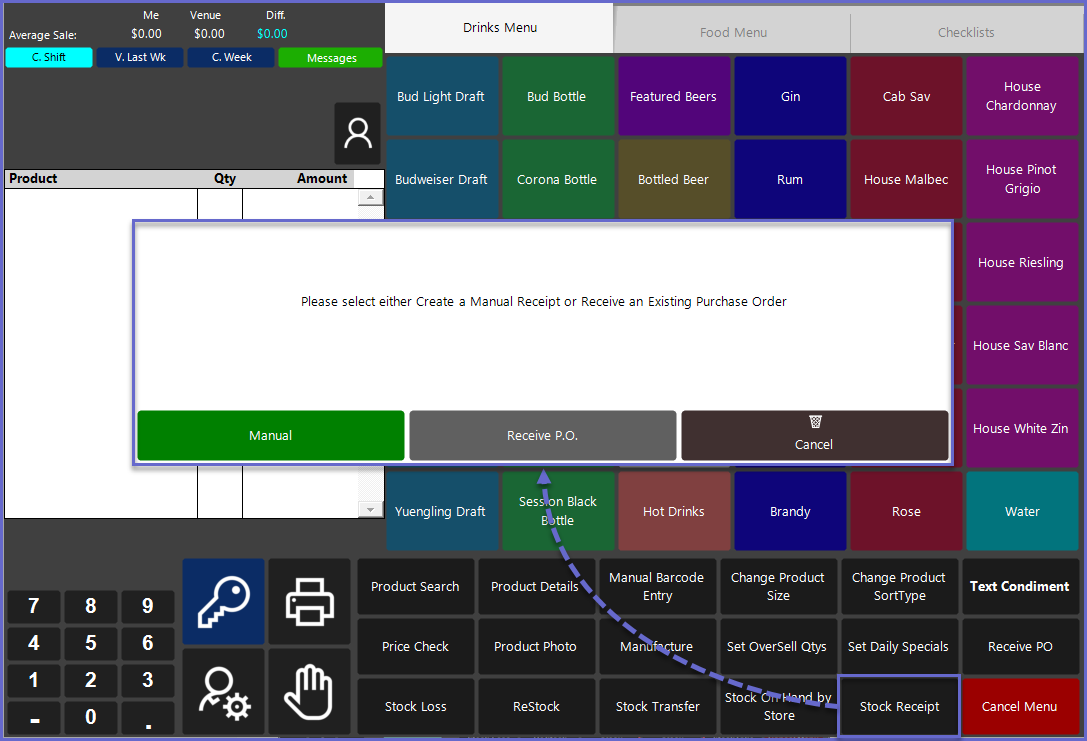
Manual
- To Receive Product/s that do not have a Purchase Order, select the Manual button
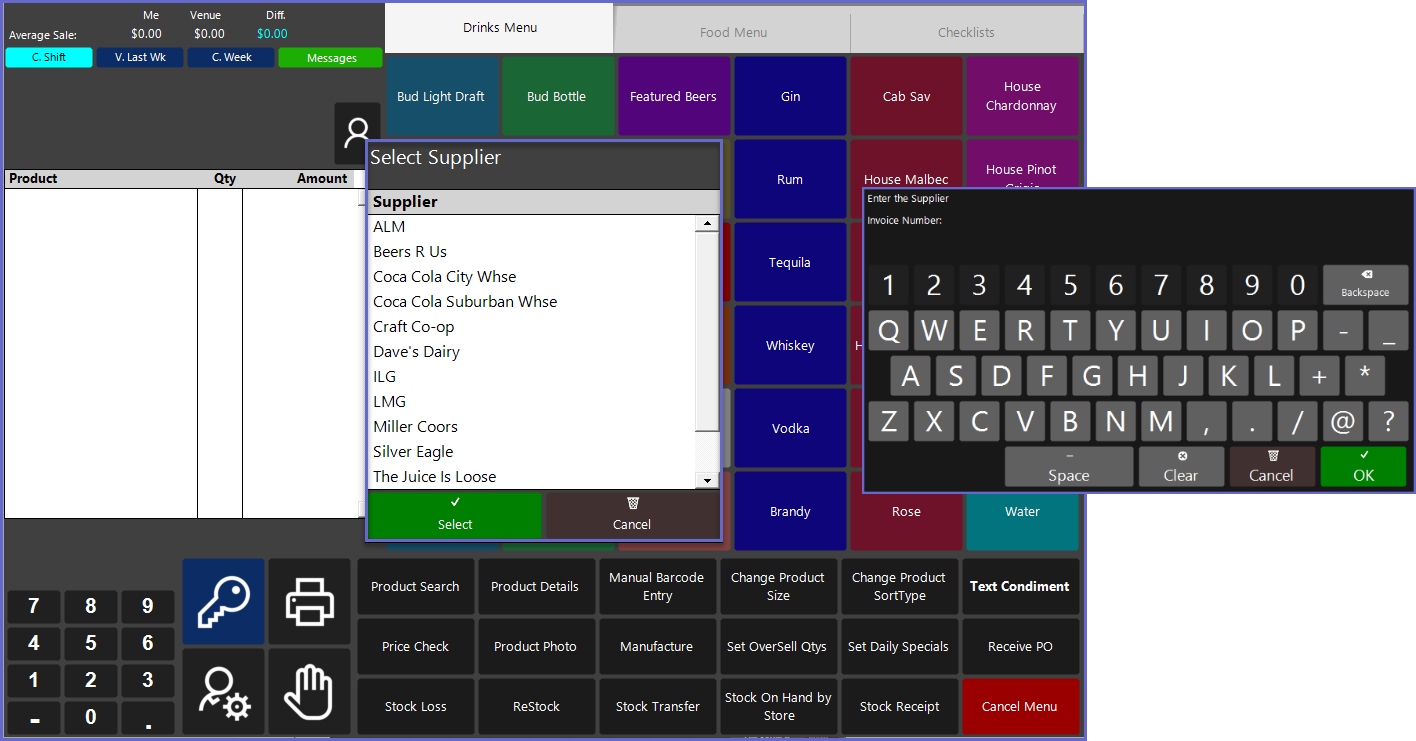
- The Operator will then be prompted to select a Supplier from the Organization's Supplier List
- After selecting the Supplier that the Product is being received from, the Operator will then be prompted to enter a Supplier Invoice Number
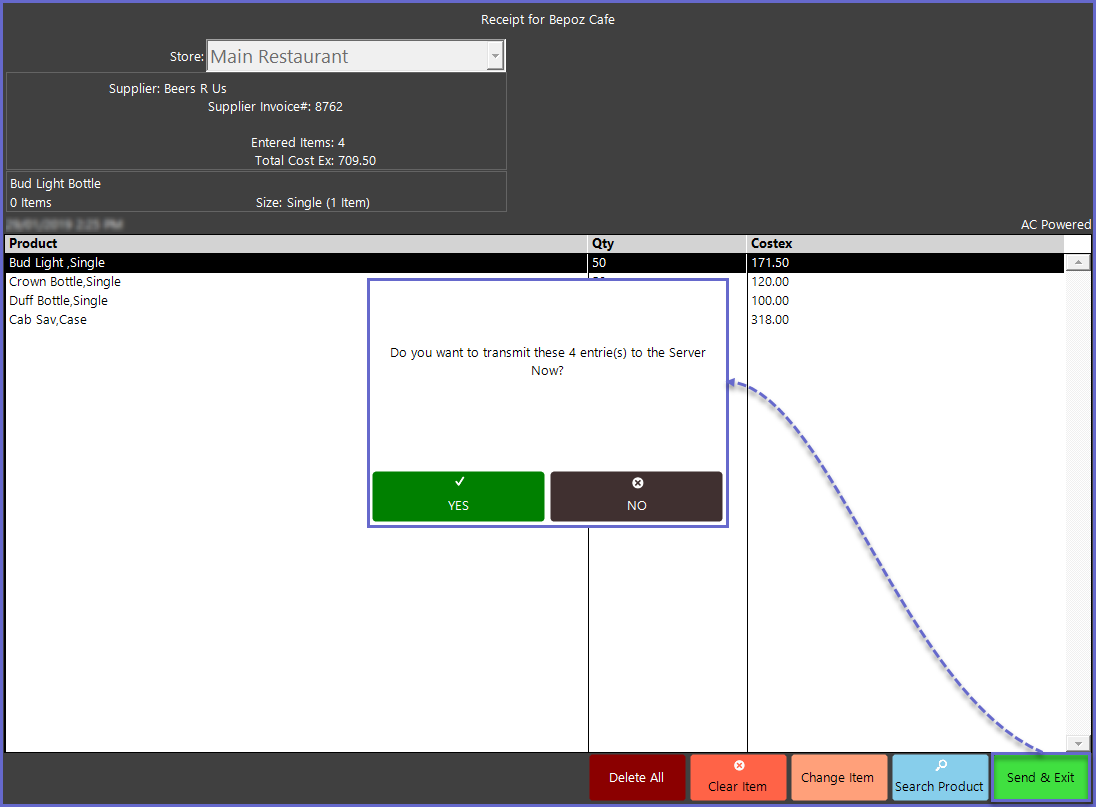
- The SmartPOS Workstation screen will now be taken over by a screen very similar to that of the
Stock Transfer screen - The key difference is in the header section; the Operator must select the Store that is receiving the Product and the Supplier information will be displayed below that
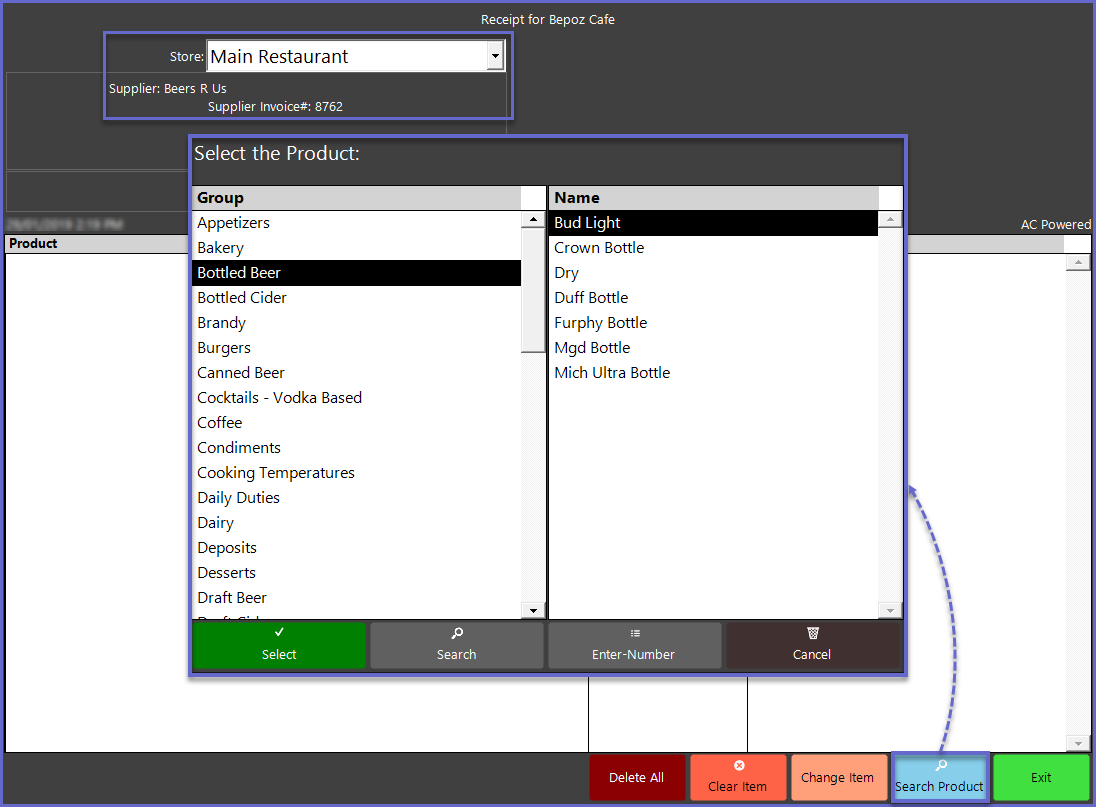
- To add the Received Products, the Operator will need to use the Product Search button
- In the Group List, only Products that have been linked to the selected Supplier in BackOffice Product Maintenance will display
- After selecting the Product and entering the Quantity that is being received, the Operator will be prompted to enter an updated Cost for the Product
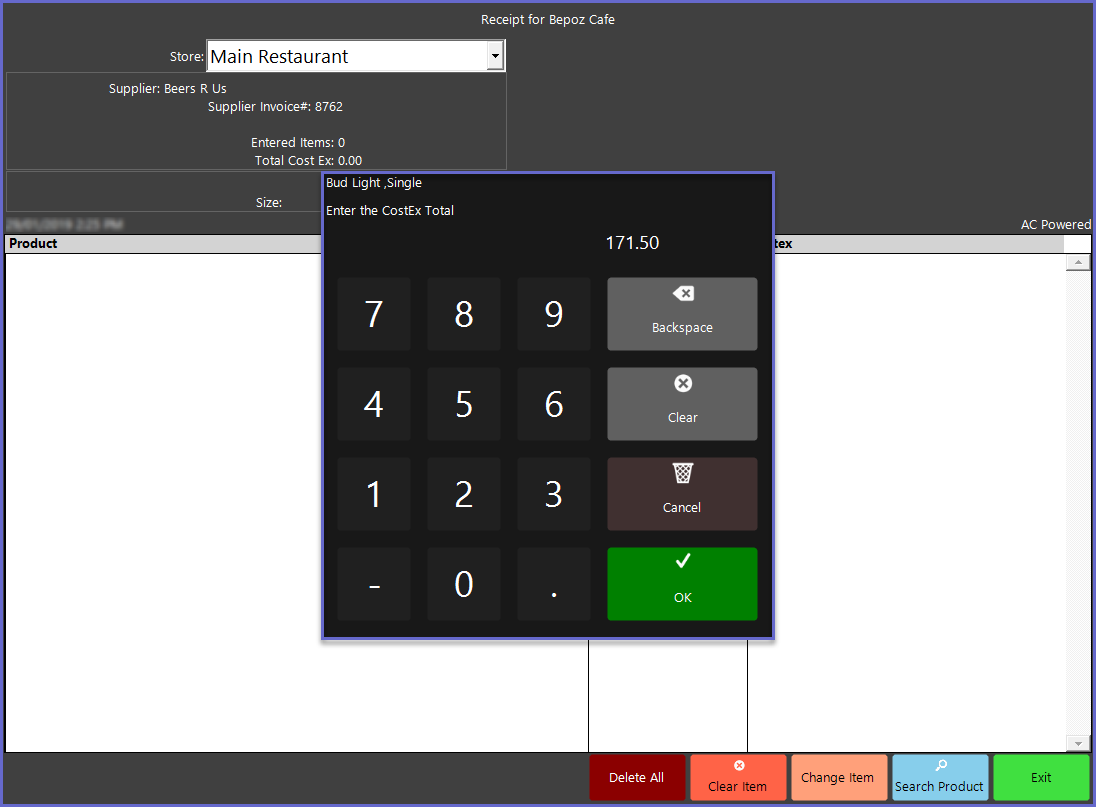
- The Cost entered is for the Total Cost for each received Product, not for the individual purchase units of each Product
- After all Products from the Receipt have been added, select the Send & Exit button to Save the Manual Receipt
- A prompt will display for the Operator to confirm transmittal of the Receipt; this provides a final chance for the Operator to go back to make any changes
- After the transmittal has been sent, a prompt will display to confirm the Receipt; this will include the Transaction ID
- The Manual Receipt will now be posted and sent to the Server which will send the Receipt to BackOffice
- This Receipt will not be able to be reopened or amended via SmartPOS Workstations, however, this can be done from BackOffice where the Purchase can be Finalized/Completed
Receive P.O.
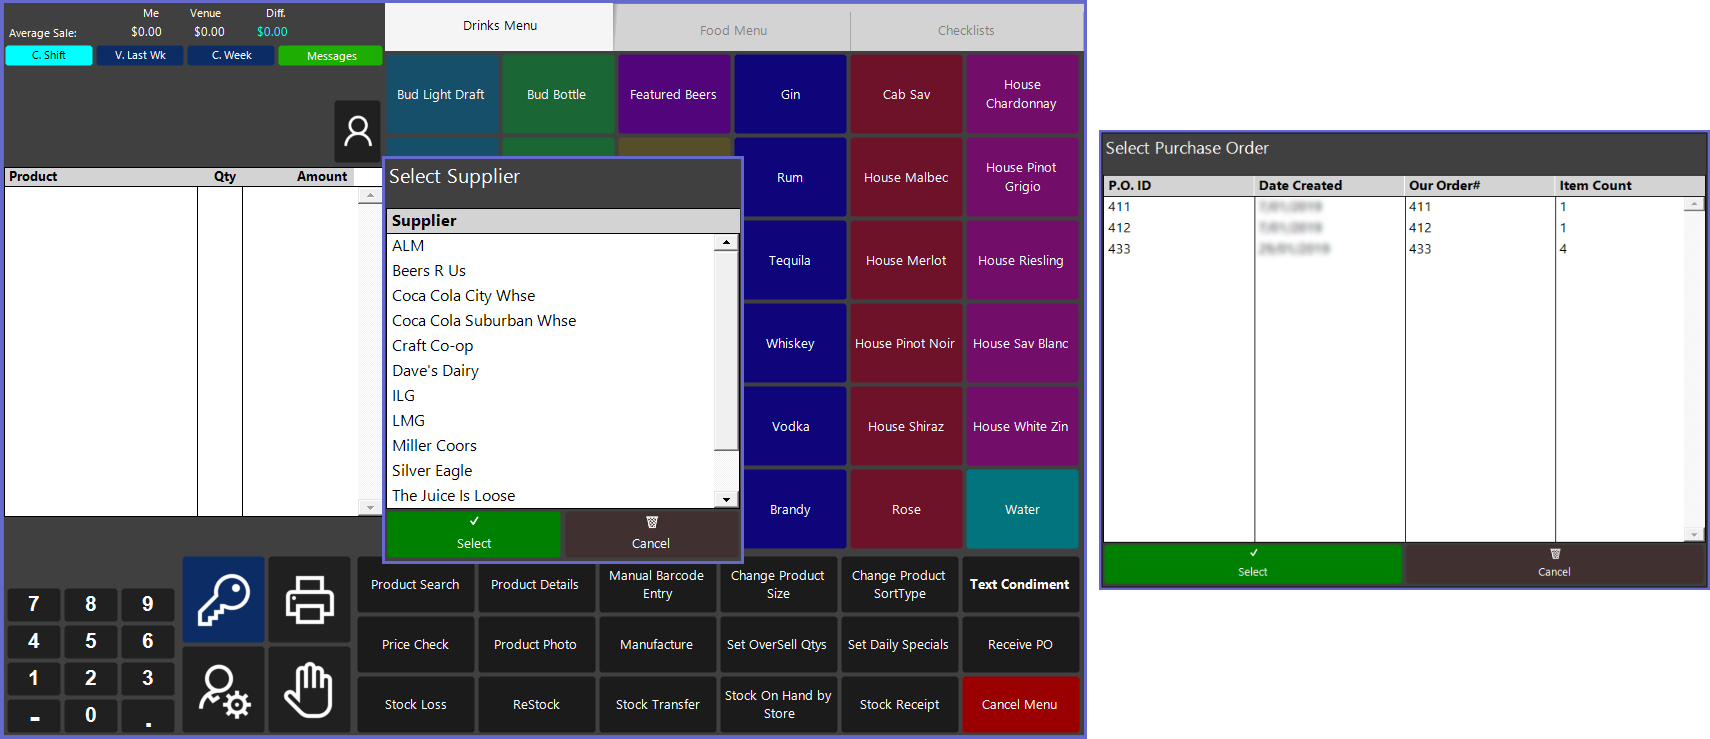
- To Receive Products that have an associated Purchase Order, an Operator will opt to select the Receive P.O. button option
- This Function is for Receiving
Purchase Orders that have been created via BackOffice - The Operator will first be prompted to select the Supplier that the Product is being received from
- All pending Purchase Orders from the selected Supplier will be displayed
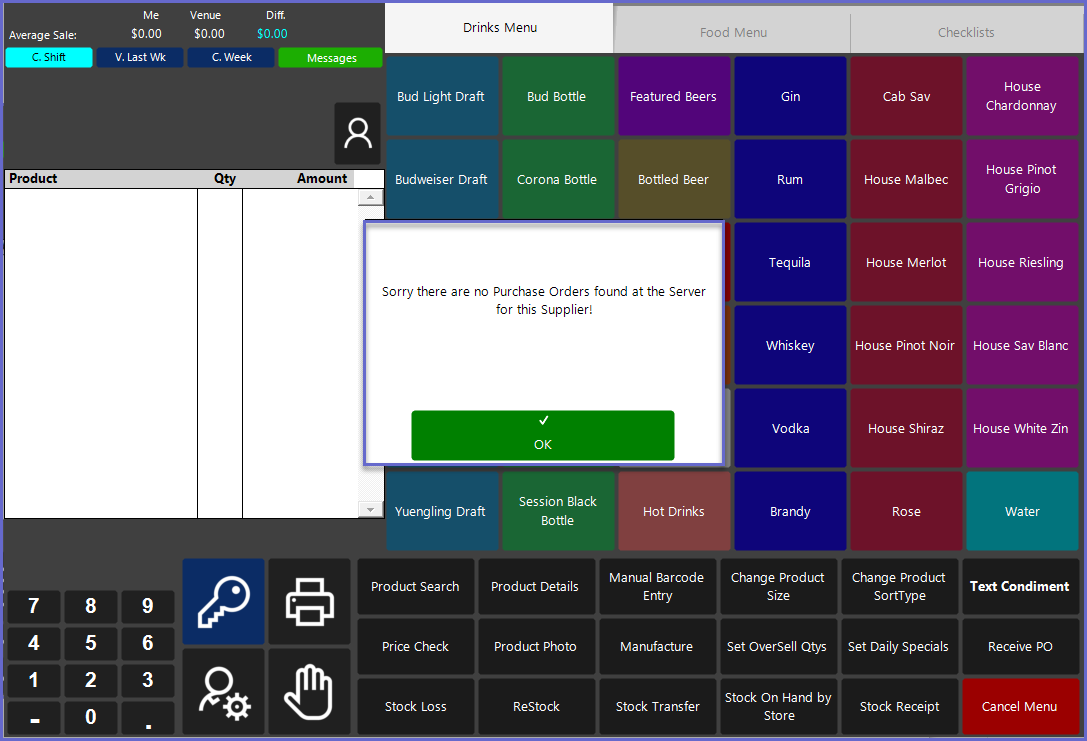
- If there are no Pending Purchase Orders from this supplier, a prompt will appear notifying the Operator:
- From the list of Pending P.O.s, either highlight the desired P.O. and tap the Select button, or double-tap the desired P.O.
- The Operator will then be prompted to enter a Supplier Invoice Number
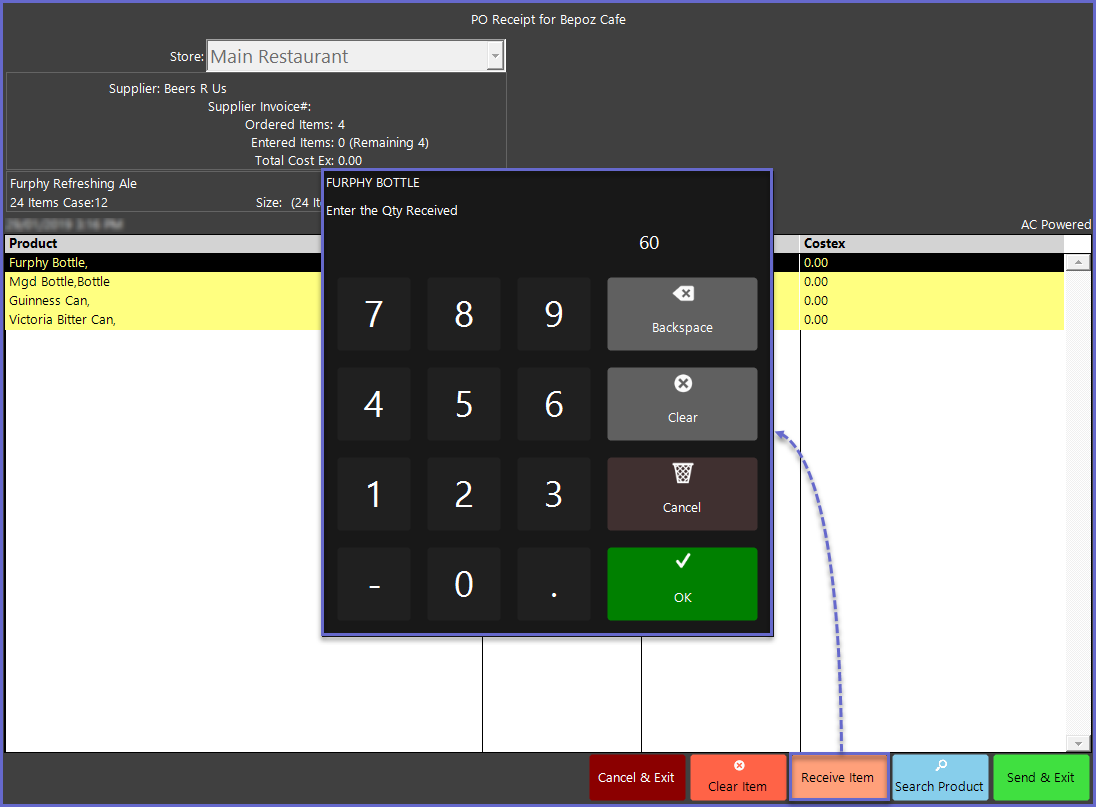
- After entering an Invoice Number, the Purchase Order will display on the SmartPOS Workstation screen
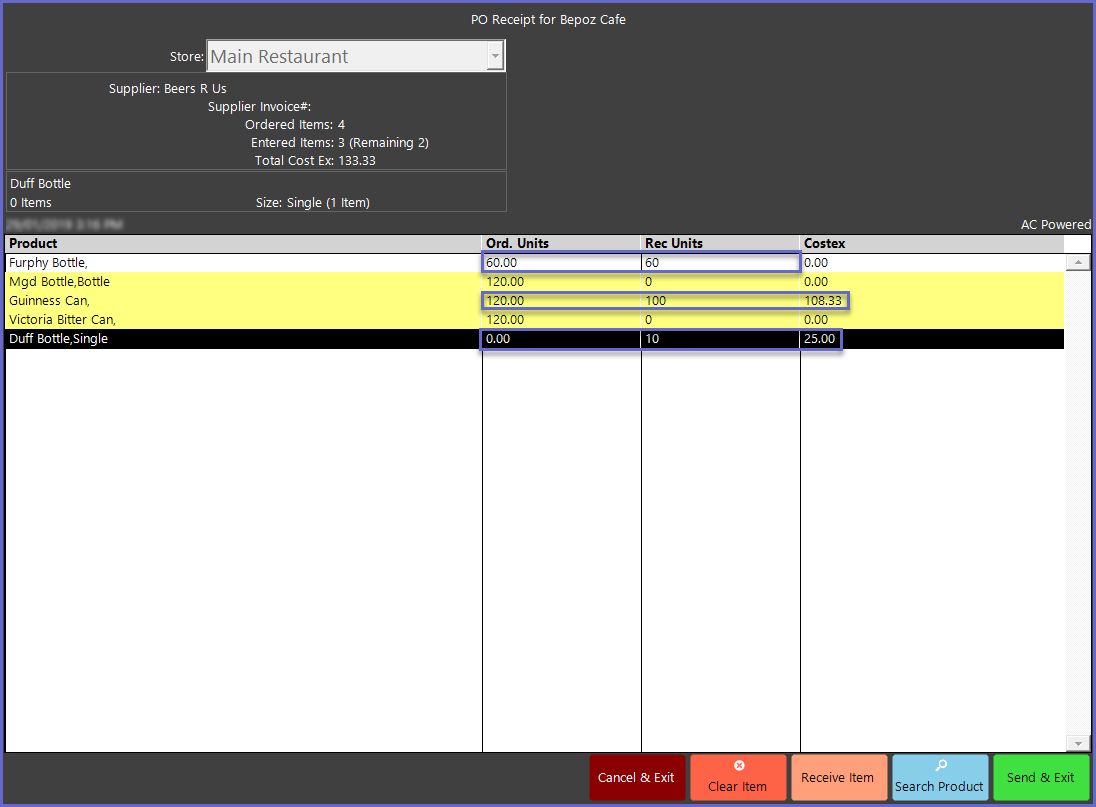
- To check-off that a Product has been Received, first either double-tap on the Product or highlight the Product and tap the Receive Item button
- A number pad window will then open prompting the Operator to confirm the Quantity Received
- The Ordered Quantity will display by default; use the number pad to change the Quantity if necessary
- The Operator will then be prompted to confirm and enter the Cost for the Received Product
- A Received Product will no longer be highlighted in Yellow, however, if a Product is only partially Received, it will remain highlighted in yellow even after the Received Units column has been updated
- If a Product has been Received that was not on the P.O., it can be added Manually using the Search Product button
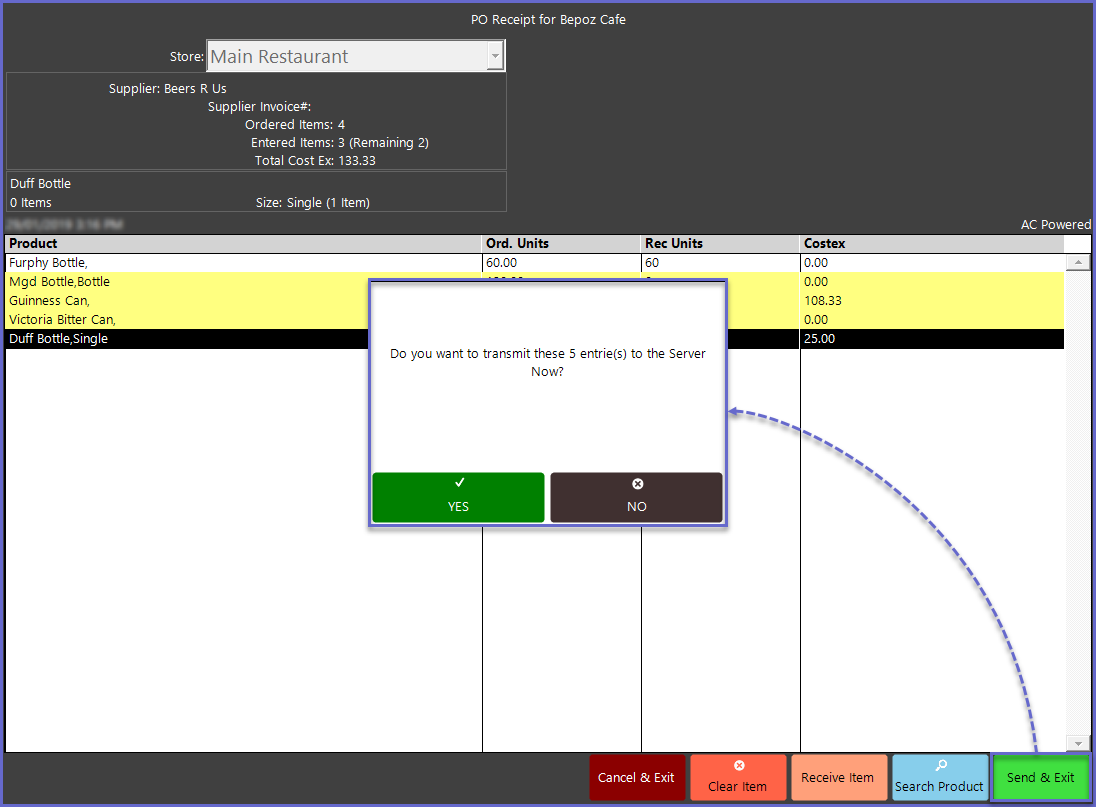
- After all of the Products have been Received, the P.O. can be saved to the server to be finalized in BackOffice by tapping on the Send & Exit button
- A prompt will display for the Operator to confirm transmittal of the P.O. Receipt; this provides a final chance for the Operator to go back to make any changes
- After the transmittal has been sent, a prompt will display to confirm the Receipt; this will include the Transaction ID
- The P.O. Receipt will now be posted and sent to the server
After a Manual Receipt has been sent to the server, the process must be finalized via BackOffice in Purchasing & Receiving
