-
End-User | Products & SmartPOS
-
End-User | Stock Control
-
End-User | Table Service and Kitchen Operations
-
End-User | Pricing, Marketing, Promotions & Accounts
- Prize Promotions
- Points, Points Profiles and Loyalty
- Product Promotions
- Repricing & Discounts in SmartPOS
- Vouchers
- Account Till Functions
- Pricing, Price Numbers and Price Modes
- Raffles & Draws
- Marketing Reports
- Accounts and Account Profiles
- Rewards
- SmartPOS Account Functions
- Troubleshooting
- Product Labels
- Packing Slips
-
End-User | System Setup & Admin
-
End-User | Reporting, Data Analysis & Security
-
End-User | Membership & Scheduled Billing
-
End-User | Operators, Operator Permissions & Clocking
-
Interfaces | Data Send Interfaces
-
Interfaces | EFTPOS & Payments
- NZ EFTPOS Interfaces
- Linkly (Formerly PC-EFTPOS)
- Adyen
- Tyro
- ANZ BladePay
- Stripe
- Windcave (Formerly Payment Express)
- Albert EFTPOS
- Westpac Presto (Formerly Assembly Payments)
- Unicard
- Manager Cards External Payment
- Pocket Voucher
- OneTab
- Clipp
- eConnect-eConduit
- Verifone
- AXEPT
- DPS
- Liven
- Singapore eWallet
- Mercury Payments TRANSENTRY
- Ingenico
- Quest
- Oolio - wPay
-
Interfaces | SMS & Messaging
-
Interfaces | Product, Pricing, Marketing & Promotions
- Metcash Loyalty
- Range Servant
- ILG Pricebook & Promotions
- Oolio Order Manager Integration
- Ubiquiti
- Product Level Blocking
- BidFood Integration
- LMG
- Metcash/IBA E-Commerce Marketplace
- McWilliams
- Thirsty Camel Hump Club
- LMG Loyalty (Zen Global)
- Doshii Integration
- Impact Data
- Marsello
- IBA Data Import
- Materials Control
- Last Yard
- Bepoz Standard Transaction Import
-
Interfaces | Printing & KDS
-
Interfaces | Reservation & Bookings
-
Interfaces | Database, Reporting, ERP & BI
-
Interfaces | CALink, Accounts & Gaming
- EBET Interface
- Clubs Online Interface
- Konami Interface
- WIN Gaming Interface
- Aristocrat Interface
- Bally Interface
- WorldSmart's SmartRetail Loyalty
- Flexinet & Flexinet SP Interfaces
- Aura Interface
- MiClub Interface
- Max Gaming Interface
- Utopia Gaming Interface
- Compass Interface
- IGT & IGT Casino Interface
- MGT Gaming Interface
- System Express
- Aristocrat nConnect Interface
- GCS Interface
- Maxetag Interface
- Dacom 5000E Interface
- InnTouch Interface
- Generic & Misc. CALink
-
Interfaces | Miscellaneous Interfaces/Integrations
-
Interfaces | Property & Room Management
-
Interfaces | Online Ordering & Delivery
-
Interfaces | Purchasing, Accounting & Supplier Comms
-
SmartPOS | Mobile App
-
SmartPDE | SmartPDE 32
-
SmartPDE | Denso PDE
-
SmartPDE | SmartPDE Mobile App
-
MyPlace
-
MyPlace | myPLACE Lite
-
MyPlace | Backpanel User Guides
- Bepoz Price Promotions
- What's on, Events and tickets
- Staff
- System Settings | Operational Settings
- Vouchers & Gift Certificates
- Member Onboarding
- Members and memberships
- System Settings | System Setup
- Reports and Reporting
- Actions
- Offers | Promotions
- Messaging & Notifications
- System Settings | App Config
- Surveys
- Games
- User Feedback
- Stamp Cards
-
MyPlace | Integrations
-
MyPlace | FAQ's & How-2's
-
MyPlace | Release Notes
-
YourOrder
-
YourOrders | Backpanel User Guides
-
YourOrders | YourOrder Kiosk User Guide
-
YourOrders | Merchant App User Guide
-
WebAddons
-
Installation / System Setup Guides
- SmartPOS Mobile App | Setup
- SmartPOS Mobile App | SmartAPI Host Setup
- SmartPOS Mobile App | BackOffice Setup
- SmartPOS Mobile App | Pay@Table setup
- SmartKDS Setup 4.7.2.7 +
- SmartKDS Setup 4.6.x
- SQL Installations
- Server / BackOffice Installation
- New Database Creation
- Multivenue Setup & Config.
- SmartPOS
- SmartPDE
- Player Elite Interface | Rest API
- Interface Setups
- Import
- KDSLink
- Snapshots
- Custom Interface Setups
-
HOW-2
- Product Maintenance
- Sales and Transaction Reporting
- SmartPOS General
- Printing and Printing Profiles
- SQL
- Repricing & Discounts
- Stock Control
- Membership
- Accounts and Account Profiles
- Miscellaneous
- Scheduled Jobs Setups
- Backoffice General
- Purchasing and Receiving
- Database.exe
- EFTPOS
- System Setup
- Custom Support Tools
-
Troubleshooting
-
Hardware
6 | "Stocktake" Till Function
This article covers an overview of the "Stocktake" Function and how it is used within SmartPOS. The Stocktake function allows Stocktake Quantities to be entered from a SmartPOS Workstation. A Stocktake created in this manner will be a Partial Stocktake and must be updated in BackOffice.
This article covers an overview of the "Stocktake" Function and how it is used within SmartPOS.
The Stocktake function allows Stocktake Quantities to be entered from a SmartPOS Workstation. A Stocktake created in this manner will be a Partial Stocktake and must be updated in BackOffice.
Prerequisites
- To access Product and Stock Control Features, the applicable Operator Privileges
-
Operator Maintenance 'Till Privileges' Tab - General: "Operate Tills" Flag
- General: "Stock Functions at Till" Flag
- An Operator must have the correct privilege flags enabled to be authorized to complete a Restock procedure via SmartPOS
- These flags can be found in BackOffice within
Operator Maintenance and on the Stock Control Tab
How-To Guide
- Tap on the Stocktake function button to begin; this is commonly located within the Stock & Products Till Function Panel, but may be located elsewhere depending on System configuration
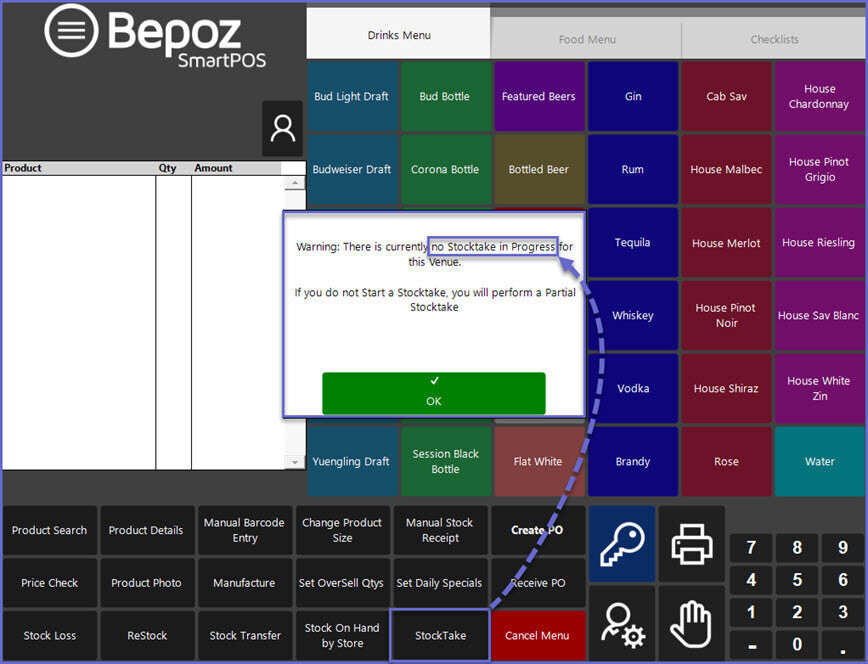
- If a Stocktake has not already been Started in BackOffice, a warning prompt will appear alerting the Operator that there is no Stocktake in Progress; if the Operator continues with this method, it will default to be conducted as a Partial Stocktake and will need to be updated and completed in BackOffice
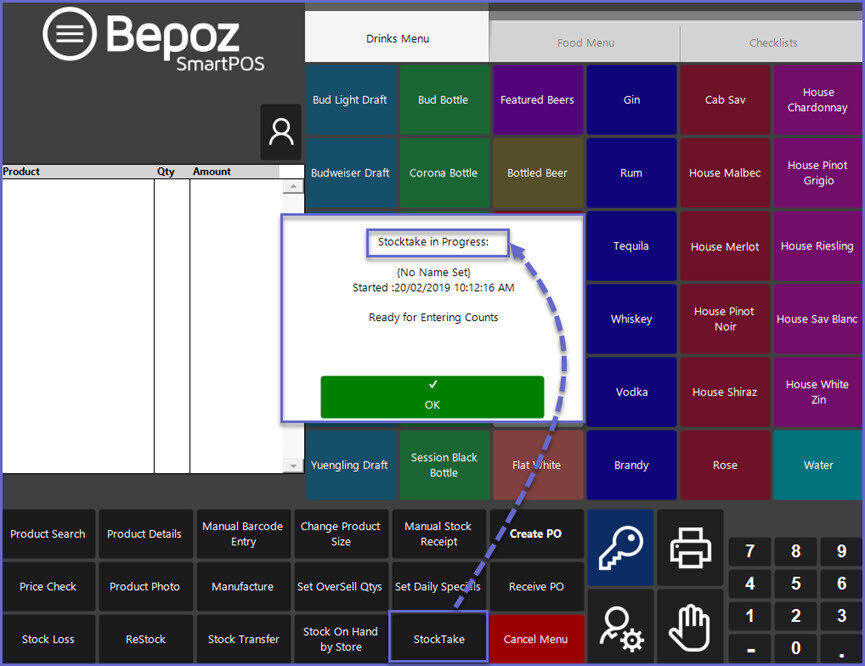
- Conversely, if a Stocktake has been started already, a prompt will notify the Operator that the Stocktake is in Progress and will include the description of the Stocktake along with the date and time it was Started
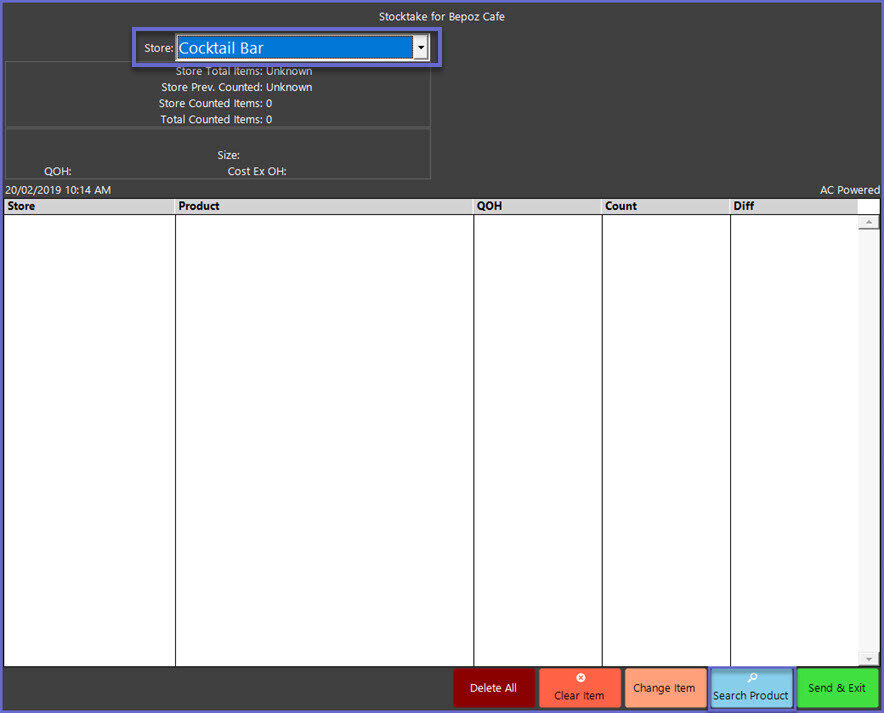
- If the Stocktake is being conducted from an In Progress Stocktake which was started in BackOffice, the Store Total Items will display beneath the Store in the Stocktake Window; however, if the Stocktake was started at the Workstation, this will display as Unknown
- After tapping OK, the Stocktake window will take over the SmartPOS Workstation screen
- Select the desired Store from the drop-down list; this will default to the Workstation's Local Store
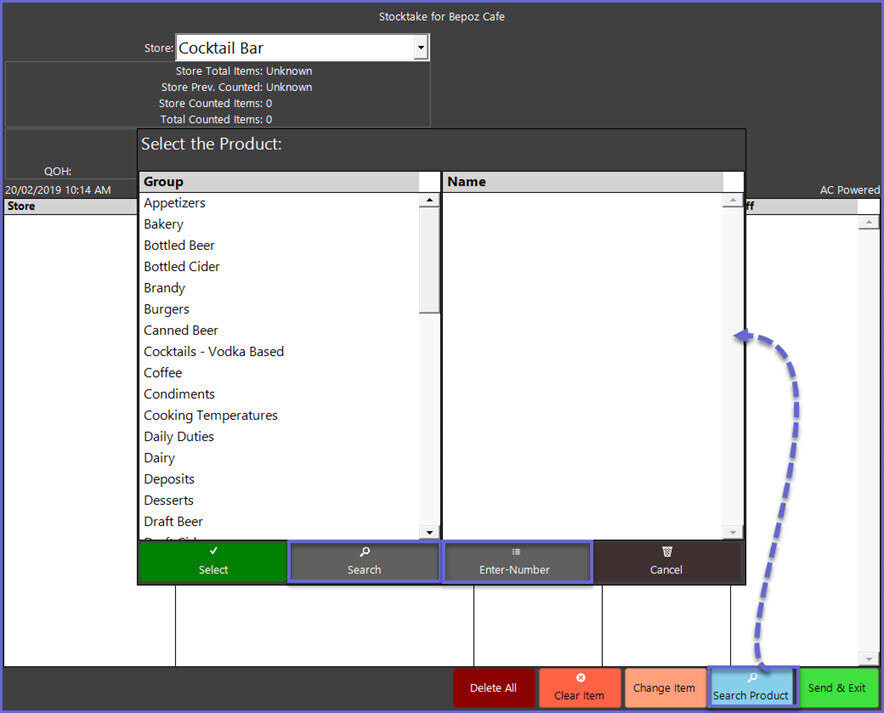
- To add counted Products, tap on the Product Search button which will allow the Operator to select a Product by navigating through the List, Searching by Name, or Entering an associated Product Number
- After selecting the Product, the Operator will be prompted to select the appropriate Size or Unit, either by the Product's Purchase Sizes or any of its Selling Sizes
- The Selling Sizes are shown in the Size Selection box while the Product's Purchase Sizes are shown to the right of the Select button
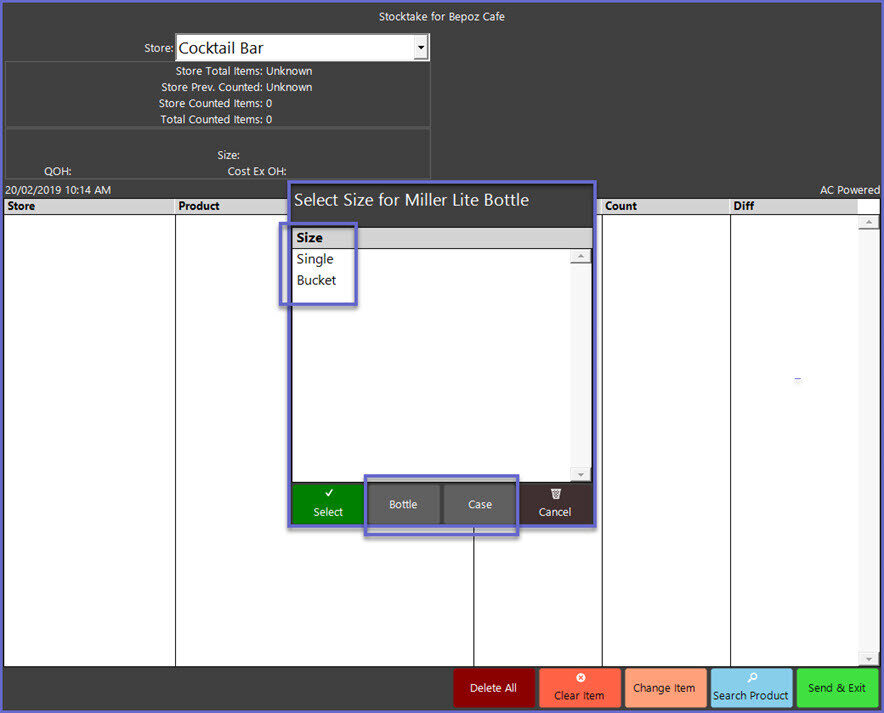
- The Operator will then be prompted to enter the Quantity Counted for the selected Product and Size
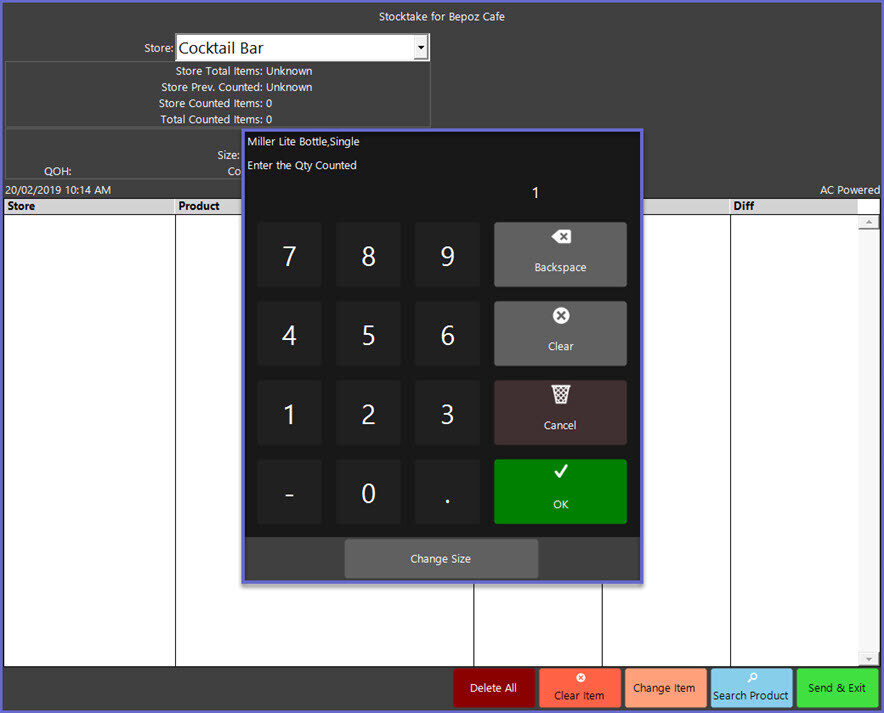
- The Product will now be added to the Stocktake window which will display the Counted Quantity, the theoretical QOH, and the Difference between the Actual and Theoretical
- Just above the window, Product information for the highlighted Product will be displayed including the Base Size; Theoretical QOH; the Size that has been Counted with the Quantity of Base Selling Units per Purchase Unit in parenthesis, if applicable; and the Cost of the Theoretical QOH
- All of the Counted Quantity for a Product can only be entered as one (1) line item using one (1) selected Size; i.e., bottled beer cannot be entered as Case/s and Single Bottle/s - only one or the other
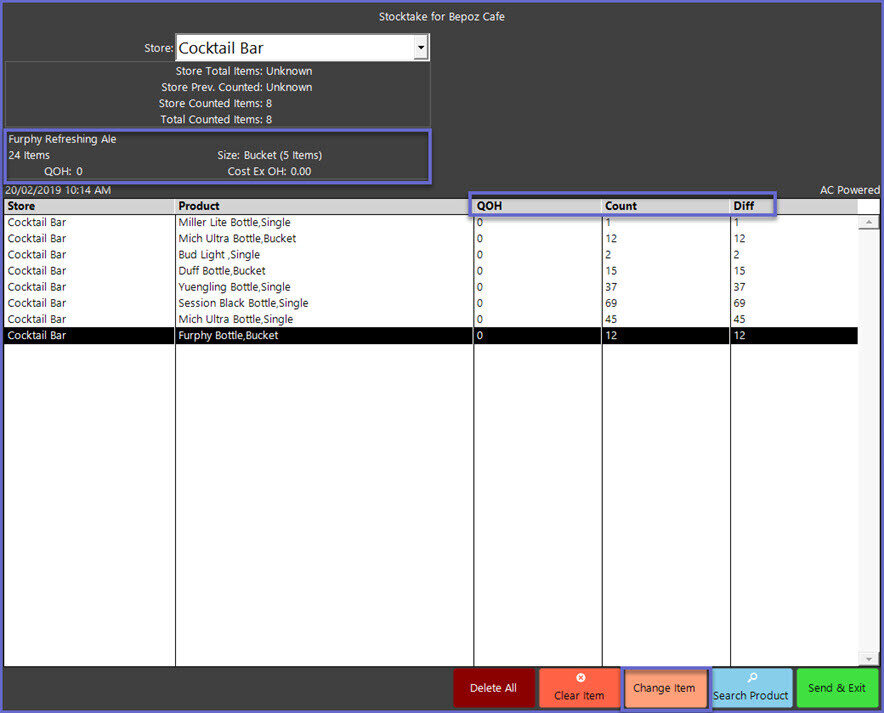
- Repeat the above steps to add all of the desired Products to the Stocktake
- If a mistake has been made for a Product, either highlight the Product and tap the Change Item button or double-tap on the Product and the Enter Quantity window will reopen
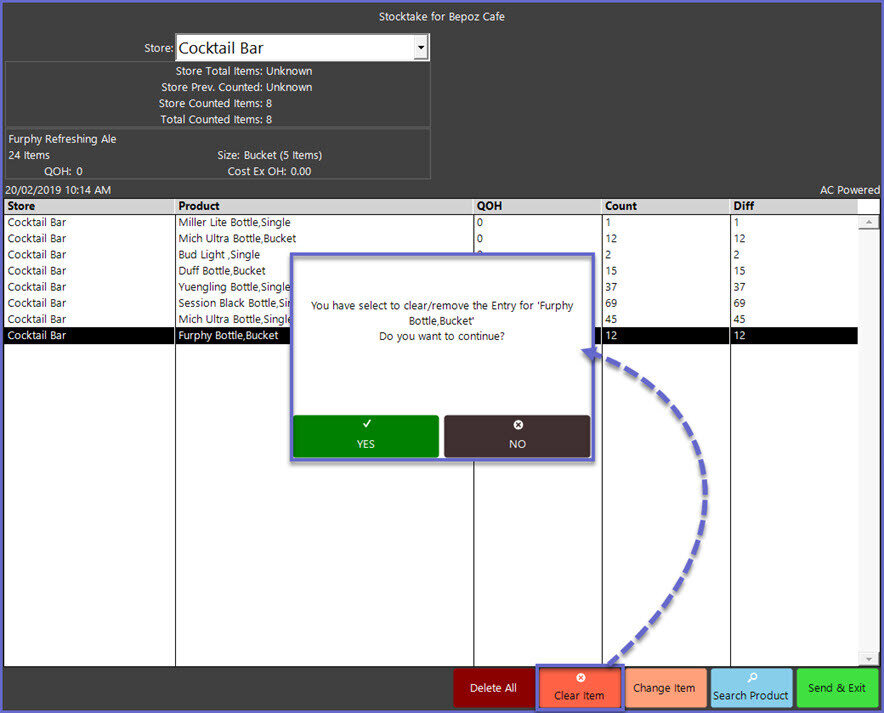
- If a Product needs to be removed completely from the Stocktake, highlight the Product and tap the Clear Item button
- A prompt will open for the Operator to confirm removal of the Product
- The removed Product will now be displayed on the screen highlighted in red and italicised along with the Name and Quantity Counted in parenthesis
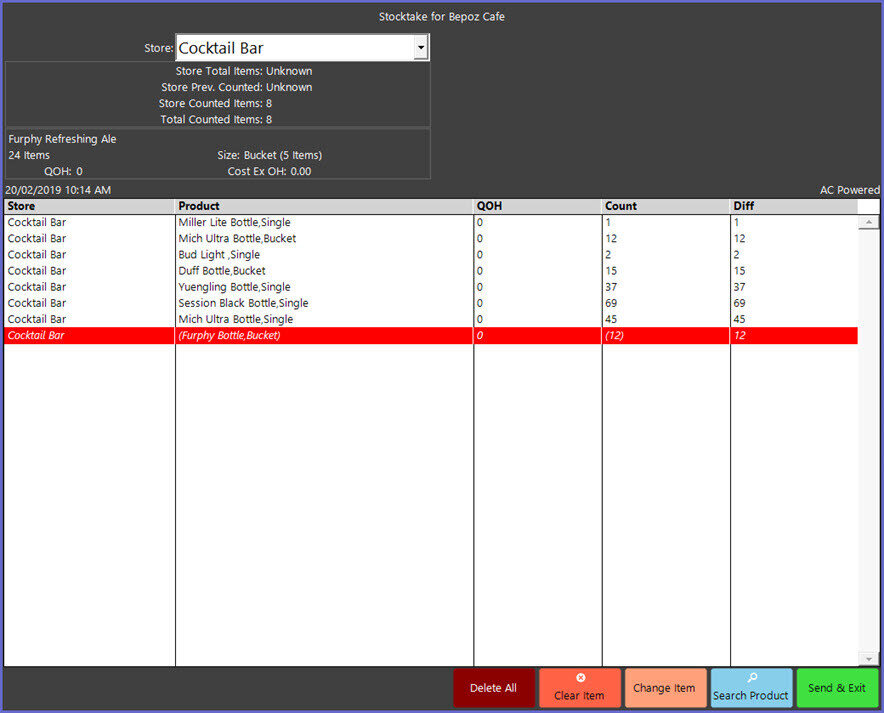
- The entire Stocktake can be cancelled by tapping on the Delete All button
- A warning prompt will display for the Operator to confirm that all of the entries will be deleted; this may require a Manager's Override
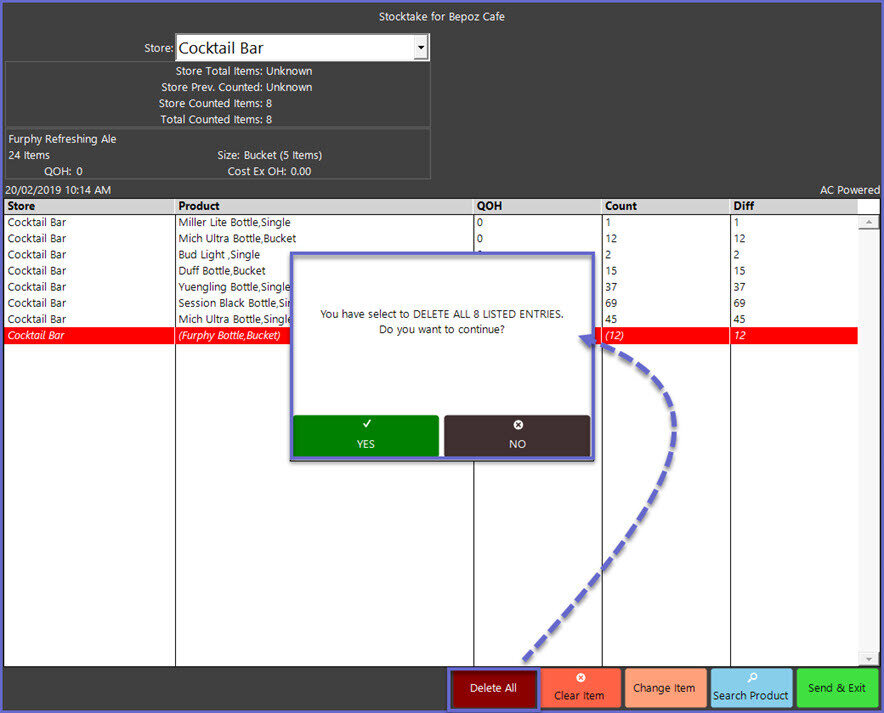
- To Save the Stocktake, tap on the Send & Exit button
- A prompt will display for the Operator to confirm transmittal of the Stocktake to the Server; this provides a final chance for the Operator to go back to make any changes
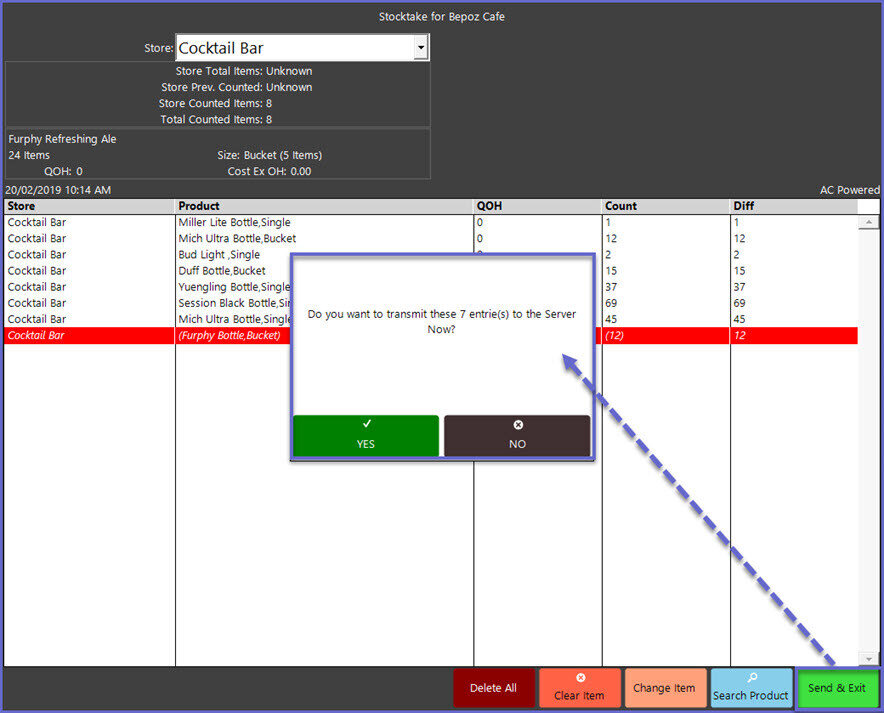
- After the transmittal has been sent, a prompt will display to confirm the Stocktake transmittal to the Server; this will include the Transaction ID for reference
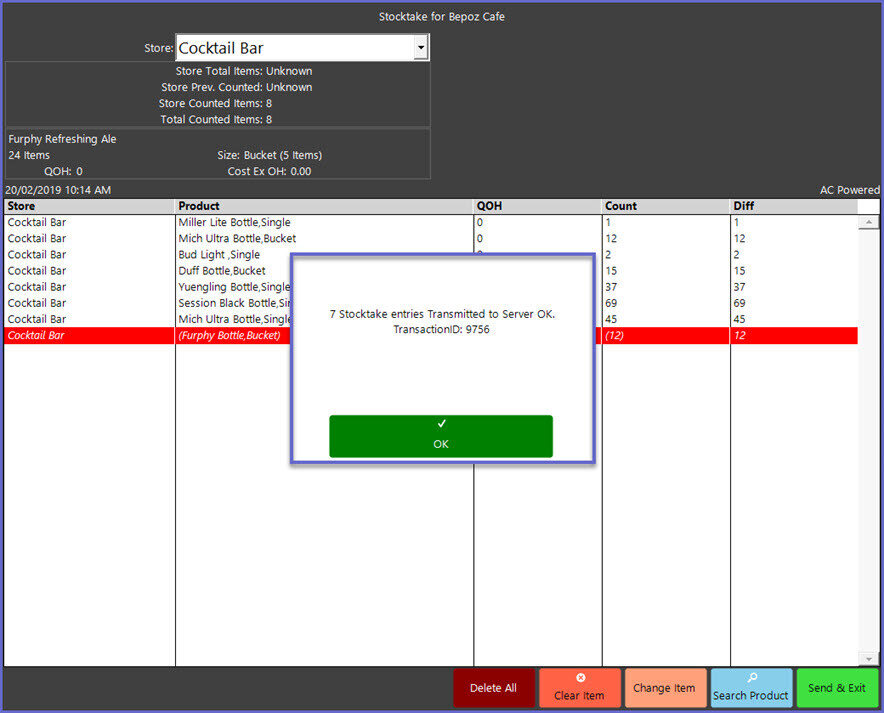
- After the Stocktake has been sent to the server, the process must be finalized via BackOffice in Stock Control
- These functions can also be individually found in SmartPOS Till Functions as SmartPOS "Restock" & "Stock Transfer" Functions and can be used for purposes other than Stocktake
