
This article outlines the Understock/Overstock Report including how it can be accessed and configured within BackOffice. This Report analyses the Stock On Hand and Sales for a selected Period, and reports whether Products are Overstocked or Understocked. With this Report, the average Organization will be able to substantially reduce the amount of Stock On Hand, as well as avoid running out of Stocked Products. Additionally, the Report has an option to set the Min. Max.
This article outlines the Understock/Overstock Report including how it can be accessed and configured within BackOffice.
This Report analyses the Stock On Hand and Sales for a selected Period, and reports whether Products are Overstocked or Understocked.
With this Report, the average Organization will be able to substantially reduce the amount of Stock On Hand, as well as avoid running out of Stocked Products.
Additionally, the Report has an option to set the Min. & Max. Settings of Products based on the analysis.
With the Min. & Max. set, Operators will be able to generate Purchase Orders in the system automatically.
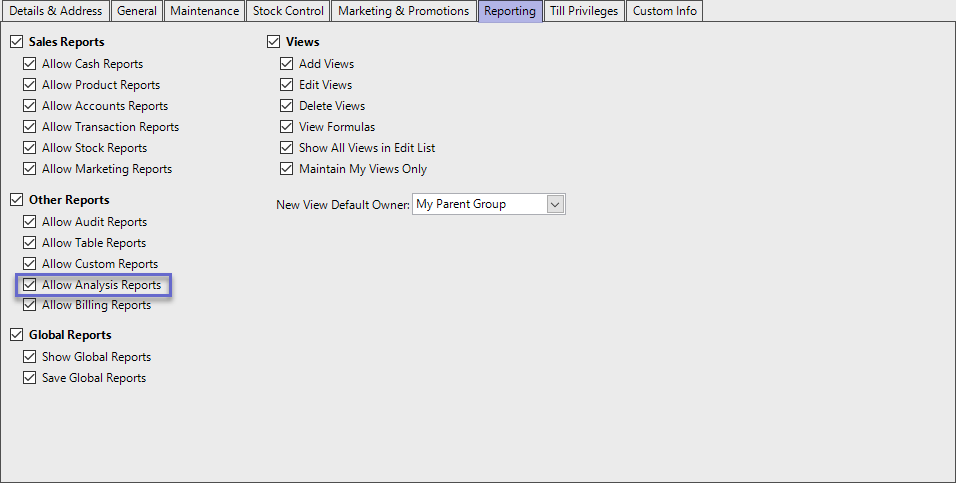
Prerequisites- For an Operator to be able to access and run Analysis Reports within BackOffice - such as the Understock/Overstock Report - the Allow Analysis Reports flag within the Reporting tab of Operator Maintenance must first be enabled
- If this flag is not enabled, an Operator cannot access UnderStock/Overstock Reports
Accessing Understock/Overstock Reports
- Complete the following steps to access Understock/Overstock Reports:
- Log in to BackOffice
- From the side menu, Select "Analysis Reports" to expand the list of Available Reports
- Select Understock/Overstock Reports which will open a new Stocktake Report Window
- Select the required Product Group from the Product tree
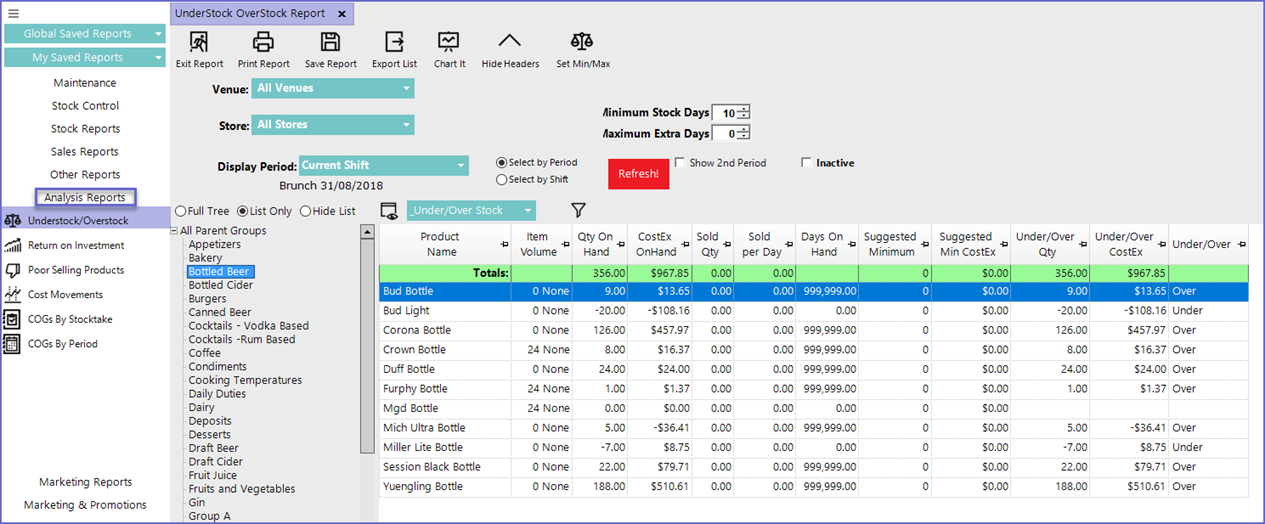
Reporting Options
- Venue
- Sets the Venue for which the Understock/Overstock report is generated
- Store
- Sets the Store for which the Understock/Overstock report is generated
- Display Period
- Sets the time period for which report will be generated
- The time can be selected either by choosing specific Period or by choosing a particular shift
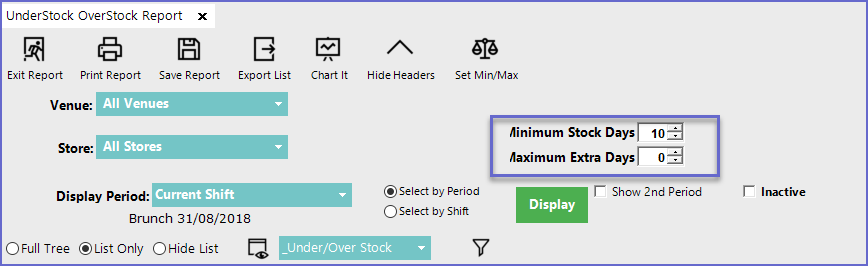
- Minimum Stock Days
- This sets the least number of days that the Product stays on hand which calculates if the Product is overstocked or understocked currently
- Maximum Extra Days
- This sets the maximum number of extra days that the Product can be stocked which calculates if the Product is overstocked or understocked currently
- Show 2nd Period
- Will show a second Display period option to allow comparison
- Inactive
- Lists all the Products along with the Inactive ones
- If Stock On Hand is 0 for a Product, the Product will not show any info for Overstock/Understock; it will be blanked out
- Also if the product is between the Min-Max value, the Report will not display the Understock or Overstock; the field will be blanked out
Minimums & Maximums
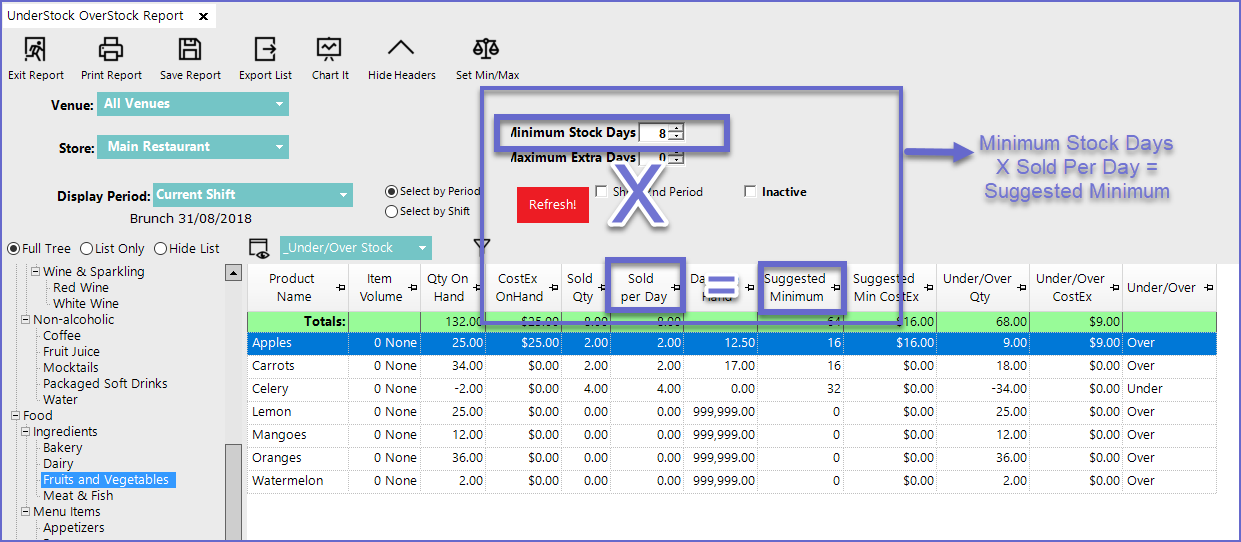
- Calculating Minimum Quantity:
- The Minimum Quantity is set by multiplying the value of Sold per Day with Stock Days
- i.e. Minimum Stock Days x Sold per Day = Suggested Minimum
- Calculating Maximum Qty:
- The Minimum Quantity is set by the following equation
- (Sold per Day multiply by Stock Days) + (Sold per Day multiply Extra Days) = Under/Over Qty
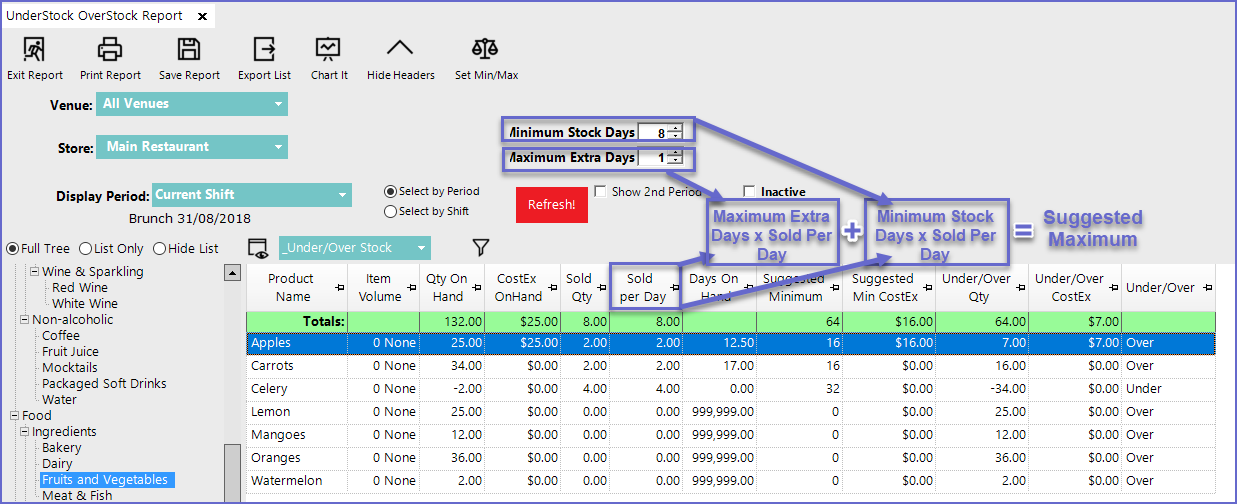
- When the value is set to 0 in the Maximum Day or Extra Days field, the field is ignored in the equation
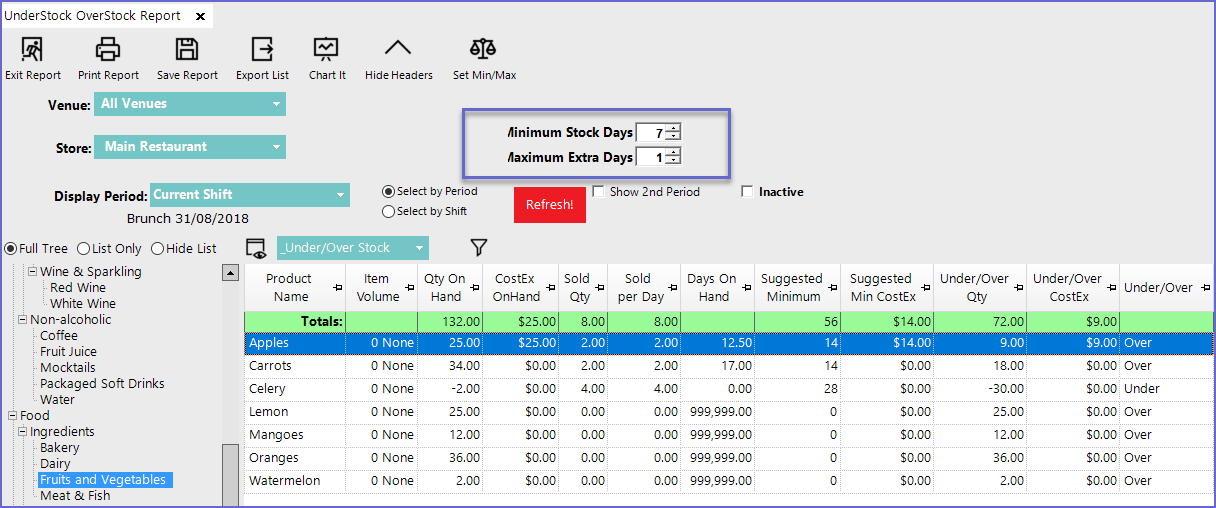
Setting Minimums & Maximums
- Bepoz allows automatic updating of Minimum and Maximum stock quantity by clicking on the 'Set Min/Max' button at the menu bar

- In the given example; the Minimum Stock Days for Apples have been set as 7 and Maximum Extra Days have been set as 1
- So when 2 Apples are sold per day; the Suggested Minimum is 14
- Double-clicking the line item will open the Product for Editing
- However, these values will not be updated in the Product Edit page
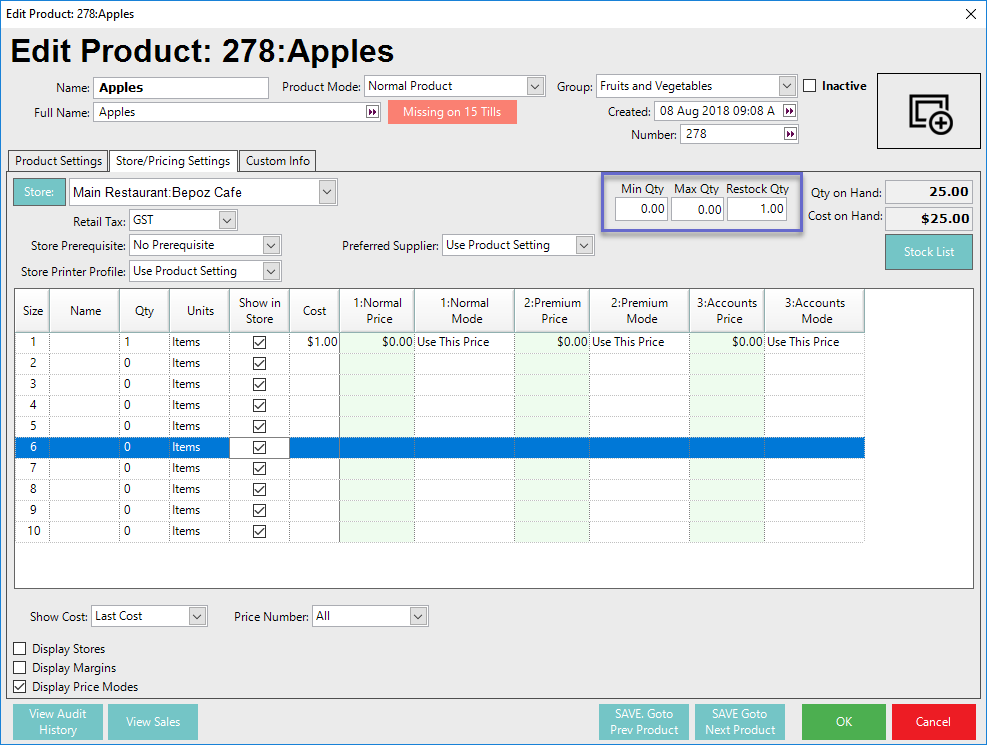
- The Operator can either manually change the value but doing so for every Product is not possible
- So to Automatically change the Minimum and Maximum value for all the products; Go back from the 'Edit Product' page
- Click the 'Set Min/Max' button which will open up a dialogue box asking for operator's permission; Click 'Yes' to continue
- The Min/Max update can only run in one store at a time; so choose one particular store from the Store Drop-down box while setting Min/Max
- This changes the Min/Max value for all the products displayed
- Double Click on the product line to check

'_Under/Over Stock' View
- This is one of the default views for this report which shows if the products are Understocked or Overstocked
- This View type has the following fields
Field |
Description |
| Product Name |
|
| Item Volume |
|
| Qty on Hand |
|
| CostEx on Hand |
|
| Sold Qty |
|
| Sold Per Day |
|
| Days on Hand |
|
| Suggested Minimum |
|
| Suggested Min CostEx |
|
| Under/Over Qty |
|
| Under/Over CostEx |
|
| Under/Over |
|
'_Overstock Receipt' View
- This shows the details of products that are Overstocked
Field |
Description |
| Product Name |
|
| Item Volume |
|
| OverStocked Last Inwards |
|
| Suggested Minimum |
|
| LastInward Qty OnHand |
|
| LastInward Qty Recv |
|
| LastInward Costex Recv |
|
| LastInward Date Recv |
|
'_Calc Min/Max' View
- This view will display the minimums and maximums of the product
Field |
Description |
| Product Name |
|
| Item Volume |
|
| Qty On Hand |
|
| Current Minimum |
|
| Current Maximum |
|
| Sold Qty |
|
| Sold Per Day |
|
| Days on Hand |
|
| Suggested Minimum |
|
| Suggested Min CostEx |
|
| Suggested Maximum |
|
| Suggested Max CostEx |
|
- Operators can also create Custom Views by clicking on the 'View' button located in the Reporting Options