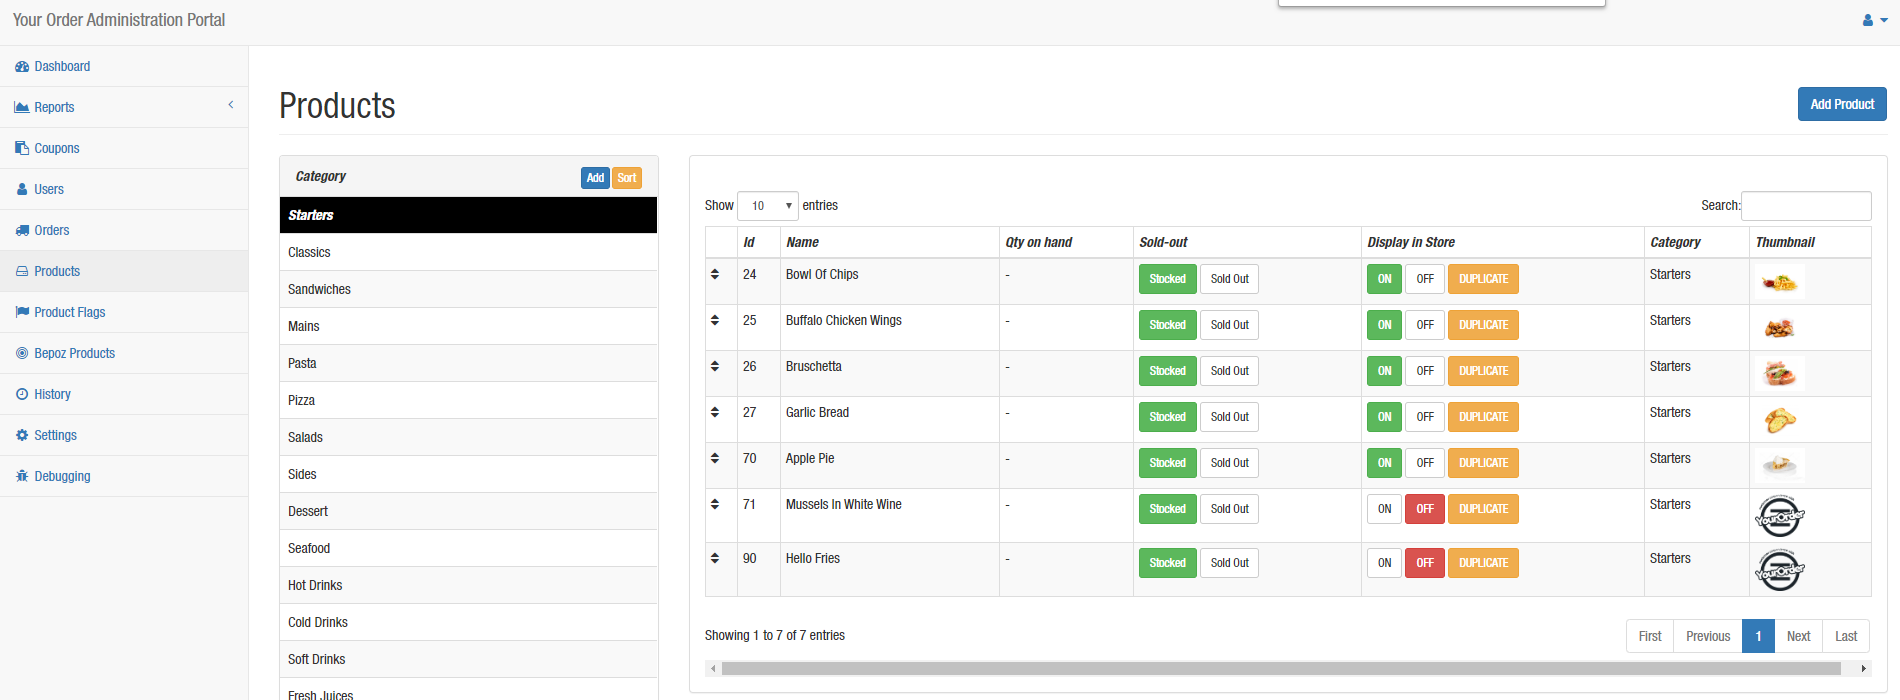
By clicking “Products” in the navigation menu you will enter the products section, this screen shows the list of all the products that were created in YourOrder.
By clicking “Products” in the navigation menu you will enter the products section, this screen shows the list of all the products that were created in YourOrder. The list has shortcuts features that allow Back-Panel users to do quick adjustments to the products, such as check the quantity on hand (of tracked products), stock available (stocked or sold-out), Display in store (Show product in YourOrder or not), category, image, and duplicate the product setup.
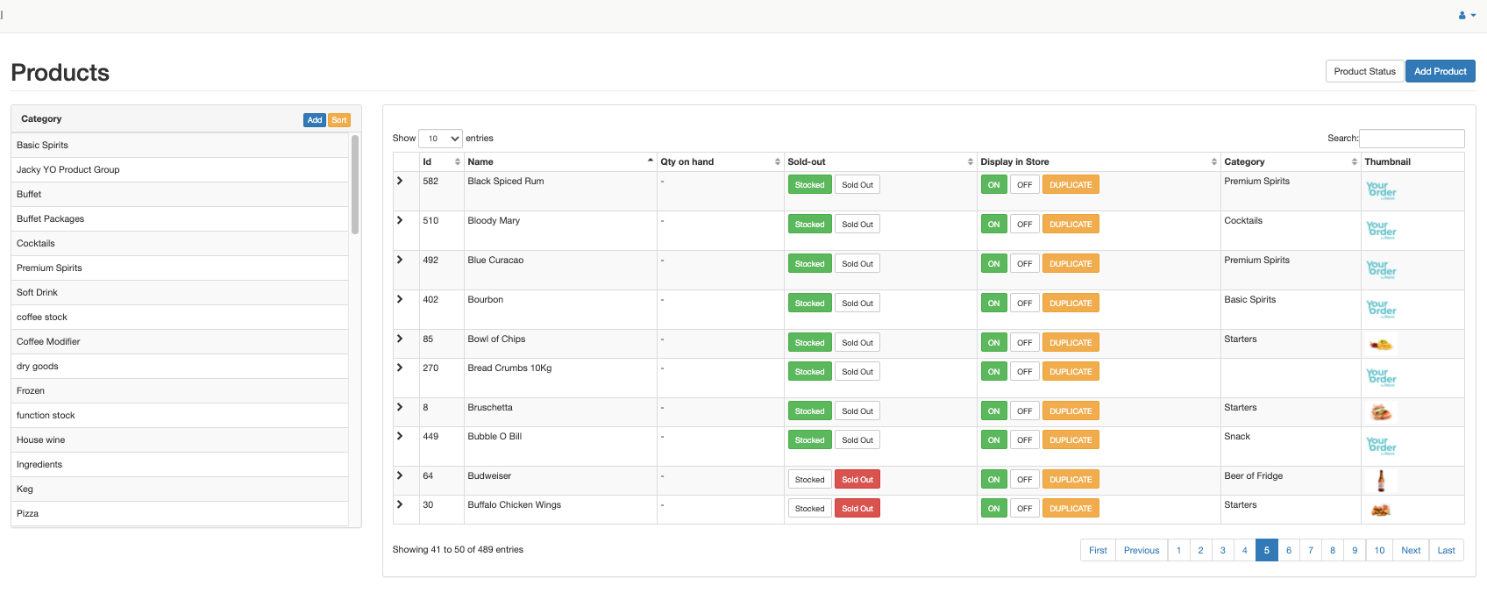
Check Product Status
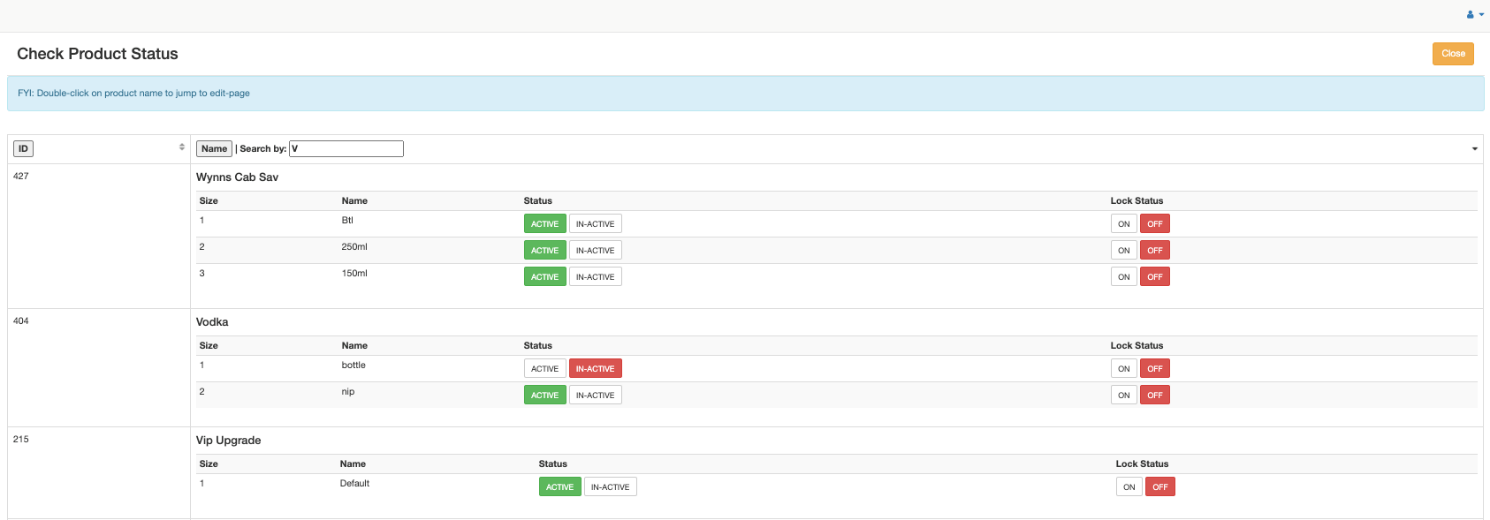
| ID |
Button sorts the Product ID numerically ascending or descending
|
| Name |
Button sorts the Product Name alphabetically ascending or descending
|
| Search |
Field filters to any matching products against the specified text. All associated sizes are also displayed
|
|
Product Name
|
Double clicking on the product name opens the product page
|
| Status |
Size status activation switch against each product size.
ACTIVE = Displays relevant size for purchase thus enabling customer to purchase product in that size
IN-ACTIVE = Hides relevant size for purchase (unless it’s the default in the product settings)
|
|
Lock Status
|
Lock status activation switch against each product size.
ON = Stops BEPOZ sync re-activating relevant size for purchase when sync runs
OFF = Allows BEPOZ sync to re-activate relevant size for purchase despite staff user deactivating previously
Note: Lock status will switch to ON by default if Status is switched to IN-ACTIVE and visa versa if switched to ACTIVE.
|
| Close |
Button returns to the Products list page
|
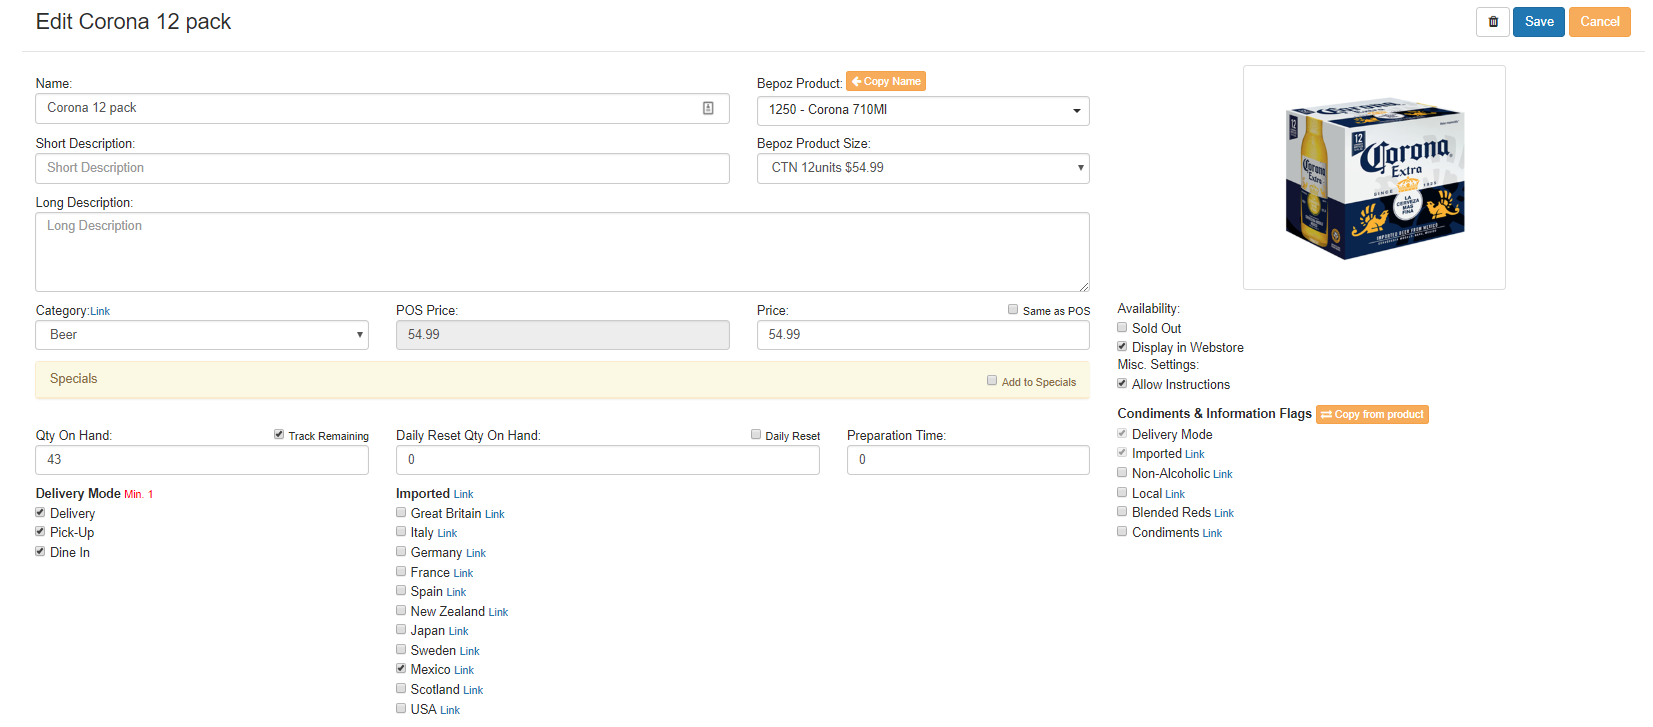
Add a New Product
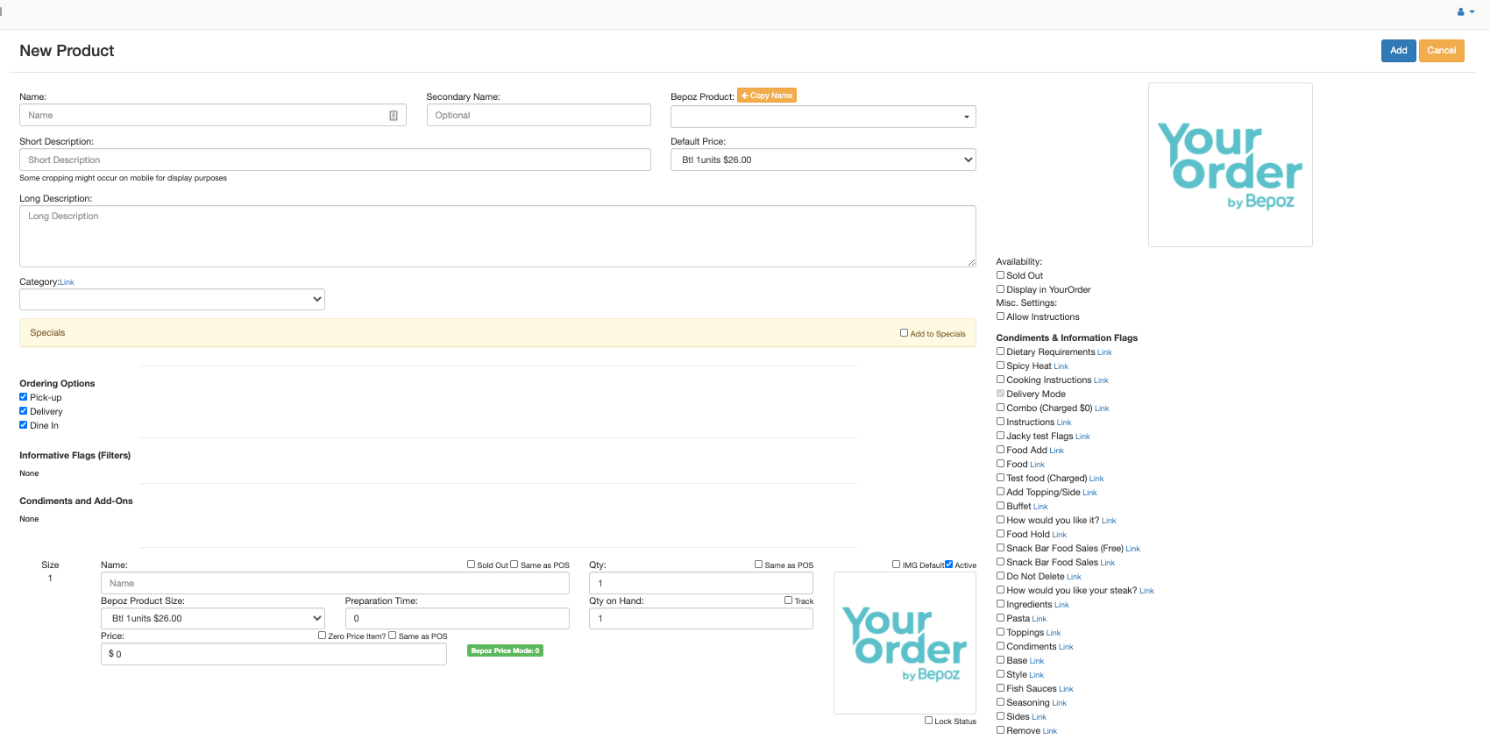
| Name |
Name of the product that will be displayed in YourOrder.
|
|
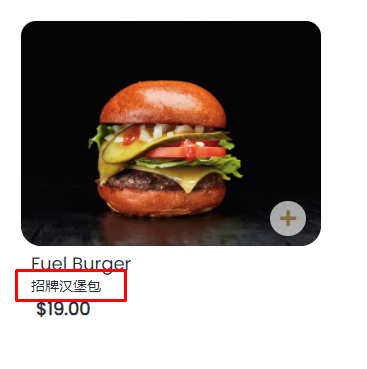
Secondary Name
|
Optional name that will be displayed below the original product name.
For instance, to support the second language, could add in Hanji/Chinese characters
|
|
Bepoz Product
|
Every YourOrder product must be linked to a Bepoz Product. All the sales will be recorded in Bepoz following this product.
|
|
Short Description
|
Product’s short description. Displayed in the menu with no images.
|
|
Long Description
|
Product’s long description. Displayed in the product’s detail panel.
|
|
Default Price
|
The default price that will show on the menu. (e.g. small, medium or large)
|
| Category |
Selects the category or subcategory this product will be displayed under in YourOrder.
|
|
Delivery Mode
|
Select in which delivery mode this product will be available.
|
|
Sold Out
|
Displays sold-out flag in YourOrder and the product is no longer available to purchase.
|
|
Display in YourOrder
|
The product is displayed on the YourOrder page.
|
|
Allow instructions
|
If checked, an “add a note” box will be displayed. This box allows end users (customers) to add custom instructions.
|
|
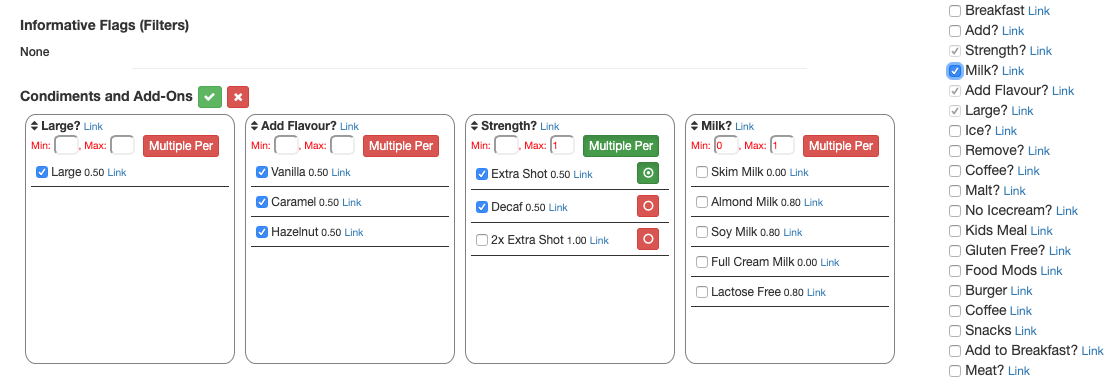
Condiments & Information Flags
|
Adds flags to the product, which allow the customer to filter it in YourOrder. These flags can be informative, e.g. dietary requirements, or about condiments e.g. spicy heat.
The Delivery Mode Flag is mandatory, and it sets if this product will be available for Delivery only, Pickup only, Dine In only or multiple delivery modes.
By clicking on “Copy from the product” a drop-down is displayed for the Back-Panel users to select a product and copy its flag’s configuration.
|
|
Sold Out
|
By checking this box, the respective product size will show as sold out in YourOrder.
|
|
Same As POS
|
Displays above the Size Name, Qty, Price fields to dictate: Ticked, if corresponding field takes the value as set from Bepoz or, unticked, if field uses custom value set in YourOrder
|
|
Size Name
|
This is the product size’s name that is shown toward the bottom of the page.
By default, the size name is set to the Bepoz size name. To assign a custom name in YourOrder to this size, untick the “same as POS” box and enter the desired name
|
|
Size Qty
|
This is the quantity of items that the product’s size corresponds to. By default, the size qty matches the Bepoz quantity for that size. To assign a custom quantity in YourOrder to this size, untick the “same as POS” box and enter the desired quantity |
|
Bepoz Product Size
|
Select which Bepoz product size corresponds to the YourOrder size for traceability in Bepoz
|
|
Preparation Time
|
Set the preparation time for this product’s size in minutes
|
| Track |
If ticked, it will count down the ’Qty on Hand’ for the specific product’s size until it reaches zero quantity based off the amount of times it’s purchased in YourOrder. Once out of stock, a sold-out flag is displayed in YourOrder
|
|
Qty on Hand
|
The number of available products of the respective size available for selling in YourOrder
|
| Price |
This is the product size’s price that will show in YourOrder.
By default, the product size’s price matches the Bepoz price for that size. To assign a custom price in YourOrder to this size, untick the “same as POS” box and enter the desired price
Note: Member Prices for products will display only when relevant customer progresses to Checkout
|
|
IMG Default
|
CHECKED = Product’s image also displays as the product size’s image
NOT CHECKED = No image or image manually selected for size from the gallery displays for the size
Note: If no image is manually selected for the current size but images are used on other sizes in the same product then the venue logo will display against the current size in the retail website
|
| Active |
CHECKED = Displays relevant size for purchase thus enabling customer to purchase product in that size
NOT CHECKED = Hides relevant size for purchase (unless it’s set as the default)
|
| Image | Product’s image displayed in YourOrder. Recommended size: 400 x 340 pixels. Picture file size: Up to 1MB |
|
Lock Status
|
CHECKED = Stops BEPOZ sync process re-activating relevant size for purchase when sync runs
NOT CHECKED = Allows BEPOZ sync to re-activate relevant size for purchase despite staff user deactivating previously
Note: Lock status will switch to CHECKED by default if Status is switched to UNCHECKED and visa versa if switched to UNCHECKED.
|

Add Flags to Product

Sort Product Display