-
End-User | Products & SmartPOS
-
End-User | Stock Control
-
End-User | Table Service and Kitchen Operations
-
End-User | Pricing, Marketing, Promotions & Accounts
- Prize Promotions
- Points, Points Profiles and Loyalty
- Product Promotions
- Repricing & Discounts in SmartPOS
- Vouchers
- Account Till Functions
- Pricing, Price Numbers and Price Modes
- Raffles & Draws
- Marketing Reports
- Accounts and Account Profiles
- Rewards
- SmartPOS Account Functions
- Troubleshooting
- Product Labels
- Packing Slips
-
End-User | System Setup & Admin
-
End-User | Reporting, Data Analysis & Security
-
End-User | Membership & Scheduled Billing
-
End-User | Operators, Operator Permissions & Clocking
-
Interfaces | Data Send Interfaces
-
Interfaces | EFTPOS & Payments
- NZ EFTPOS Interfaces
- Linkly (Formerly PC-EFTPOS)
- Adyen
- Tyro
- ANZ BladePay
- Stripe
- Windcave (Formerly Payment Express)
- Albert EFTPOS
- Westpac Presto (Formerly Assembly Payments)
- Unicard
- Manager Cards External Payment
- Pocket Voucher
- OneTab
- Clipp
- eConnect-eConduit
- Verifone
- AXEPT
- DPS
- Liven
- Singapore eWallet
- Mercury Payments TRANSENTRY
- Ingenico
- Quest
- Oolio - wPay
-
Interfaces | SMS & Messaging
-
Interfaces | Product, Pricing, Marketing & Promotions
- Metcash Loyalty
- Range Servant
- ILG Pricebook & Promotions
- Oolio Order Manager Integration
- Ubiquiti
- Product Level Blocking
- BidFood Integration
- LMG
- Metcash/IBA E-Commerce Marketplace
- McWilliams
- Thirsty Camel Hump Club
- LMG Loyalty (Zen Global)
- Doshii Integration
- Impact Data
- Marsello
- IBA Data Import
- Materials Control
- Last Yard
- Bepoz Standard Transaction Import
-
Interfaces | Printing & KDS
-
Interfaces | Reservation & Bookings
-
Interfaces | Database, Reporting, ERP & BI
-
Interfaces | CALink, Accounts & Gaming
- EBET Interface
- Clubs Online Interface
- Konami Interface
- WIN Gaming Interface
- Aristocrat Interface
- Bally Interface
- WorldSmart's SmartRetail Loyalty
- Flexinet & Flexinet SP Interfaces
- Aura Interface
- MiClub Interface
- Max Gaming Interface
- Utopia Gaming Interface
- Compass Interface
- IGT & IGT Casino Interface
- MGT Gaming Interface
- System Express
- Aristocrat nConnect Interface
- GCS Interface
- Maxetag Interface
- Dacom 5000E Interface
- InnTouch Interface
- Generic & Misc. CALink
-
Interfaces | Miscellaneous Interfaces/Integrations
-
Interfaces | Property & Room Management
-
Interfaces | Online Ordering & Delivery
-
Interfaces | Purchasing, Accounting & Supplier Comms
-
SmartPOS | Mobile App
-
SmartPDE | SmartPDE 32
-
SmartPDE | Denso PDE
-
SmartPDE | SmartPDE Mobile App
-
MyPlace
-
MyPlace | myPLACE Lite
-
MyPlace | Backpanel User Guides
- Bepoz Price Promotions
- What's on, Events and tickets
- Staff
- System Settings | Operational Settings
- Vouchers & Gift Certificates
- Member Onboarding
- Members and memberships
- System Settings | System Setup
- Reports and Reporting
- Actions
- Offers | Promotions
- Messaging & Notifications
- System Settings | App Config
- Surveys
- Games
- User Feedback
- Stamp Cards
-
MyPlace | Integrations
-
MyPlace | FAQ's & How-2's
-
MyPlace | Release Notes
-
YourOrder
-
YourOrders | Backpanel User Guides
-
YourOrders | YourOrder Kiosk User Guide
-
YourOrders | Merchant App User Guide
-
WebAddons
-
Installation / System Setup Guides
- SmartPOS Mobile App | Setup
- SmartPOS Mobile App | SmartAPI Host Setup
- SmartPOS Mobile App | BackOffice Setup
- SmartPOS Mobile App | Pay@Table setup
- SmartKDS Setup 4.7.2.7 +
- SmartKDS Setup 4.6.x
- SQL Installations
- Server / BackOffice Installation
- New Database Creation
- Multivenue Setup & Config.
- SmartPOS
- SmartPDE
- Player Elite Interface | Rest API
- Interface Setups
- Import
- KDSLink
- Snapshots
- Custom Interface Setups
-
HOW-2
- Product Maintenance
- Sales and Transaction Reporting
- SmartPOS General
- Printing and Printing Profiles
- SQL
- Repricing & Discounts
- Stock Control
- Membership
- Accounts and Account Profiles
- Miscellaneous
- Scheduled Jobs Setups
- Backoffice General
- Purchasing and Receiving
- Database.exe
- EFTPOS
- System Setup
- Custom Support Tools
-
Troubleshooting
-
Hardware
1 | Xero Integration Setup (decrepitated)
This article explains how to set up the integration with Xero. Private applications use 2 legged OAuth and bypass the user authorization workflow in the standard OAuth process. Private applications are linked to a single Xero organisation which is chosen when you register your application. Access tokens for private applications don't expire unless the application is deleted or disconnected from within the Xero organisation. You can create a maximum of 2 private applications against a single Xero organisation.
This article explains how to set up the integration with Xero.
Private applications use 2 legged OAuth and bypass the user authorization workflow in the standard OAuth process. Private applications are linked to a single Xero organisation which is chosen when you register your application. Access tokens for private applications don't expire unless the application is deleted or disconnected from within the Xero organisation.
You can create a maximum of 2 private applications against a single Xero organisation.
Xero Private Applications
How to setup a Xero Private application.
- Generate a public/private key-pair for use with your application.
- Login to the Xero Developer portal which is located at https://developer.xero.com/myapps
- Go to the My Applications > Add Application screen in the Xero Developer portal to add your application.
- Select "Private" and enter a name for your application
- Choose your organisation from the drop down list
- Upload the public certificate (.cer file) you generated in step one.
- Choose save. You will now have a Consumer Key to use for your application.
Why do I need an X509 Public Key Certificate?
- When using a private application, all calls to the Xero API must be signed using RSA-SHA1.
- An X509 Certificate (containing the public key only) will need to be uploaded to Xero so that we can use this to verify the source of your API calls.
Create A public/private key pair
Overview
Private and Partner applications must sign messages using the OAuth RSA-SHA1 method.
This requires that you create a public/private key-pair, and upload the public certificate during application registration. We refer to this certificate as an application certificate.
To get started with creating a public/private key-pair we recommend the use of OpenSSL
- Download OpenSSL for Windows: LINK
- You may need to open the command prompt with admin privileges (Run as administrator
- You will need to restart your computer before SSL can generate certs
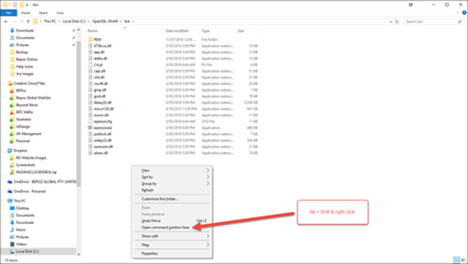
- To run the commands below, go to the OpenSSL32 directory on your PC, and change to the /bin directory.
- Press Alt + Shift & right click then choose “open command window hear”
- openssl genrsa -out privatekey.pem 1024
- openssl req -new -x509 -key privatekey.pem -out publickey.cer -days 1825
- openssl pkcs12 -export -out public_privatekey.pfx -inkey privatekey.pem -in publickey.cer
- Generates a private key
- creates a X509 certificate (.cer file) containing your public key which you upload when registering your private application (or upgrading to a partner application).
- Export your x509 certificate and private key to a pfx file. If your chosen wrapper library uses the .pem file to sign requests then this step is not required.
Please make a note of the expiry date of your certificate as you will need to upload a replacement in the Xero Developer Center before the expiry date to ensure uninterrupted service
Xero Public Applications
- Website: https://developer.xero.com/myapps
- Your API application details should follow these guidelines:
- Should be the same as the name of the add-on
- Should not include any references to Xero trademarks or products
- Company URL should be a direct link to the product or company
API application setup screen
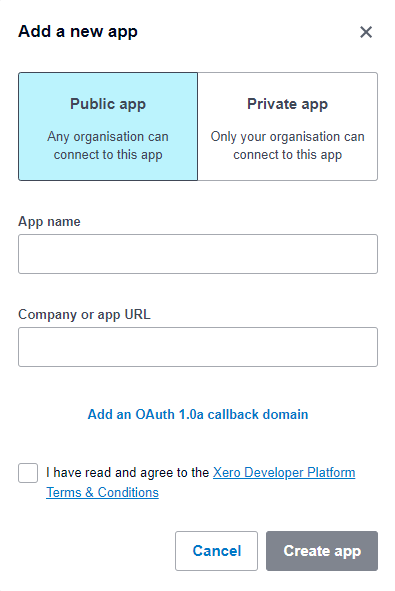
Give the app a name and the company website address
· AppName: XeroBepoz
· URL: https://companyname.com
BackOffice Xero Device Configuration
Private Application
In BackOffice you will need to access venue, store and tills. Select the venue workstation the end-user will be accessing Xero from. When you have selected the venue workstation on the tab tool bar you will see Add New Device – click on Add New Device.
The snap shot below shows an example of the device setup.
- Device type: Account Link
- External DLL Name: Accint.Dll
- Class Name: Xero
- Device name: Xero Public
- Workstation: selected workstation device is attaching to
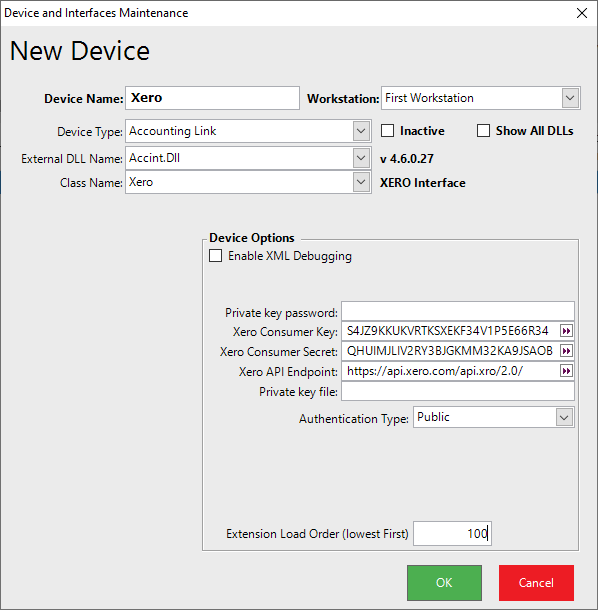
- Xero consumer key:
- Xero consumer secret:
- Xero API endpoint: https://api.xero.com/api.xro/2.0/
- Private Key file: N/A
- Authentication type: Public
Once you have set the device up in back office – the whole Bepoz system will need to restart to initiate the Xero link in Backoffice.
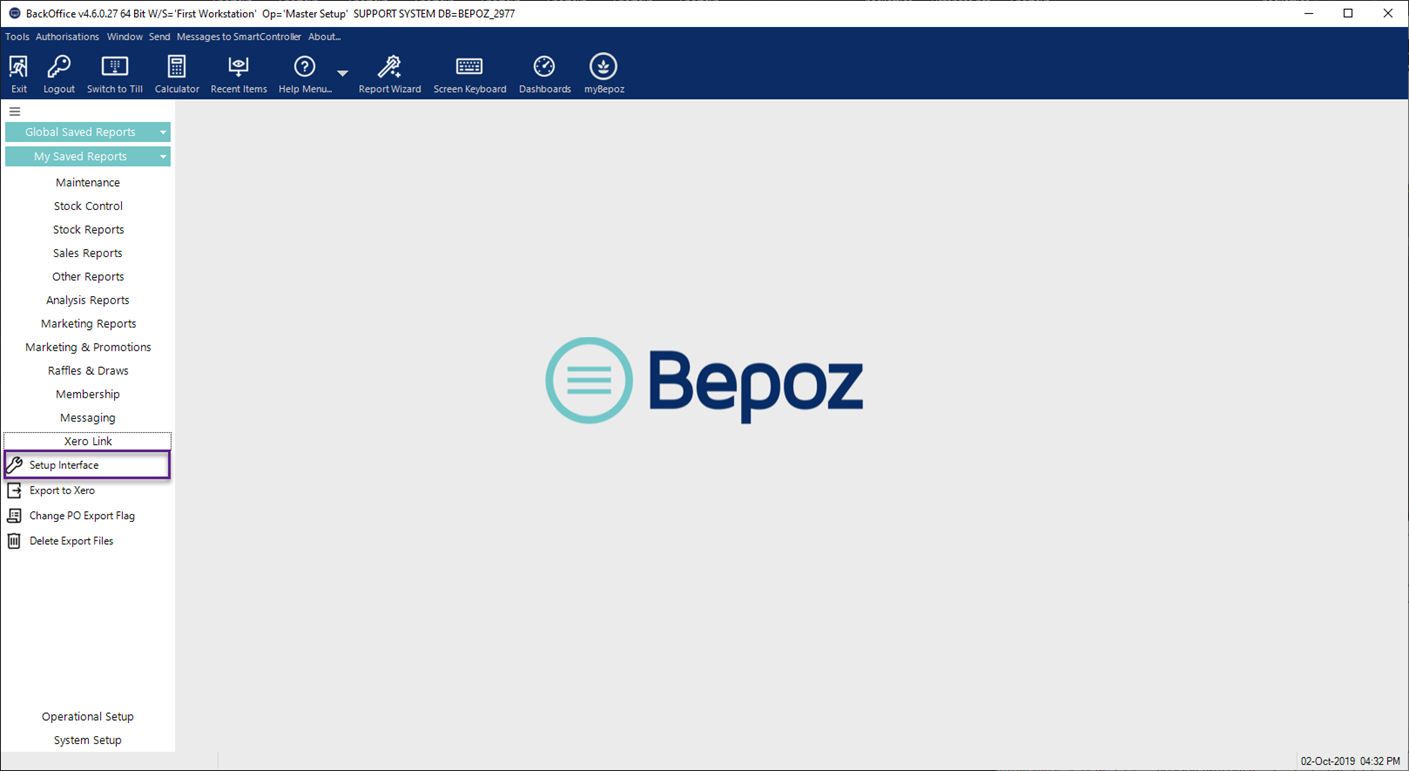
Xero Setup Configuration
Click on Setup interface
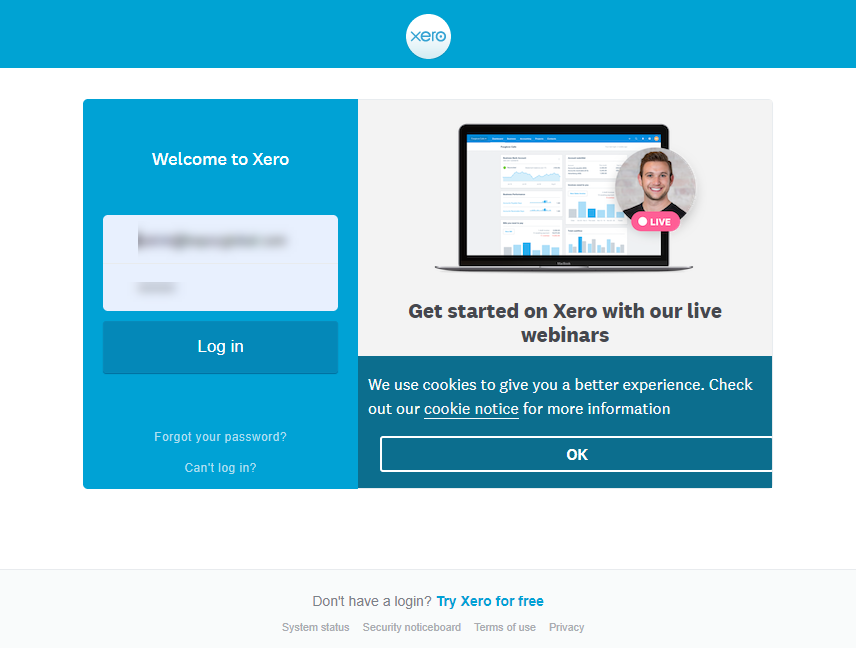
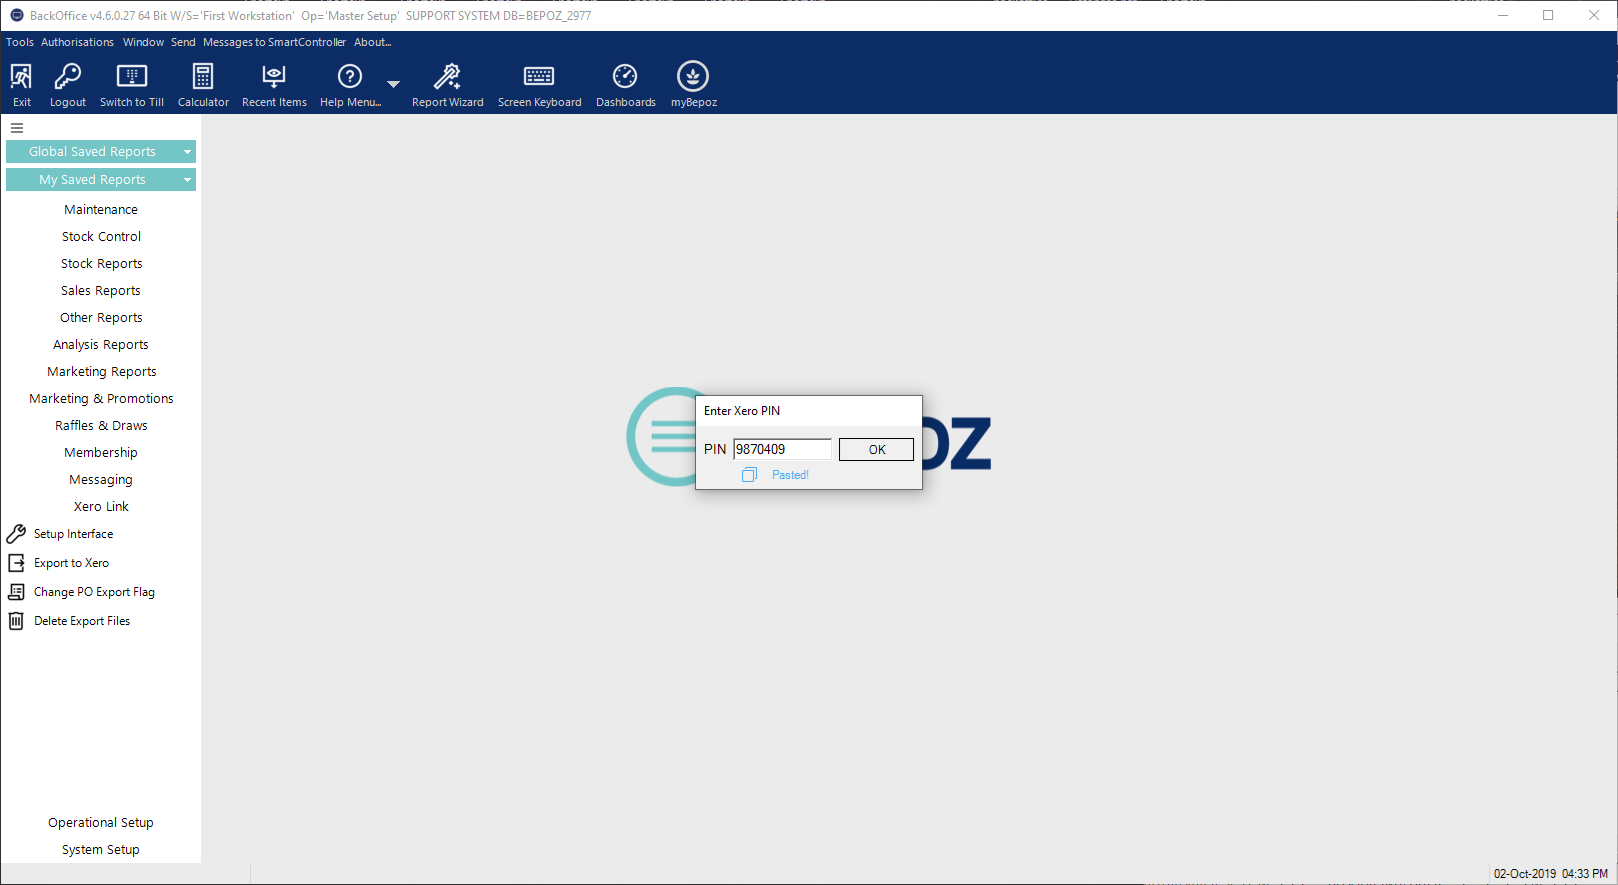
Login to Xero
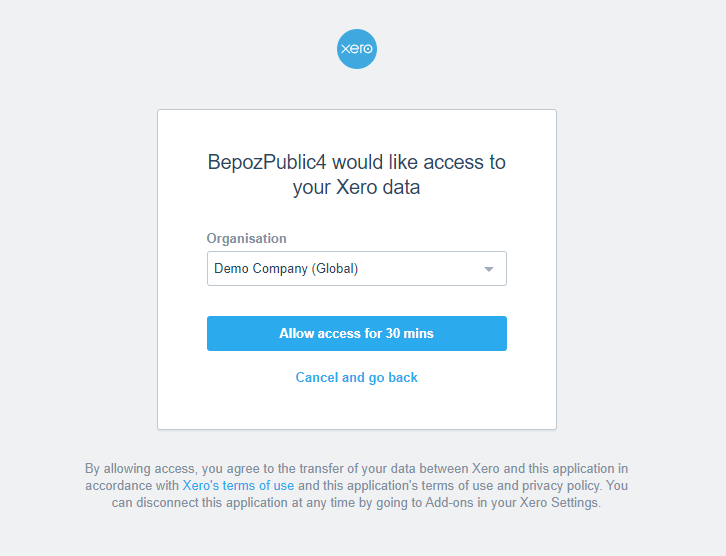
Choose Organisation
Copy Code
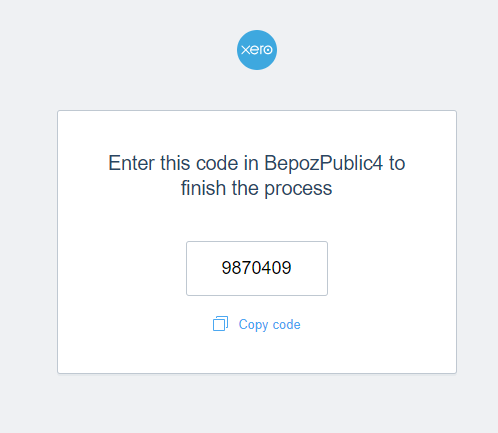
Paste Code
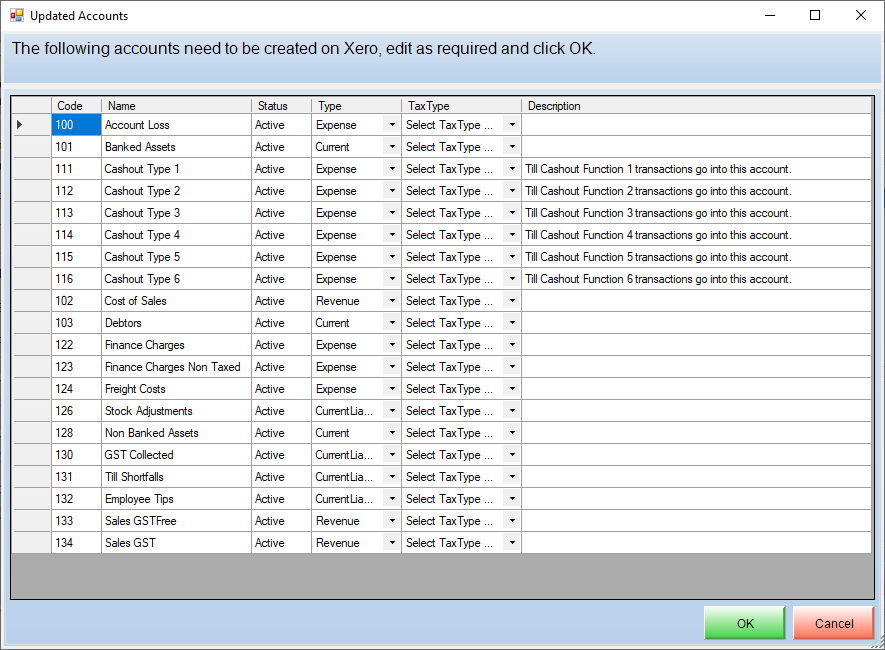
Sync Accounts
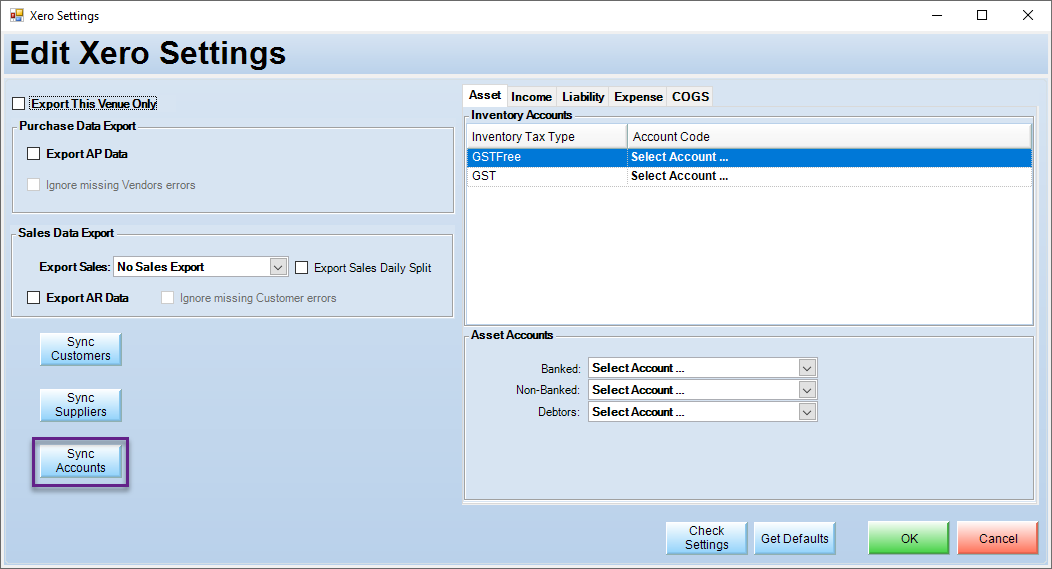
Choose your Tax Types