
Overview
The Suggestion List feature is used for upselling products through recommendations.
Item Suggestion
The Suggestion List feature is used for upselling products through recommendations. A backpanel user may see that certain products upsell better at different days, times and service areas and will configure lists using these conditions.
Example 1. Coffees may sell more in the morning while lemonade and cola sell often in the afternoon. The back panel user will change coffees to be suggested between 8:00am to 10:00am and lemonade or coke from 12:00pm to 9:00pm.
Example 2. Customers who use dine in may be suggested an alcoholic drink but customers who use the drive through will not. The back panel user will have lists that contain alcoholic drinks assigned to the dine in service and one with non-alcoholic drinks allocated to the drive through service.
The Menu/Suggestion Items section is where users can change these conditions. This window contains three major sections.
-
Suggestion List panel: Displays the existing suggestion lists. Each list should contain different products and is used in conjunction with Order Type and Default schedule.
-
Order Type section: This area is used to specify the service type that needs to be modified. Each service type is separated by tabs and applying lists to each is done separately. This area can be used for situations like example two by containing suggested products to specific ordering areas.
-
Default Schedule section: Displays weekly schedule times that suggestion list can be assigned to. This area can be used in circumstances similar to example one, where upselling of products should be applied to times when they are most popular.
Suggestion List Setup
In the Suggestion List page, users will be able to create a new list or edit an existing one. Products can be added, deleted and configured separately.
Add/Edit a Suggestion List
|
Feature |
Description |
|
|
|
|
|
Name |
Name of the Suggested List that is displayed to the Admin Backpanel operator. |
|
|
|
|
|
Select Products |
Displays a selection of products that can be added to the products list. Each product can be searched through manual scrolling or the search bar. |
|
|
|
|
|
Products List |
List of all products that are to be included within the Suggestion List. |
|
|
|
|
|
Show? |
ON: Shows product to customers when suggestion list popup appears. |
|
|
|
|
|
This button within the products list removes the product. |
|
|
|
|
|
|
Save |
Saves the configurations of the Suggestion List and takes user to Menu/Suggestion Items Window. |
|
|
|
|
|
Cancel |
Discards the new configurations of the Suggestion List and takes user to Menu/Suggestion List Window |
|
|
|
|
Steps
-
To access the Menu/Suggestion Items section, simply click the Menu/Suggestion Items button on the left-hand side. This will take users to the Menu/Suggestion Items page.
-
There are two methods to access different suggestion list pages:
i. To add a new suggestion list, click the button in the suggestion list panel.
![]()
ii. To edit an existing suggestion list, double left-click an option in the suggestion list panel.
-
Once a user advances to a suggestion list page, input a custom name within the name field, if a name is not present.
-
For adding products and products list functionality:
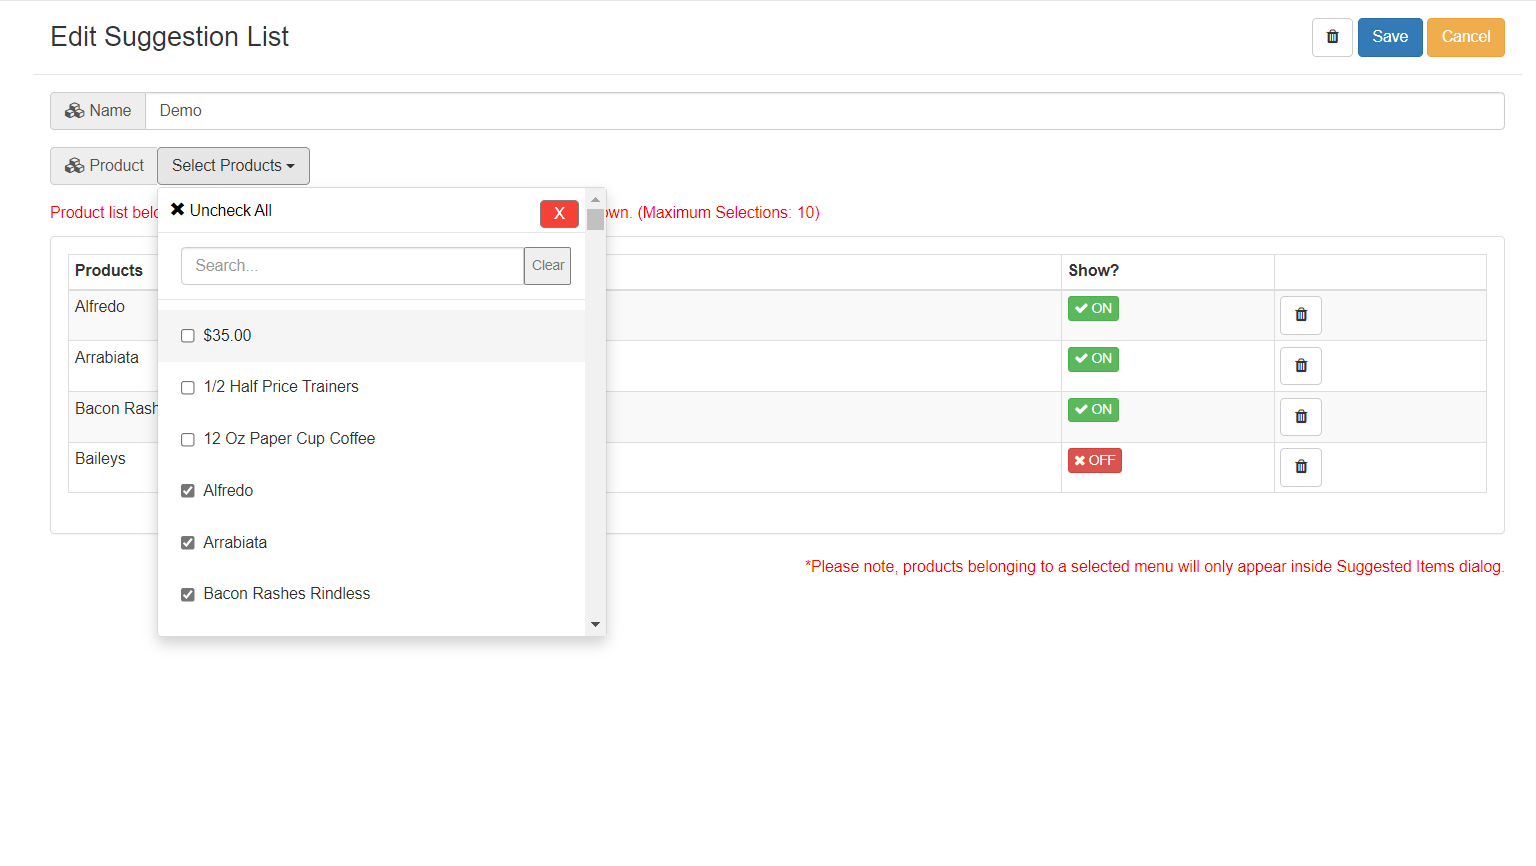
i. Click Select field next to Product field and a dropdown window will appear.
ii. Search for a product by scrolling down the list or using the search bar. Press clear to reset search bar.
iii. To select products, click the box to the left of the product. Multiple products can be selected from the dropdown.
iv. If the user needs to reset the list click button above the search bar to revert the product list to empty.
![]()
v. Pressing the button will close the dropdown window. Alternatively, users can click outside the dropdown window.
![]()
vi. By default, items within the product list are ON under the “show?” title. This column allows products to be seen by customers when the suggestion list popup occurs. To disable items from showing, click the green ON button in the show column and it will convert to a red OFF button.
vii. If the User would like to delete a specific item, click the in the respective product row and the product will be deleted from the list.
![]()
-
Once configurations are finalized, press save in the top right corner to save the new changes or cancel to discard them.
Note:
-
A minimum of 1 item and a maximum of 10 items can be added to one suggestion list. If the suggestion list is empty a prompt will occur asking to have at least 1 item.
Schedule a Suggestion List
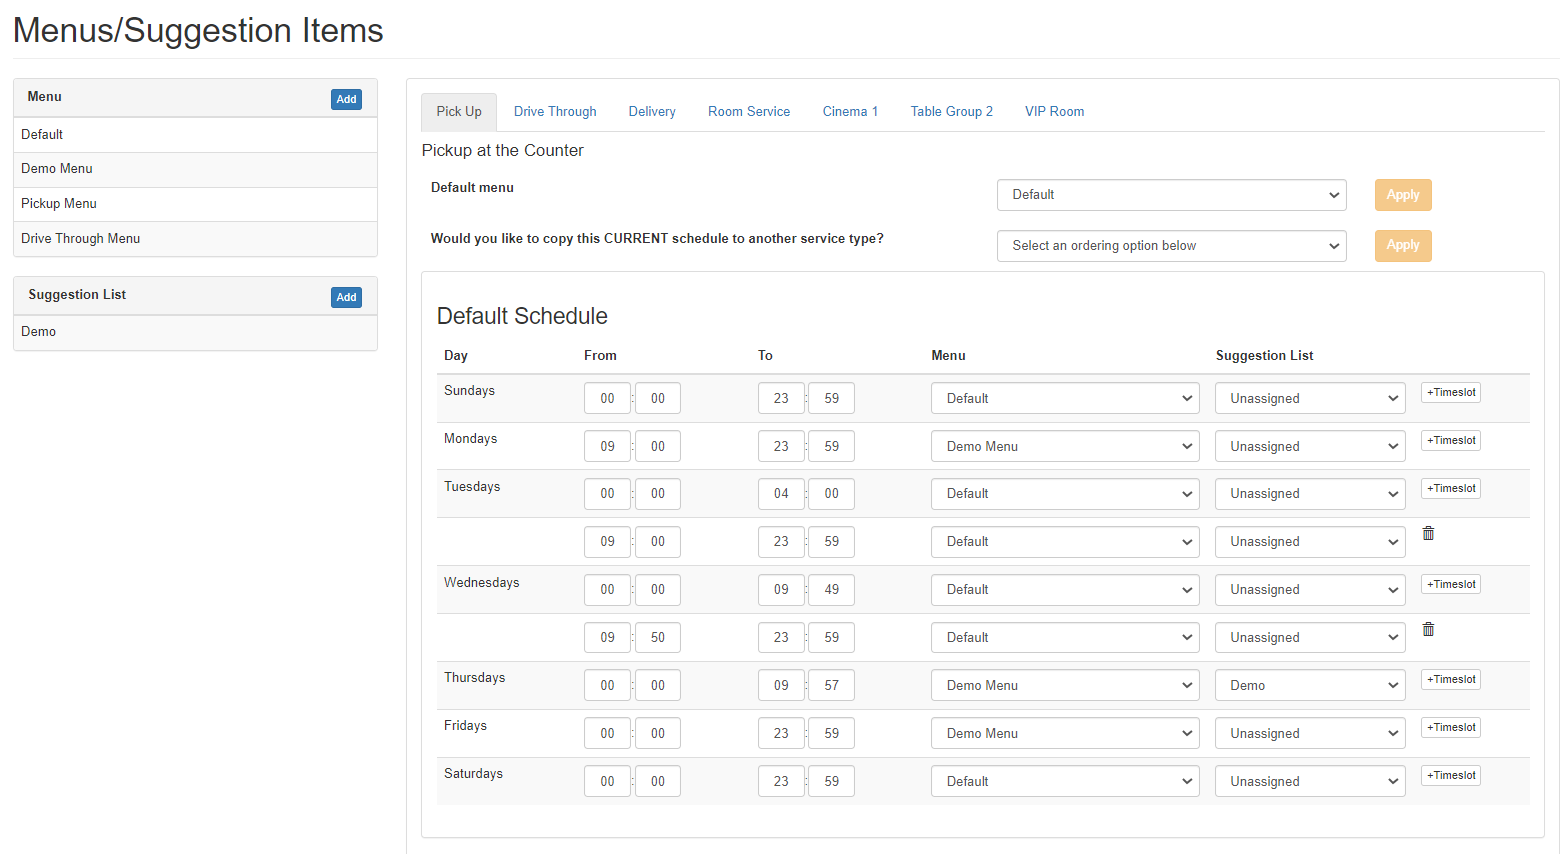
The Default Schedule section will display weekly schedule times that lists can be assigned to. By default, the suggestion list column will be unassigned. Above the Default Schedule is the service type section. This segment displays different order types in tab form, a default menu field to choose the standard menu and a copy schedule field to duplicate the same schedule to another service type.
Default schedule and order type section
Steps
-
Click the menu/suggestion list button on the left side of the page. The Menu/Item Suggestions List window will open.
-
Choose and select the preferred service type.
-
View the default schedule and select a menu schedule time. If the scheduled time is unavailable add a new time by clicking the button. Times can also be deleted by pressing the button.
![]()
-
Click the drop down in the Suggestion List column and select an option.
-
Users can also apply the same schedule and suggestion lists to other ordering types by navigating to the section above the default schedule. There will be a field inquiring “Would you like to copy this CURRENT schedule to another service type?”. Users can then click the dropdown and select the desired service time and click apply next to the field.
A popup will appear, inquiring if the user is sure they would like to copy the schedule to the new order type. If CANCEL is clicked the schedule will not be applied to the assigned order type. If OK is clicked, another popup will occur asking if user would also like to copy suggestion lists assigned to the schedule. If OK is clicked again, lists will be copied, if CANCEL is pressed within this popup, lists will not be copied but schedule copy will still apply.
Note:
-
If Schedule times overlap a popup warning will occur.
-
When copying schedules and suggestion lists, users should be cautious. The order type receiving the schedule copy cannot revert to its previous schedule. To reverse the timetable, users would have to do it manually. This warning will appear in the first popup when hitting apply to copy schedule field.
Frontend View
From the menu screen, customers will need to select a service, add products to their order, sign in and click checkout. Once done, the suggestion pop-up will occur, displaying various items. Customers can click the button or the product image to add them to the order. Once an item is selected, a green tick will appear indicating that the product is added to the cart and will be removed from the suggestion list a few seconds later. When the customer has finished and clicks the bottom button, they will be moved to the payment screen. If customers do not want to add any of the suggested items click the “no thanks” button or the in the top corner.
![]()
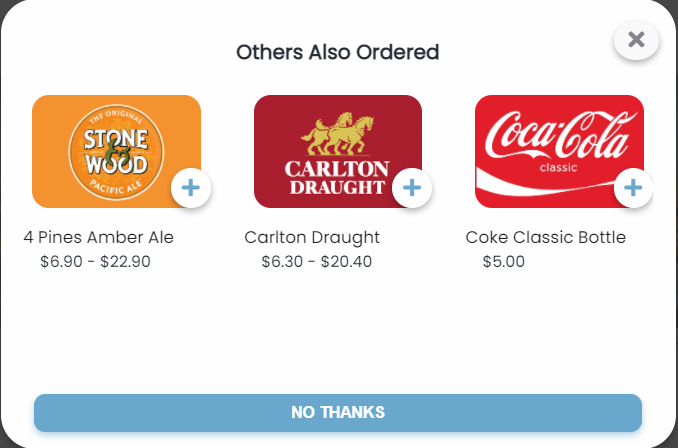
Suggestion pop-up
Note:
-
Suggestion items that are already placed in the order before the pop-up occurs, will not appear
-
In the suggestions pop-up, when an item is selected, the text in the bottom button will change to continue.
-
If a product has different sizes, the minimum and maximum costs will be displayed under the product. When is clicked it will send customers to the product size page and when a choice is made, it will move them back to the suggestion page, if there are still suggested options available
![]()
![]()
-
If products have condiments after clicking the , a pop-up will occur showing the product and all its condiment options. When choices are completed, the popup will close and customers will be sent back to the suggestion panel.