
This document contains information on basic operations in the YourOrder Kiosk.&n
This document contains information on basic operations in the YourOrder Kiosk.
Use the Table of Contents on the left to easier navigate this page.
System Requirements- Windows 10 and above (Android and IOS are not supported at this time)
- 21 Inch screen touchscreen monitor (to ensure the image quality of the images and interface)
- Epson TM-m30II network printer (Only this specific model and interface is supported at this time)
- Eftpos is done only via Oolio Payment terminals
Things to note:
- Only Pick Up and Dine In orders are available at the Kisok
- Oolio Payment is the only payment option
- Linking to existing loyalty and membership systems is currently not supported
The Kiosk installer can only be acquired from the Your Order team as each installer is unique to a venue. This means an installer for one venue will not work for another, which makes it essential that the correct installer is run for the correct venue.
For installers, this file can be found in YourOrder Kiosk Files. If the installer for the venue you’re installing is not there, please contact the Your Order Team.
Steps to install:
- Download the zip file from YourOrder Kiosk Files
- Create a folder in C:\ and call it YO Kiosk
- Extract the contents of the zip file to this folder
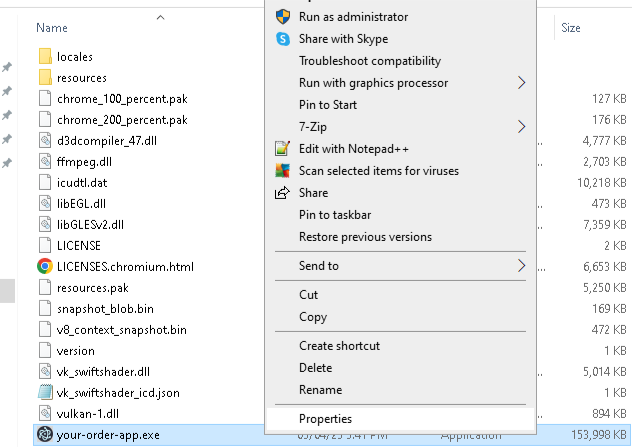
- Open the YO Kiosk folder and look for your-order-app.exe. Right-click and select properties. Go to the Compatibility tab, click the Change settings for all users and click Run this program as Administrator and hit Ok.
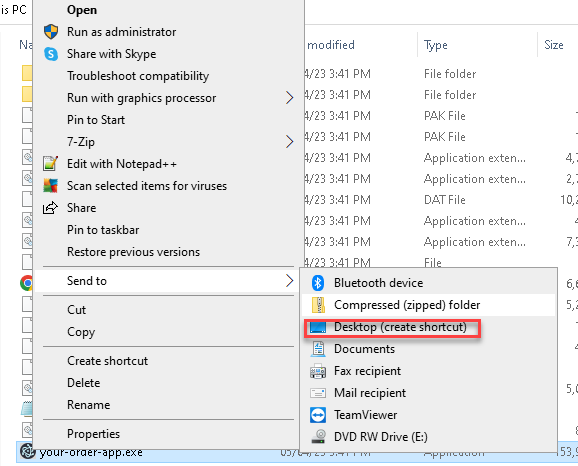
- Right-click on your-order-app.exe once more and select Send to then Desktop (create shortcut). You can then run the program from the Desktop.
 |
 |
 |
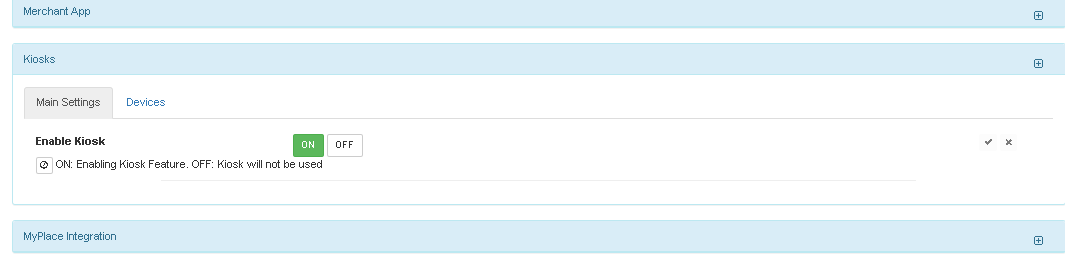
To set up the Kiosk, go to Settings>Kiosks.
Under the Main Settings, users can enable or disable the Kiosk service.
Under the Devices tab, users can add the Kiosks and the devices that would be installed with them.
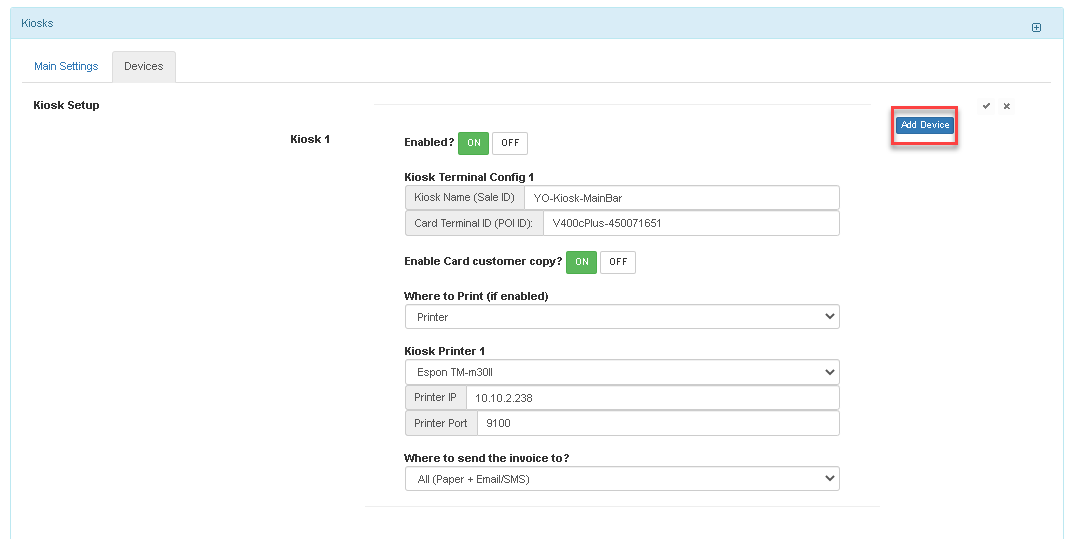
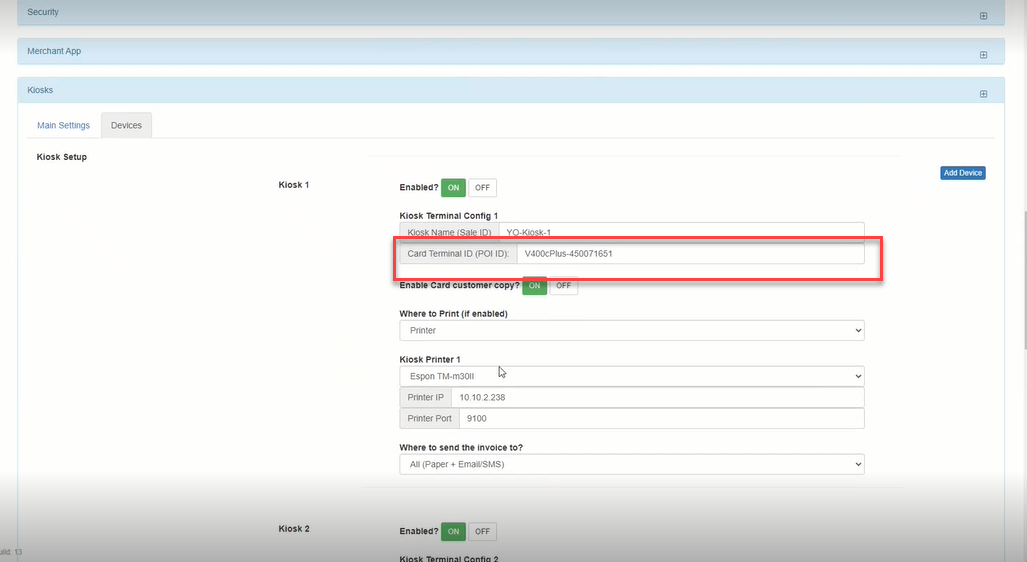
Click the Add Device button to add a new Kiosk device.
Set the Kiosk Name with the name that you would want to show under the reports.
Card Terminal ID is the model-serial number of the Oolio device that will be used with the Kiosk.
Kiosk Printer 1 is for the printer device setup which will be discussed later.
Setting up the Kiosk Banner ImageVenues can also set up their preferred image in the Kiosk to meet their advertising or branding purposes.
This can be done in the Backpanel by going to Settings>Branding>Kiosk Banner Image.
Things to remember for the image setup:
- The default size is W1400 x H2400 pixel for portrait mode
- The maximum image size is 2 MB.
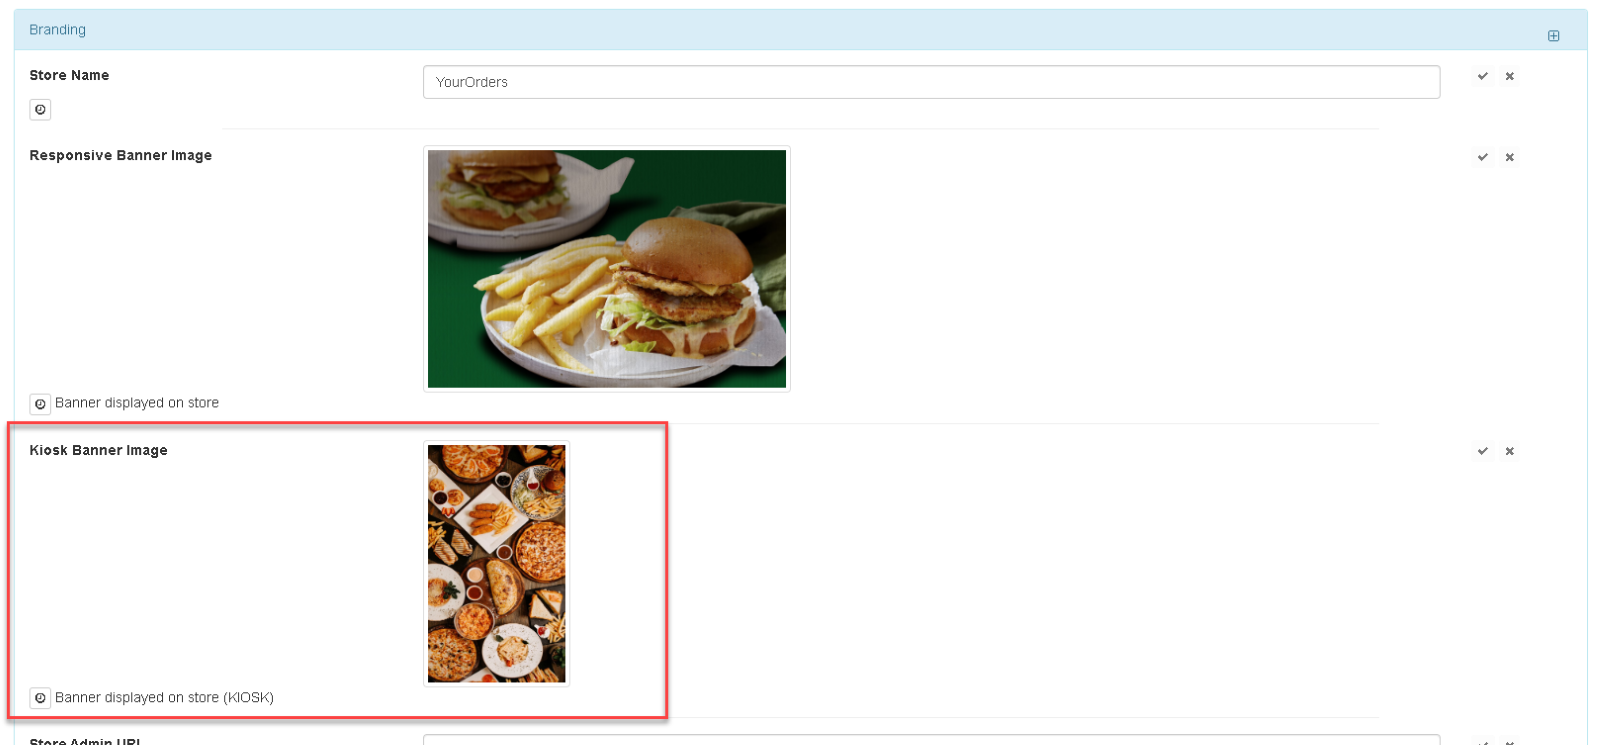
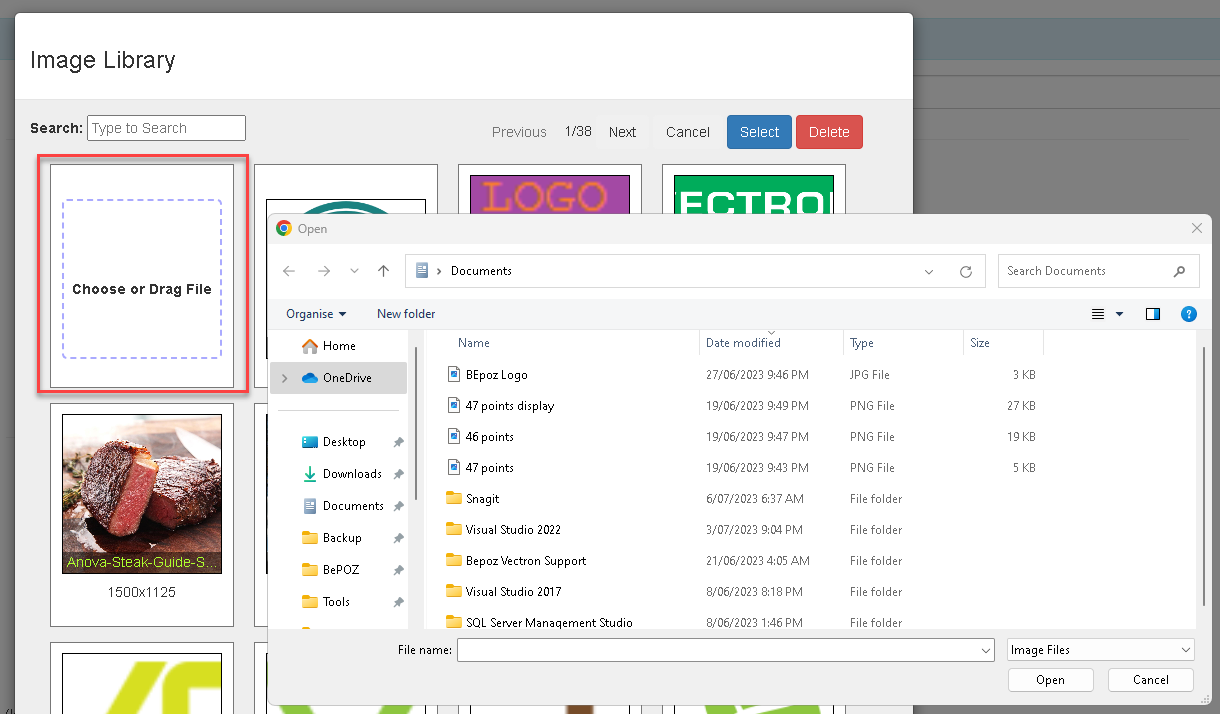
To add an image, click on the current image to bring up the Image Library. Users can now add a new image from their documents or select an existing image that is already in the system.
Simply highlight the image to use and hit Select.
Note: Do not forget to save the settings by clicking the tick mark on the right
In the Card Terminal ID field, enter the Oolio terminal information. Its format is Oolio model-serial number. You can find this information from your Oolio rep or from the back of the eftpos terminal.
Note: Remember to click the tick mark to save each setting.
Enable Card Customer Copy? - This flag lets you turn on or off the customer copy from printing.
Where to Print (if enabled) - This flag allows you to either print the customer copy from the receipt printer of the Kiosk or the Oolio terminal printer.
Adding a receipt printer to the KioskAfter the Oolio device setup is the printer setup.
Note: As of this time, only Epson TM-m30II network printer is supported in the system.
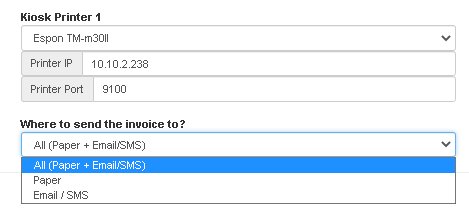
You would need to get the IP address of the printer and set it in the Printer IP field. To get the IP address of the printer do a self-test print by turning off the printer, holding down the feed button and turning it on with the feed button down.
The Printer Port can be left at 9100, or use the port that the venue IT would specify.
Under Where to send the invoice to? users can have the Kiosk print only (Paper), Email/SMS, or do both.
To confirm the printer is working, a test page can be run from the Kiosk device setup page.
Accessing the Device setup pageThe Device Setup page in the Kiosk is used to confirm the name of the Kiosk and the devices that are setup under it.
On the Kiosk screen, keep tapping on the lower-right corner until you get a pop-up to unlock the screen. You may have to tap at least ten times to get the pop-up to appear.

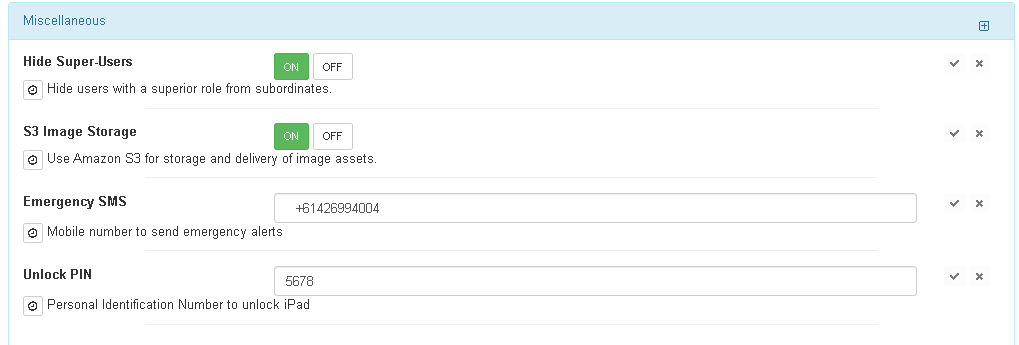
The passcode is the unlock PIN that can be found in Settings>Miscellaneous in the YourOrder Backpanel.
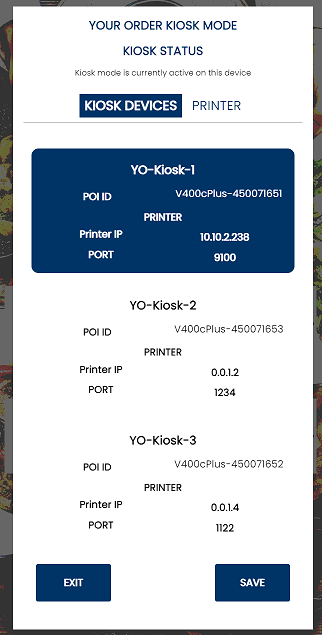
You will now see the Kiosk Mode screen.
The highlighted or selected entry is the identity or the name of the current kiosk. Should it be incorrect, select the correct Kiosk name and hit Save.
You can see all the Kiosk devices (printers and Oolio terminals) on this screen. You can also see the printer IP addresses and the Oolio terminal model (POI ID) and serial numbers. This screen is helpful in identifying which device is connected to which Kiosk screen.
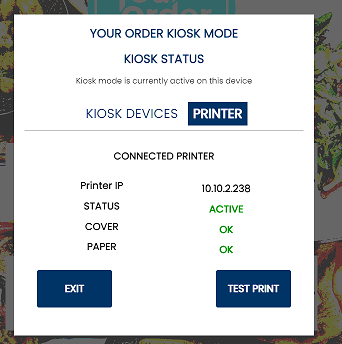
Doing a Printer Test
Click on the Printer tab. From this screen, you can see the status of the printer attached to the Kiosk and also do a print test. A small test docket should print out of the printer. If a test docket did not print, please contact the support team.
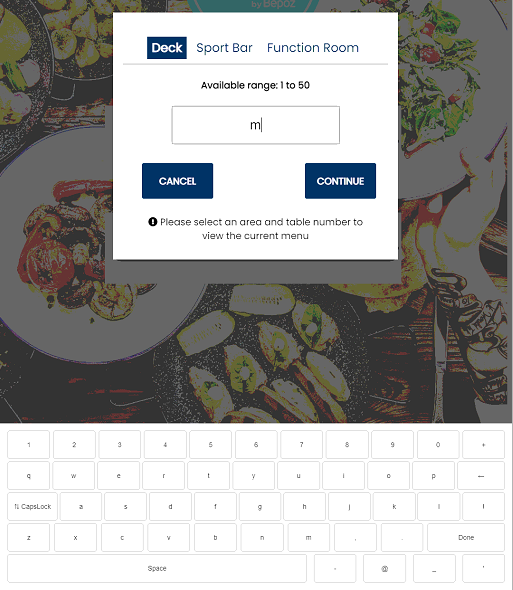
To start a transaction, select Start Table or Click & Collect. AS mentioned previously, the Kiosk can only do dine-in and pick up transactions.

Click on Start Table and the user will be prompted to enter a table number and a Name. The table name and number can be configured in the YourOrder backpanel.
As a reminder, current loyalty or membership information is not linked at the Kiosk. All accounts are guest accounts
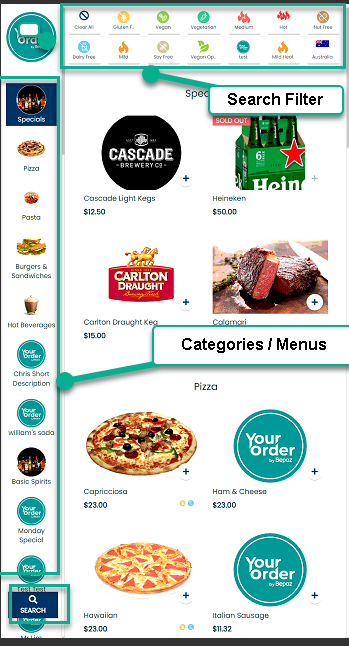
On the main screen are the products that are available for ordering.
The left panel shows the Menus or Categories for the items. Users can select the menu to show the products in that menu. Scrolling down on the main product screen will also automatically select the category on the left.
At the top of the screen are informative tags. These allow the venue to categorize their items based on the criteria that they want. For example, the venue can tag items as Chef’s Specials or Promo Items and these can be more easily selected in this section.
A user can make multiple selections based on their preference. Simply click the button to select or deselect the criteria. Click on Clear All to reset the selection to all items.
Note: There is a timeout setting of one minute so the user must make a selection, otherwise, the screen will return to the Home Screen and the user will have to start over. If there’s an item in the cart, the user has two minutes to select an action, otherwise they will get a prompt to start over.
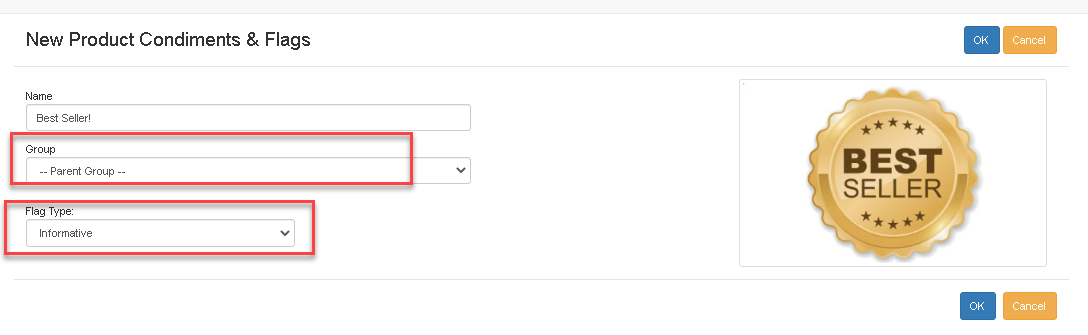
Setting up Informative FlagsTo setup Informative flags in the system, you need to access the Your Order Backpanel and add a Condiment group and the flags under it.
In Backpanel, go to Product Condiments & Flags and click Add Condiment.
Enter the name for the group and select -- Parent Group – under Group
Ensure that you set the Flag Type to Informative and hit ok.
You can also add an image as the Icon that will appear at the kiosk screen.
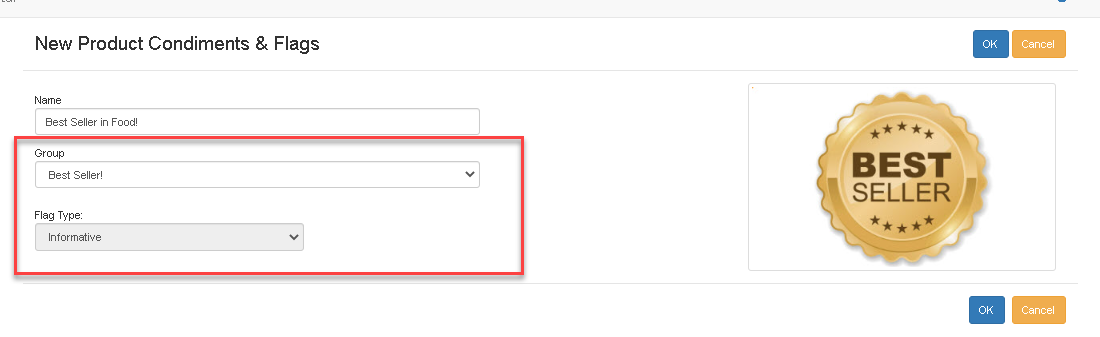
Add another Condiment and this time select the group you just created under the Group dropdown and hit OK.
Next, you need to tag the items that you want this flag to apply to.
Go to Products and double-click on the product you want to tag.
Go to the Condiments & Information Flags, look for the group you have added and tick the box.
On the right, tick the boxes of the options that you want to show, and click Save to save the product settings.
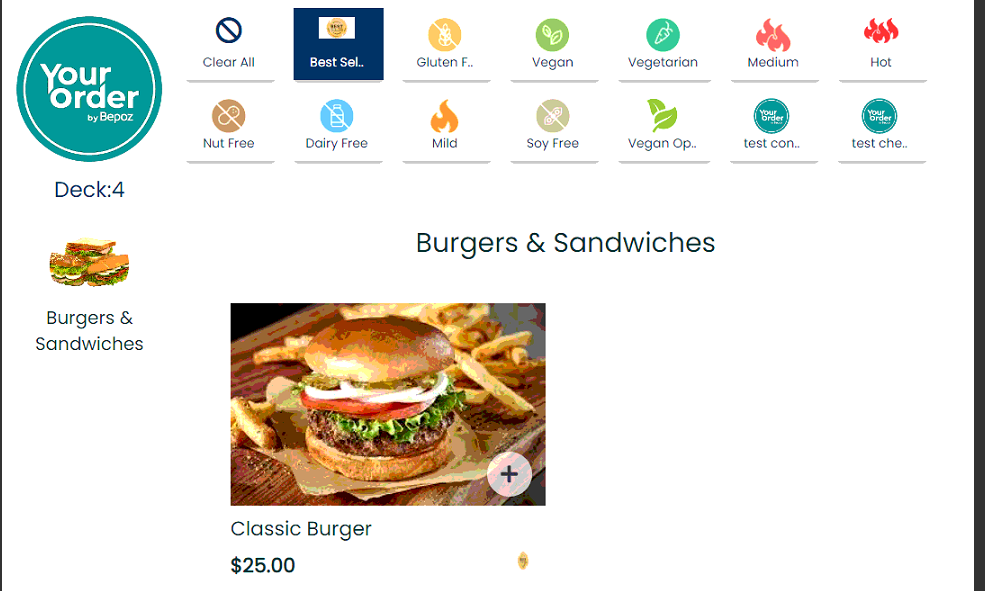
On the Kiosk menu screen, once you hit a category, it will show items that were tagged with the informative condiment.
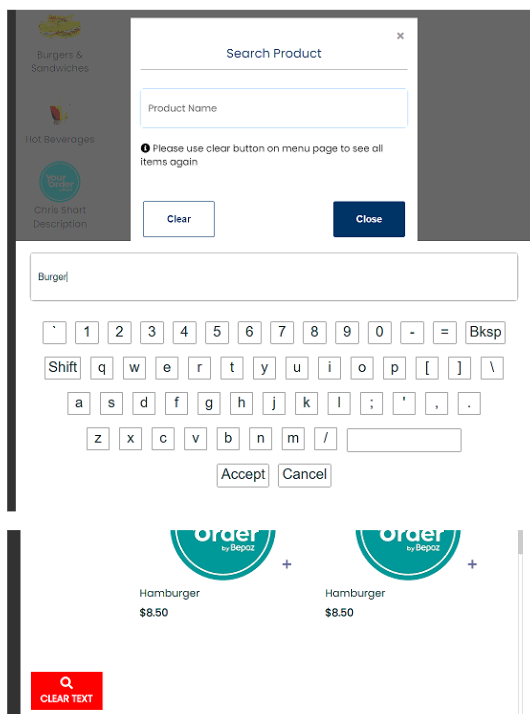
At the bottom left is the Search button if a user would like to search for the item by entering the product name. Click on Clear Text to reset and go back to the main page.
Click on an item to order it. Select the needed information such as size, or modifiers/condiments on the next screen and click Add to cart.
Note: There is a timeout setting of one minute so the user must make a selection, otherwise, they will get the screen timeout prompt. When no selection has been made, the screen will return to the Home Screen and the user will have to start over. Clicking Cancel lets the user continue the order.